Slepydremr
-
Posts
294 -
Joined
-
Last visited
-
Days Won
1
Recent Profile Visitors
1,635 profile views


Slepydremr's Achievements
")


-
Colin has some tips in here that may help you.
-
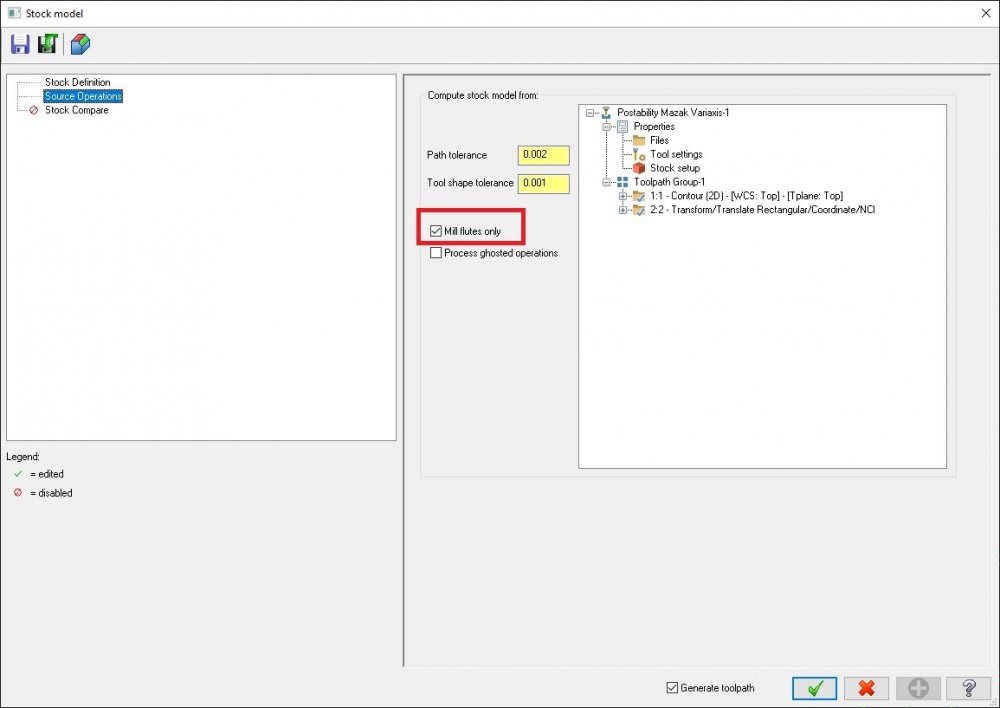
2022 only seems to work with translated paths if you check the "Mill flutes only" box
-
I just checked and opened an old mx5 file, does the same in 2020, 2021 and 2022. Those are the only versions I have on this computer.

-
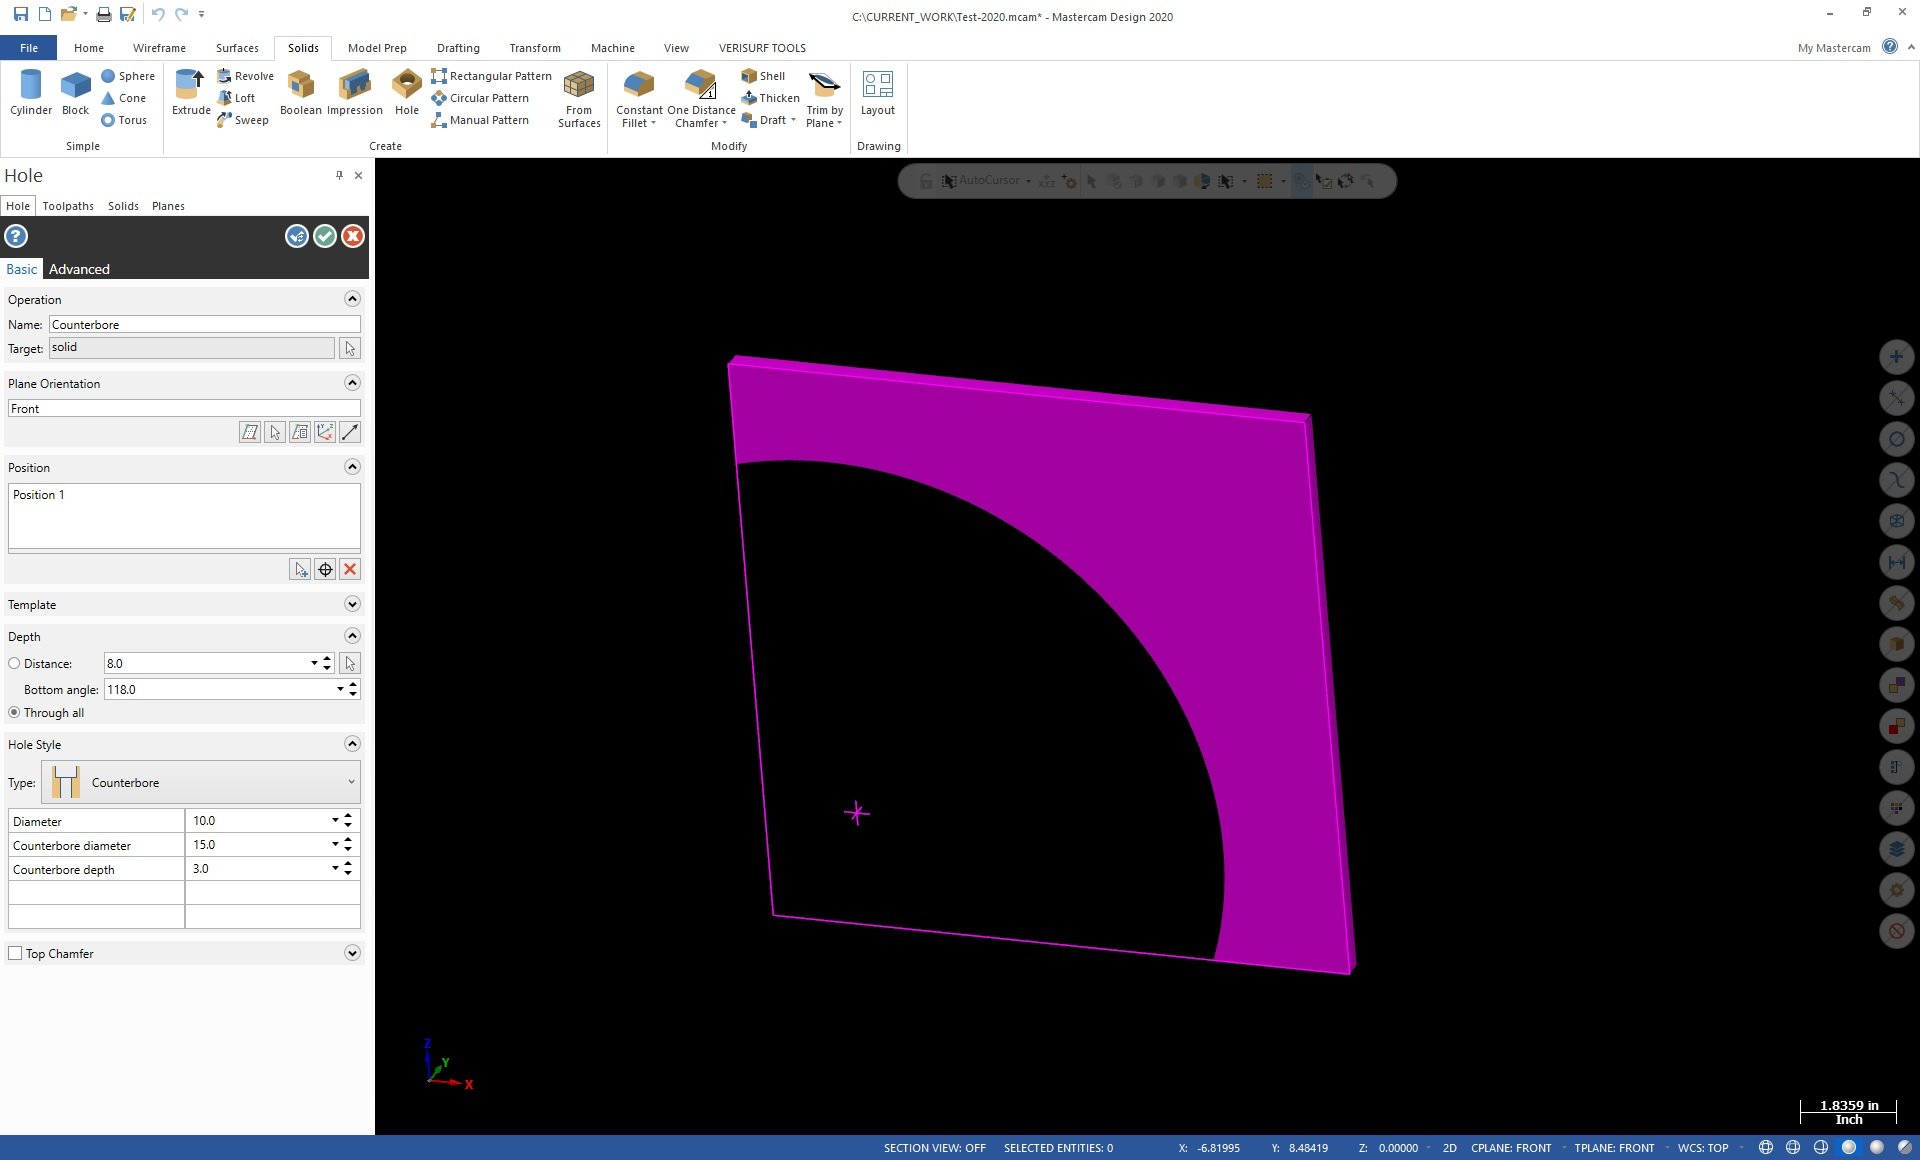
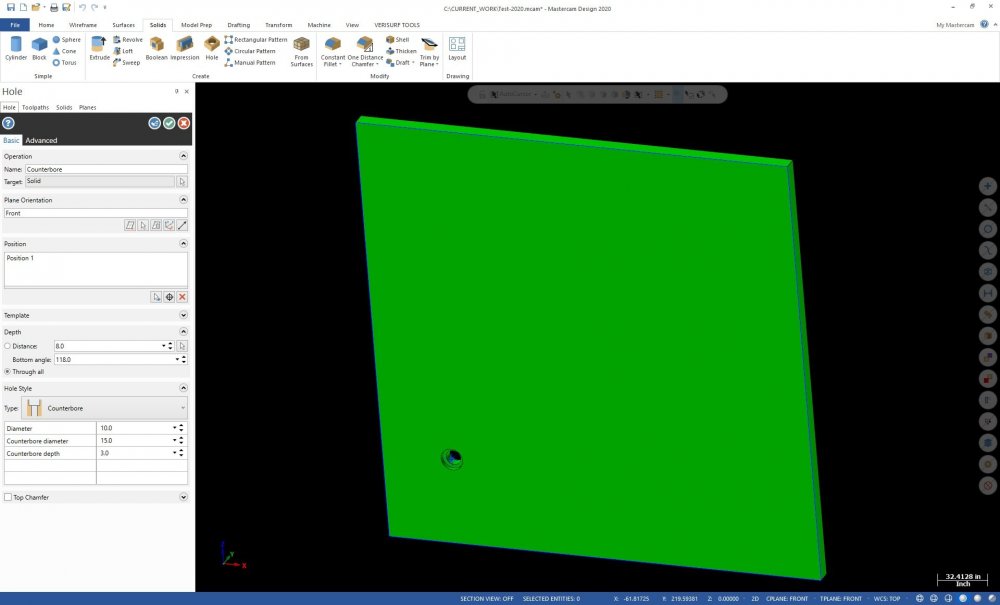
I've run across something new to me, it appears to go back to at least 2020, but I've only just come across it now. When I create solid using metric dimensions, then scale it down to inch afterward, the hole sizes do not scale. Has this been known about for a long time and I'm just late to the party because we're starting to see more metric work? Scale-test.mcam

-
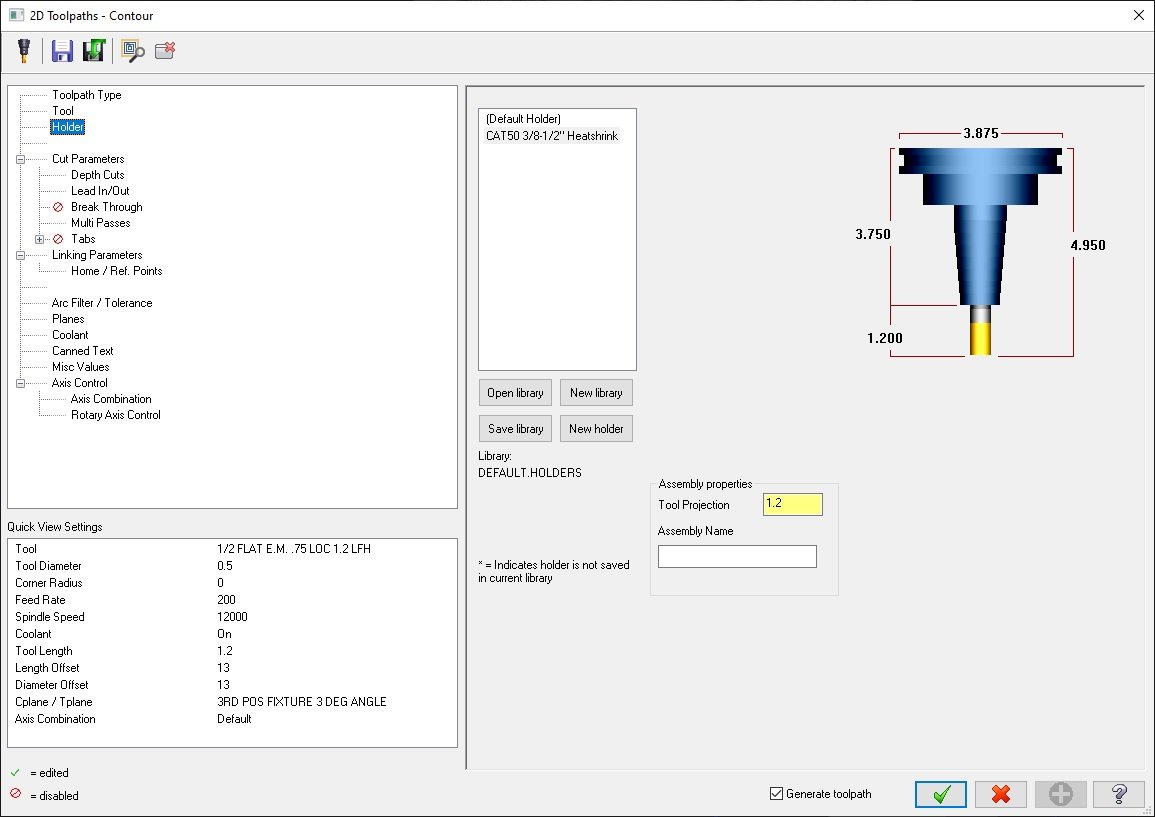
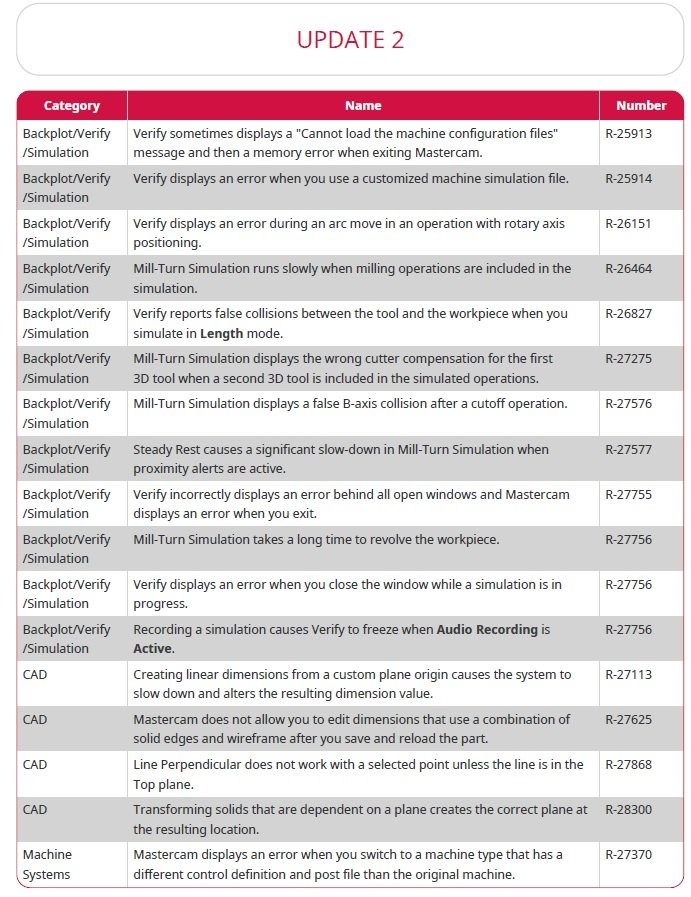
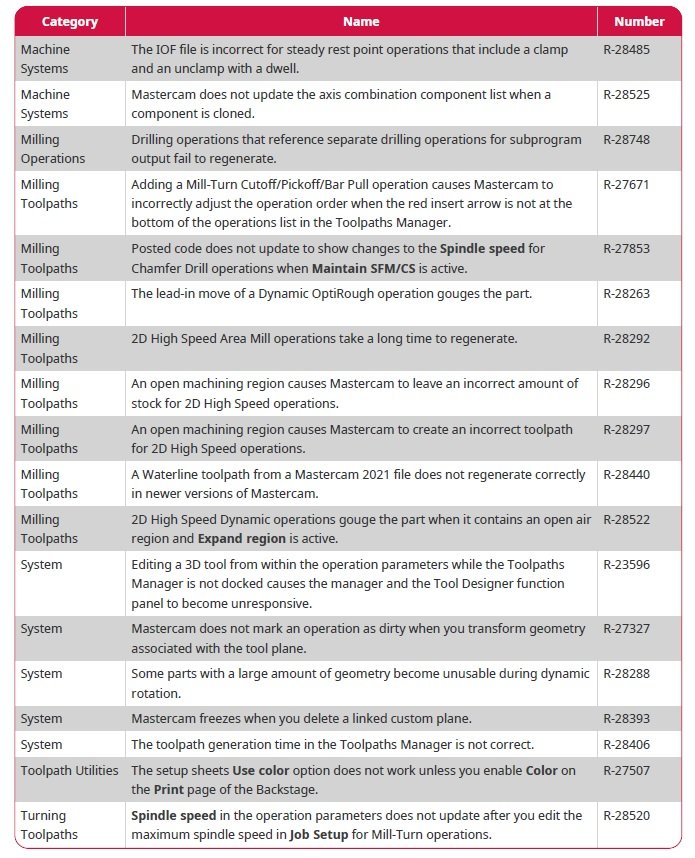
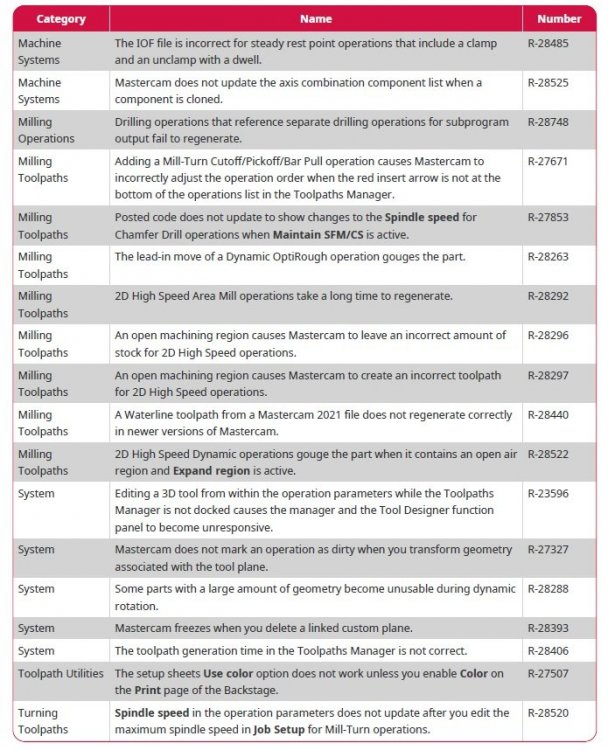
Here's what's in the readme.
-
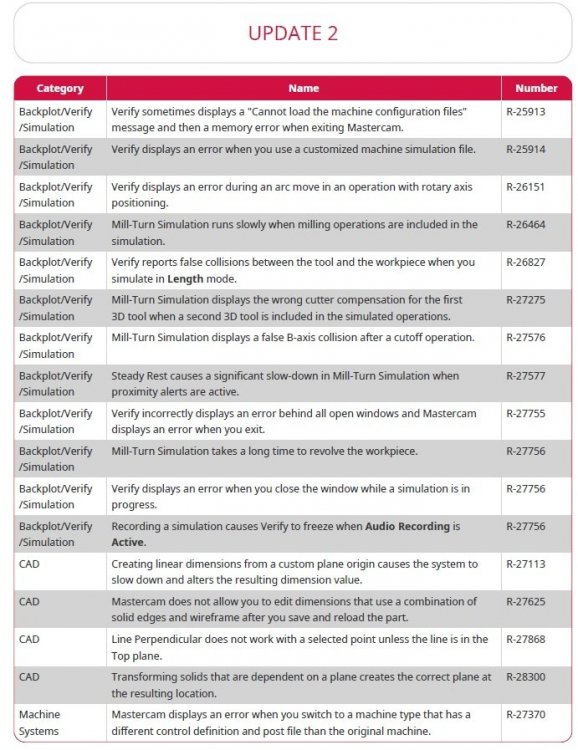
It would appear that after update 2, if you project geometry associated with an origin, the origin does not follow. Can anyone else confirm this? Works fine in 2020 and 2021, I think it was working in 2022 before the update, but now I'm not certain My morning is not off to a good start.
-
Updated to 2022 Update 2 yeterday. Not sure if I'm crazy or I've changed a setting I'm unaware of, but now when I try to trim a line using trim to point and select "O" for origin, it is trimming to where ever my cursor is, not to the origin. Anyone else seeing this? I have power keys enabled, been doing this for a long time fine, but today it no longer works.
-
Plane Creation for 5th axis Indexing
Slepydremr replied to [email protected]'s topic in Industrial Forum
Sorry it's called plane by entity normal. I use it often, just forgot what it's actually called. It is in all the previous versions I can think of. Not sure when it was added. -
Plane Creation for 5th axis Indexing
Slepydremr replied to [email protected]'s topic in Industrial Forum
If it's a constant radius and it's intersecting a flat plane, then then this is a line. You can create a line there and then select plane by vector and you will be perpendicular to that radius, you can then rotate plane as needed.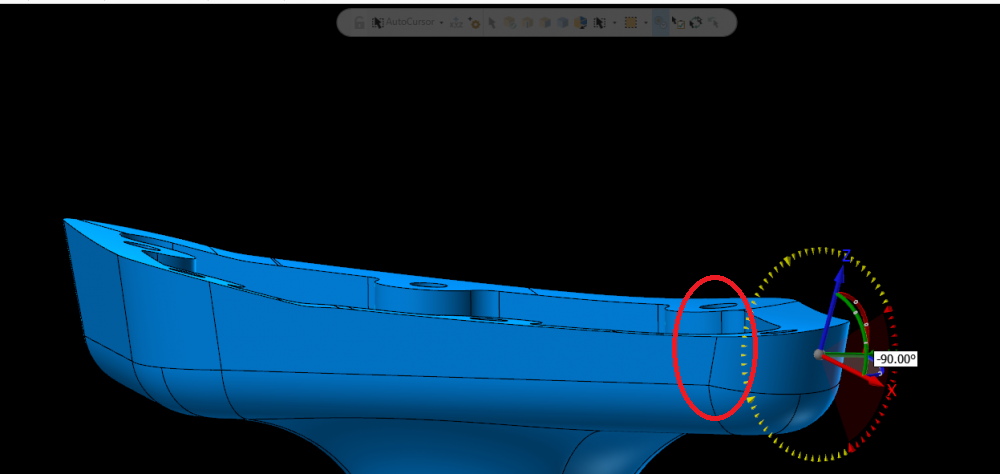
-
Okay, thank you all for the input. At least this is a minor inconvenience that can be worked around easily.
-
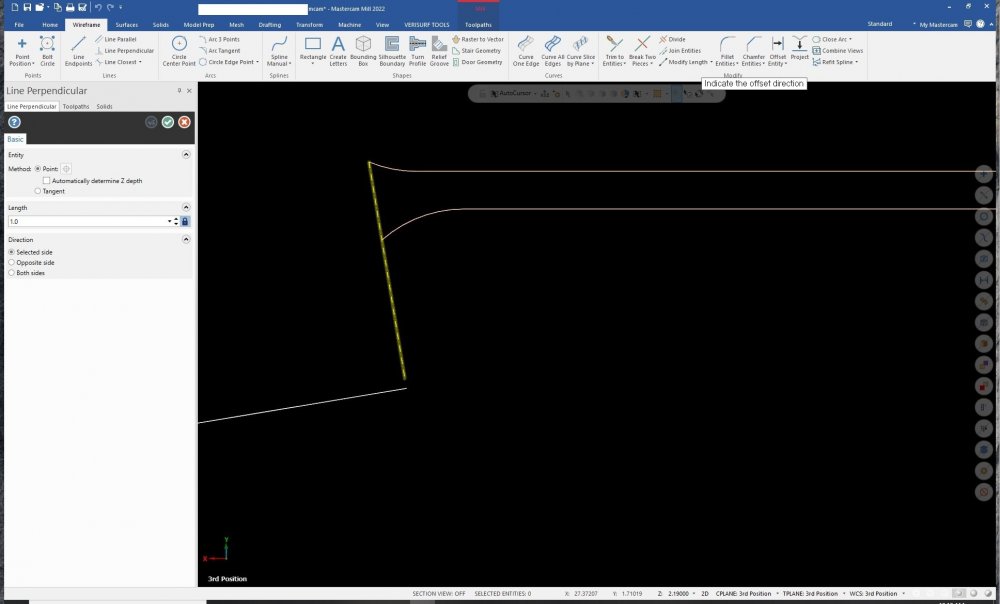
Anyone else having trouble in 2022 creating a line perpendicular to the end of another line? Every time I try clicking the end of this line I want to be perpendicular to, it then asks me to pick an offset direction and when I do the line moves, it's not snapping or staying where it's supposed to. perpendicular.mcam Is there a snap setting somewhere I've missed? Thanks in advance.

-
mastercam X8 to 2019 "change wireframe color"
Slepydremr replied to sirdrake's topic in Industrial Forum
True. At least in this case the clicks are all relatively close together. -
mastercam X8 to 2019 "change wireframe color"
Slepydremr replied to sirdrake's topic in Industrial Forum
After you click the right mouse button you can select any of the 3 down arrows next to the 3 color options at the top and then you will be able to select any color you want.
-
Returning after long time Edgecam encounter
Slepydremr replied to wojtek90's topic in Industrial Forum
For the slope I would use a 3/4" 45 degree chamfer mill since the surface is a 45 degree angle. If they were an odd angle I'd do like Steve said and Ball nose the surfaces. Honestly though, if the material is already squared up to size then this part would be even easier in 3 operations the same tooling could be used for all ops. 1st OP. Mill slot 2nd op Rotate 90 and Drill Hole in back of part 3rd op machine the 45 degree face and deep slot 56-350-00-MP_3OP.mcam -
Mine seems to be working. After I finish selecting the geometry I can then select which type of boundary I want. I have to click the "End Selection" button first. Then I have the different options.