Leaderboard


Popular Content
Showing content with the highest reputation on 06/08/2019 in all areas
-
I used the one from ISCAR on a project and we were using a 2" 3 Flute tool cutting 1200 IPM at 24000 RPMS taking .125 Depth of Cut by 1.2" Width of cut. That worked out to 180 MMR.2 points
-
You are in "2D" mode. This means you are restricting Mastercam to only draw at a specific "Z Depth", in whichever Plane is currently active. (This is known as the active "Construction Plane".) Easy solution is to Right-Click, and click the "2D" button in the Right-click menu. This will toggle to "3D" mode. When you click on the endpoints of the two lines, Mastercam will start the depth at the Z position of the first point you click on. The other option (better if you want to draw multiple entities at the same depth), is to Right-click, and click the letter "Z", in the Right-click menu (attributes panel). This puts you into "depth selection mode", and Mastercam will prompt you to select a point of geometry, to set a new depth. Simply click on either endpoint of the two lines, and you'll notice that the "screen grid", will move to a new depth. In addition to pressing the "Z" button, you can simply type in a new Z depth manually as well.1 point
-
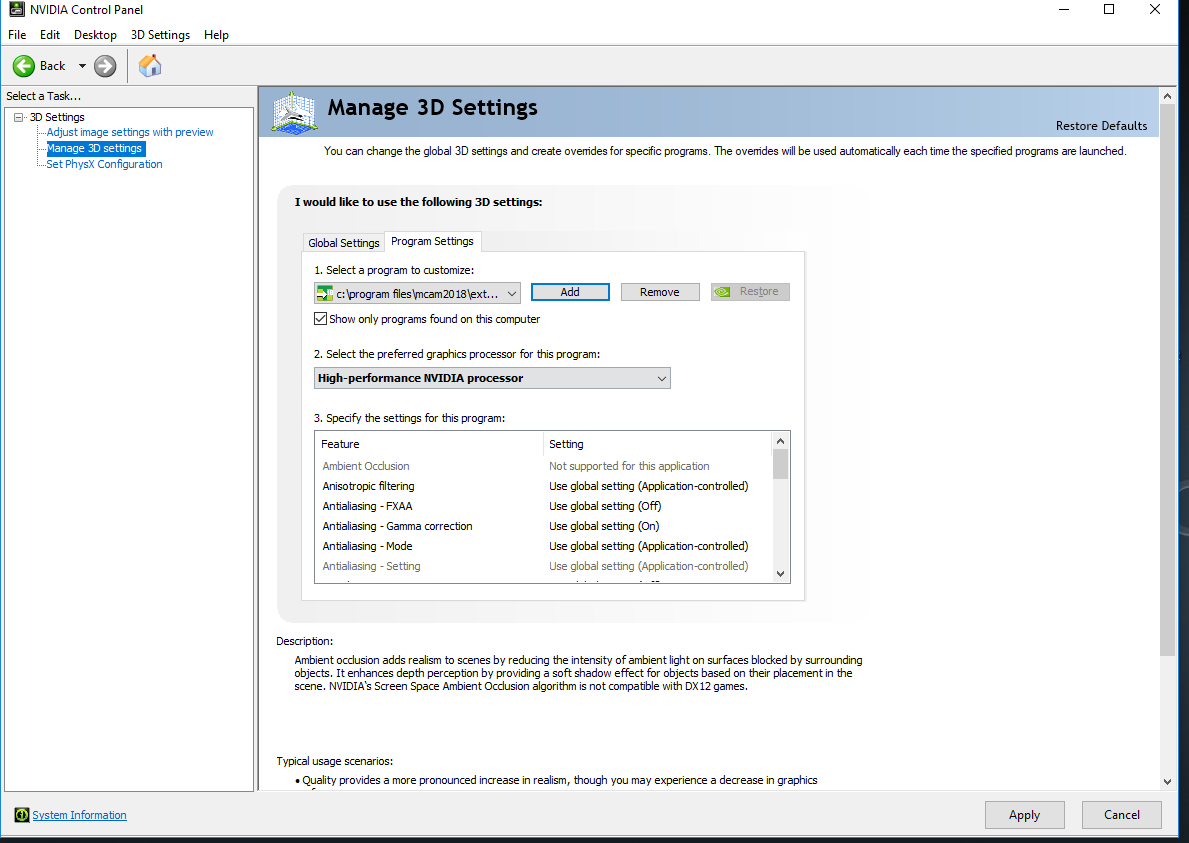
I have seen this issue occur on laptops with integrated graphics. The Tool Manager, for whatever reason, tries to use the Intel integrated graphics first, and when it needs to draw something on the screen, like when you double click on Cutting Tools or Holders after opening a library, it instantly locks up. I went up and down driver revisions for the Intel integrated graphics on my laptop and couldn't solve the issue that way. The solution is to force the use of your dedicated graphics card for the Tool Manager application. This applies to desktops with integrated graphics as well- This is the process for NVIDIA cards: 1. Right click on the desktop and choose Nvidia Control Panel. 2. Go to Manage 3D Settings on the lefthand side. 3. Choose the Program Settings tab on the right. 4. Select Add under "Select a program to customize", and navigate to the location of your tool manager. By default for 2018, that is C:\Program Files\Mcam2018\Extensions\ToolManager.exe 5. Under "Select the preferred graphics processor for this program:", select High-Performance NVIDIA processor to force Tool Manager to open with the NVIDIA card and skip the Intel integrated graphics. 6. Hit apply in the bottom right corner. Repeat these steps for any other installed versions of Mastercam to ensure each tool manager version works with the dedicated card. You should now immediately be able to open up the tool manager and view libraries without crashes. See the attached image for reference
 1 point