


Leaderboard


Popular Content
Showing content with the highest reputation on 05/26/2021 in Posts
-
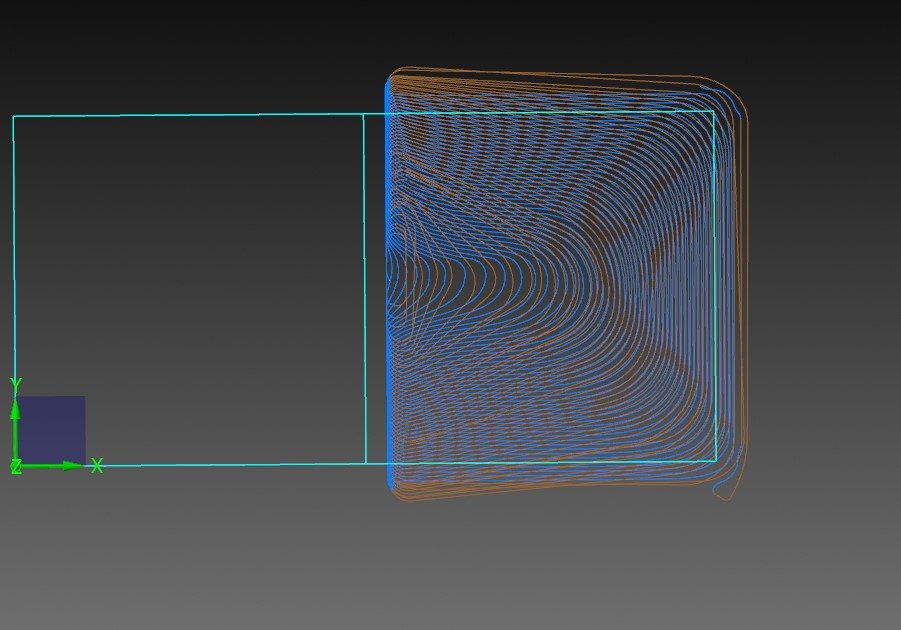
That was a great video. Thanks for the link! On the technique where he basically separated the facing into 2 squares, I would have used the part square as a machining region (not oversized geometry), from outside, and used the top, bottom, and right sides as air regions, rather then working from right to left. not sure if that would've been any more or less successful or efficient. Longer transition moves, but also seems like more time consistently in the cut. Either way, splitting it in half is a simple trick I hadn't thought of!
 2 points
 -
I noticed the metric endmill to the left. Could OP be working in metric perhaps? Actually, after seeing the 4800 feedrate, I'm sure that is the case.2 points
-
When you are in "partial chain mode", by default Mastercam asks you to pick the "start" of the chain, then prompts you to select the "end" of the chain. This can be problematic, if your geometry isn't perfect. (gaps, overlaps, branch points, etc.) There is a "Wait" Checkbox on the Chaining Dialog Box. When you are in partial chain mode, you can enable that check box, to make the system "pause" during chaining, at each branch point the system encounters. It can be very helpful, since you can "start the chain", and then pick "each next branch" in succession. Mastercam won't "end the chain", until you press the "end chain or apply" button. Also, when you get a file that has lots of "entities which lay on top of each other", I typically do the following: Run the "Delete Duplicates" command. Run the "Find Overlap" Chook. (This is an add-in program to Mastercam, that ships with the software. Press "ALT + C" on the keyboard, and choose 'FindOverlap.dll' from the list. This only works on Lines and Arcs. It does not work on splines, but it can be super helpful to find these "phantom" entities, that are connected at the Branch Points, and causing your Chain to stop.1 point
-
Pete, you da man! That was it. Chain partial solved it. You made my day...no week! Really appreciate it.1 point
-
I think there was a Chain-Partial option in chaining in X8... pick the two lines as the 1st and last ...1 point
-
Hi, I looked at the dialog code - it looks like the minimum segment length is set to 3X the total tolerance on the way into the dialog. So, you may have found the work-around - set the total tolerance really small, set your segment length, exit the dialog, reenter the dialog and set your total tolerance back to the larger value (this time, don't touch the segment length). As you exit, you may get some warnings but it seems like the smaller segment length will stick (and get applied to the toolpath). I logged this as D-45365 so that we may take a closer look. The tolerances and settings all do work together - you may have a valid use case for a segment length smaller than the total tolerance - so, I think, the dialog should allow that. But maybe a warning would still be helpful(?). Thanks for reporting this.1 point
-
The Lang vises are what I'm using, but dovetailing the stock and holding about 3mm of it.0 points

