Coco
-
Posts
36 -
Joined
-
Last visited
Coco's Achievements
")
Newbie (1/14)
5
Reputation
-
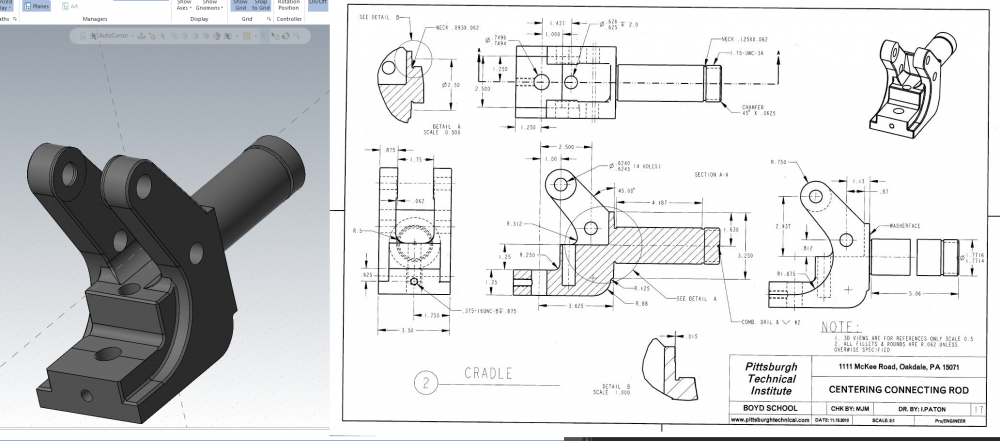
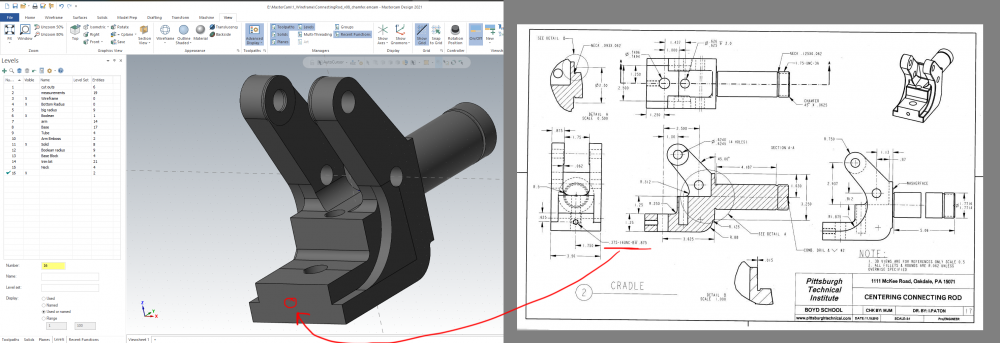
Found the two bottom edges, you mentioned. I updated the model. Thank you so much for all your help, Crazy^Millman.

-
Thanks for keeping me honest, crazy^millman. Here is the fix.
-
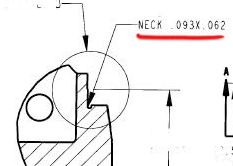
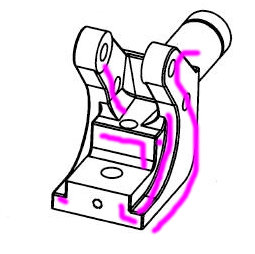
You mean these edges?
-
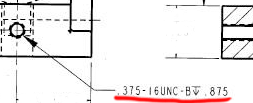
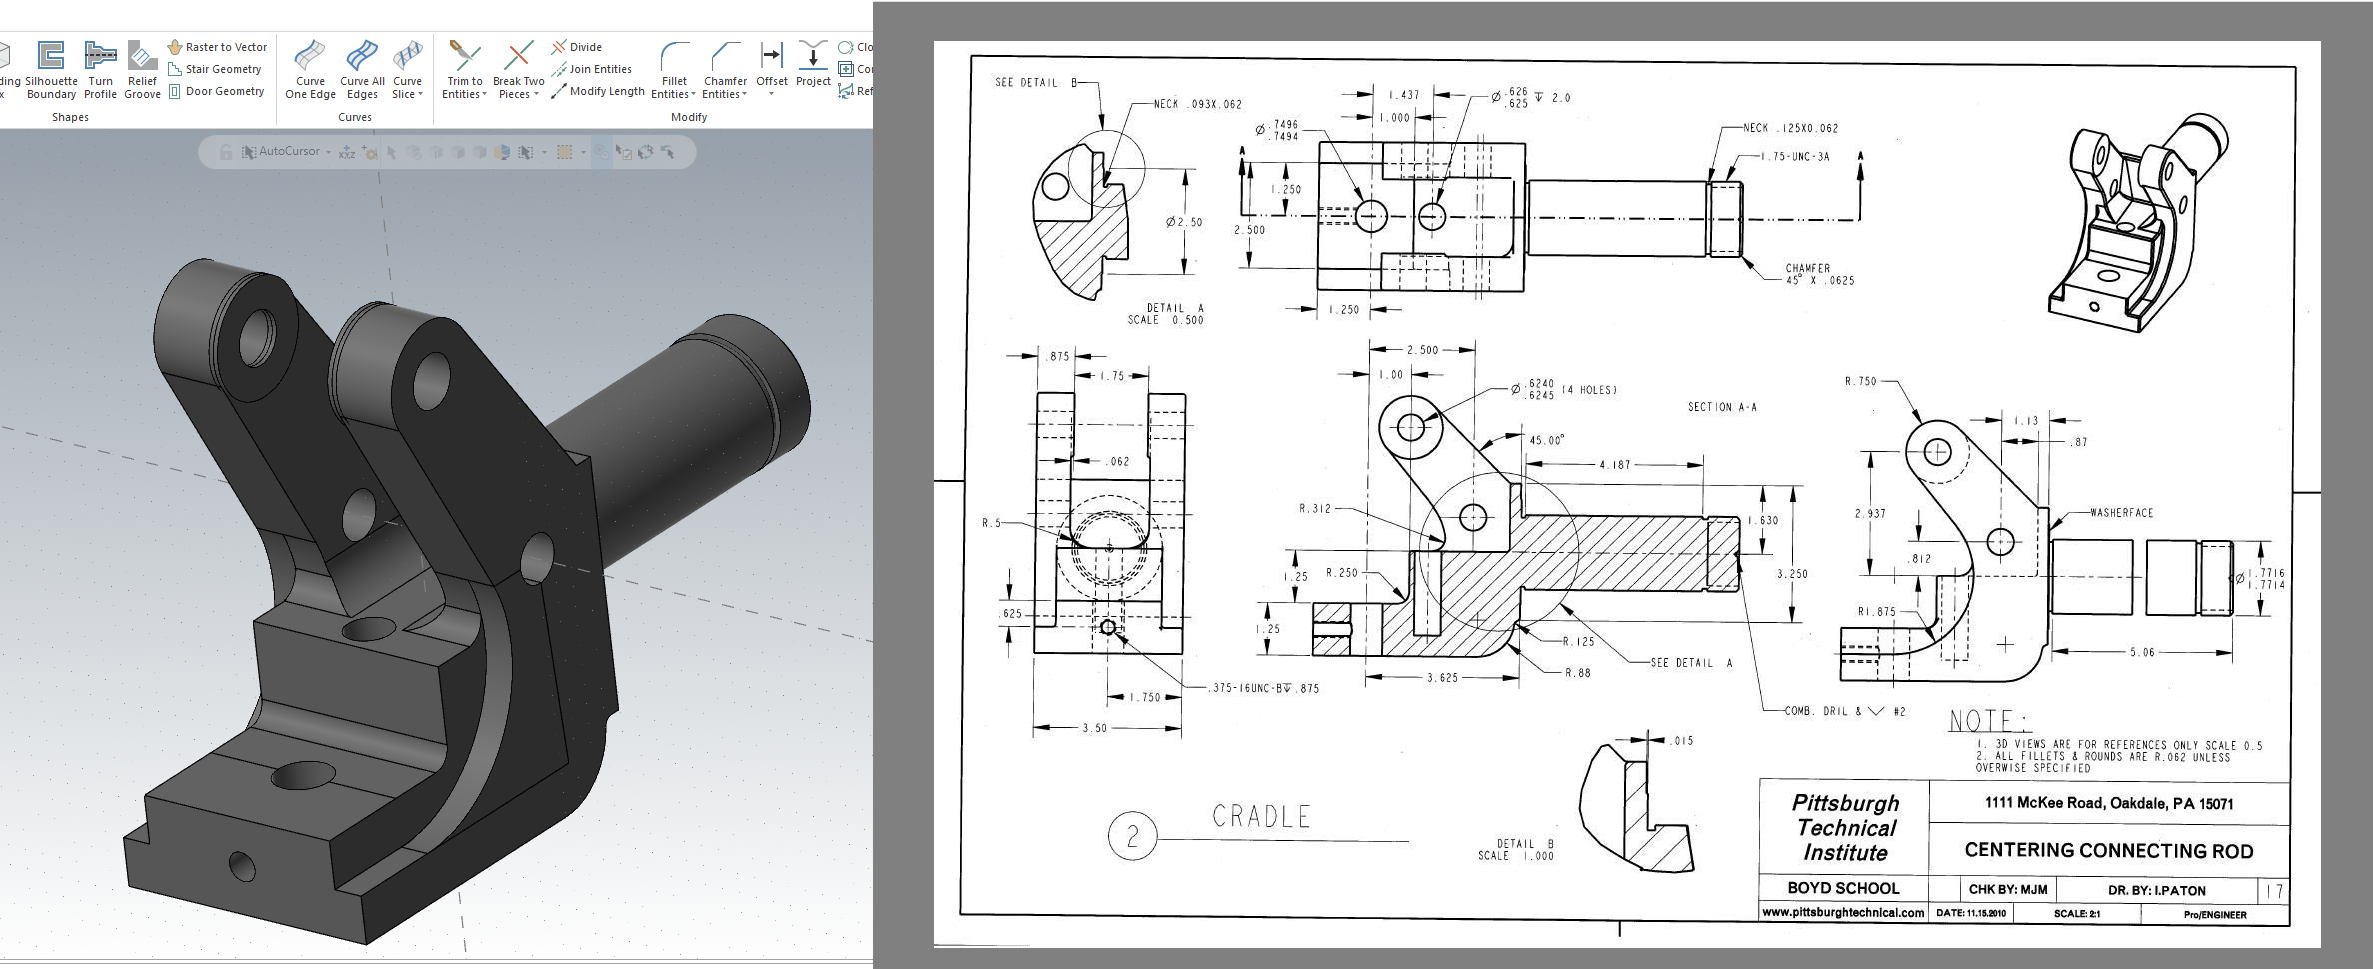
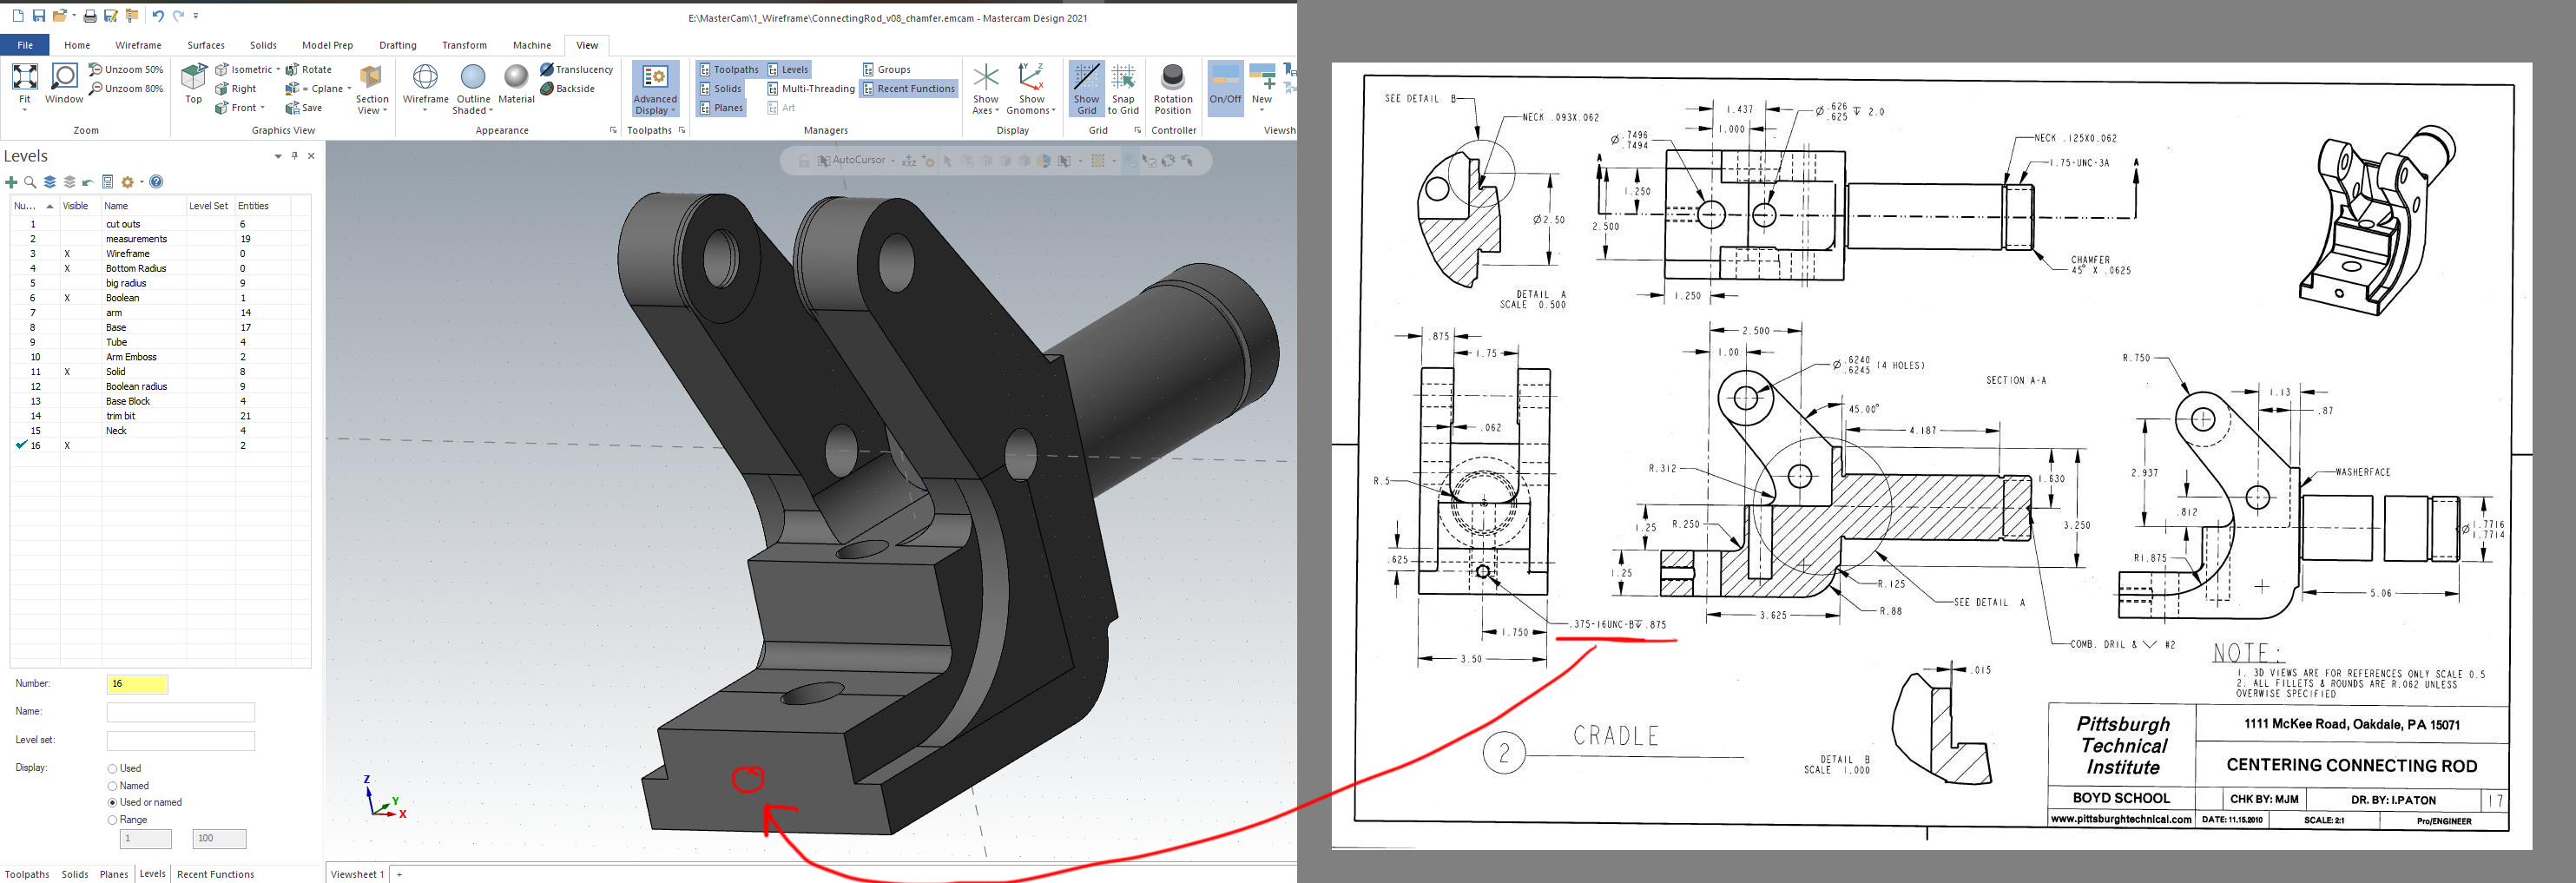
The demo of Mastercam does not do tool paths. So I just punched a hole with a diameter of .375 and a depth of 0.875. Thank you for all your help "Crazy^millman", "So not a Guru", and "Rekd." I learned a lot. Any suggestions on a new free blueprint to model and learn more? Cheers,

-
So not a Guru, thank you for the tip, "The .375-16UNC callout is the SAE thread size in diameter & threads per inch the .875 following the depth symbol is the depth that the hole is tapped to." I'm going to start learning that, today.
-
Thank you, Rekd and Crazy^millman. I hope to get the Solid work done, by tomorrow. Thank you all for helping understand this blue print. Gotta find another challenging blueprint after this one.
-
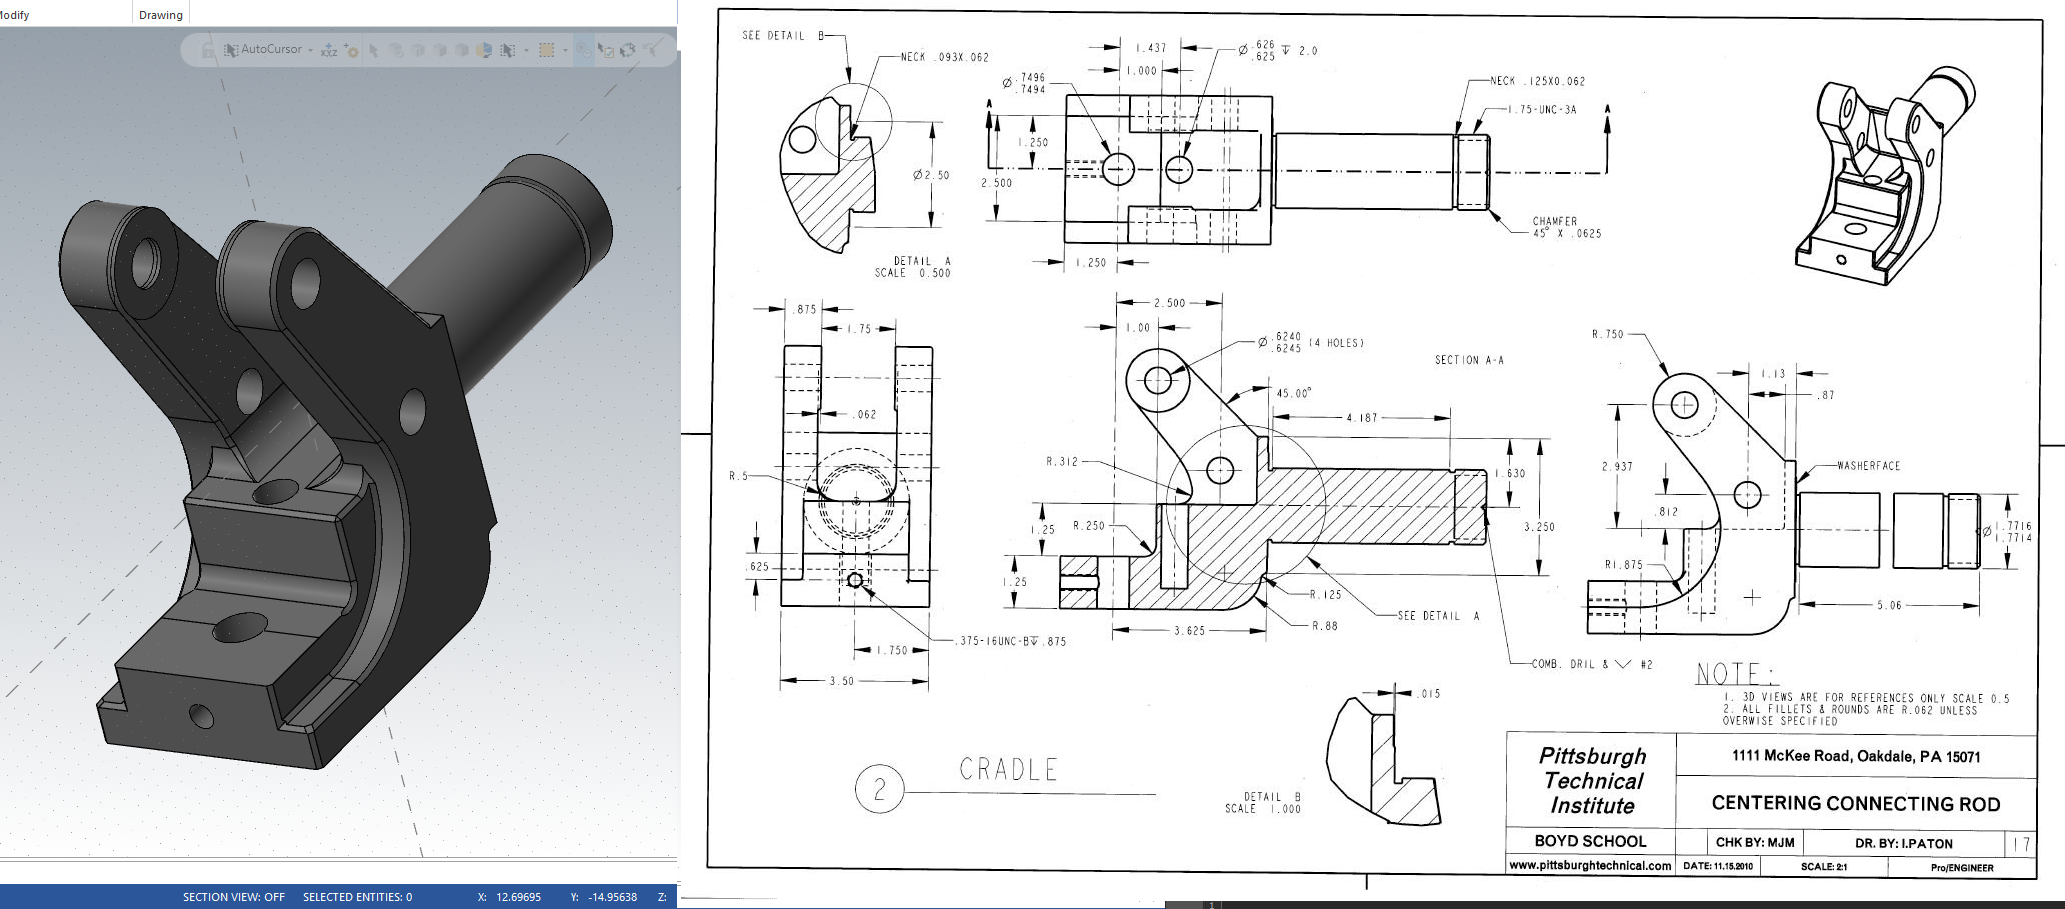
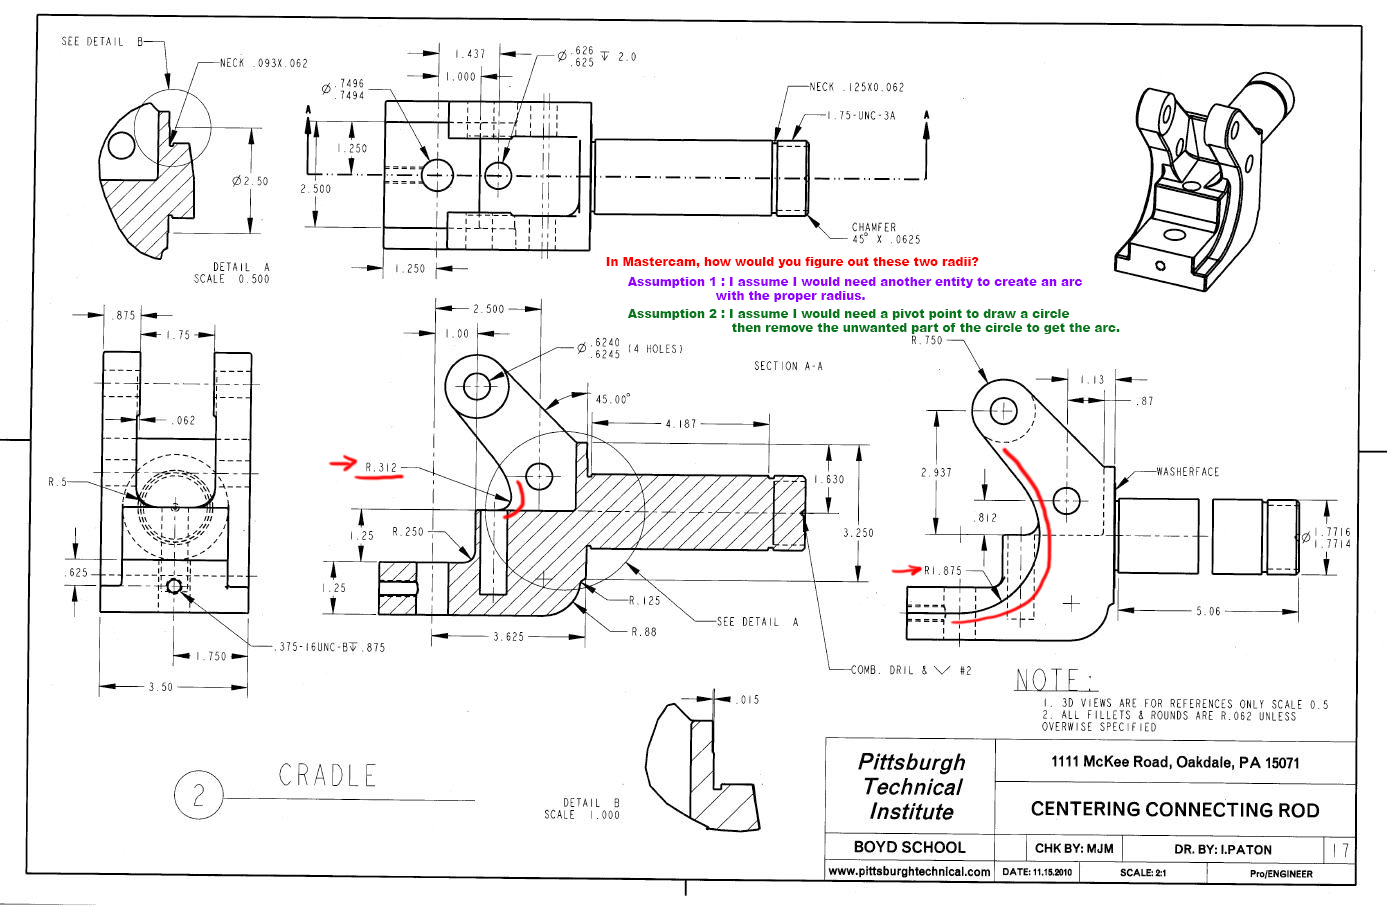
Thank you, now I'll try to understand your explanation of R .312. Thank you, again.
-
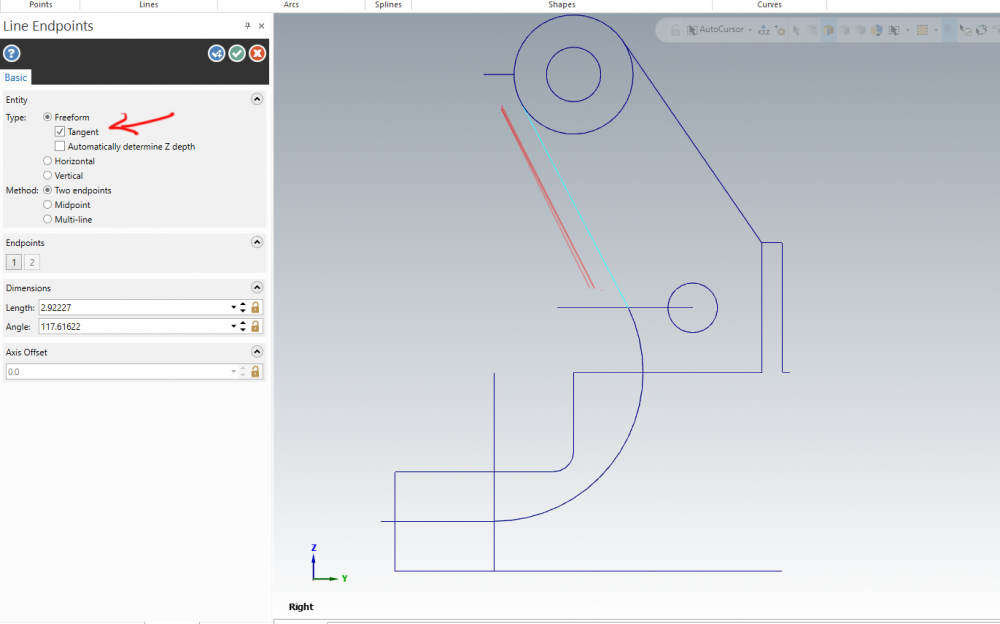
I just drew a tangent line connecting the two entities. Is this correct? The drawing looks like there is a slight arc where they meet in the middle. I used a lline.
-
I'm try to understand how the bottom R 1.875 connects to the top R .750. 1. Thank you for explaining how to find the center of the R 1.875. 2. I now see where the R 1.875 starts and ends. 3. How did you figure out the slight tangent arc coming off the R .750 that connects to the R 1.875 on the bottom? Thank you again for helping me understand this blueprint.

-
Thank you, Crazy^millman. I'm a newby, Thank you so much for helping a "stranger" understand how to interpret this blue print. May the divine light shine on you, always.
-
Good Lord, that was an intense 10th grade machine shop class.
-
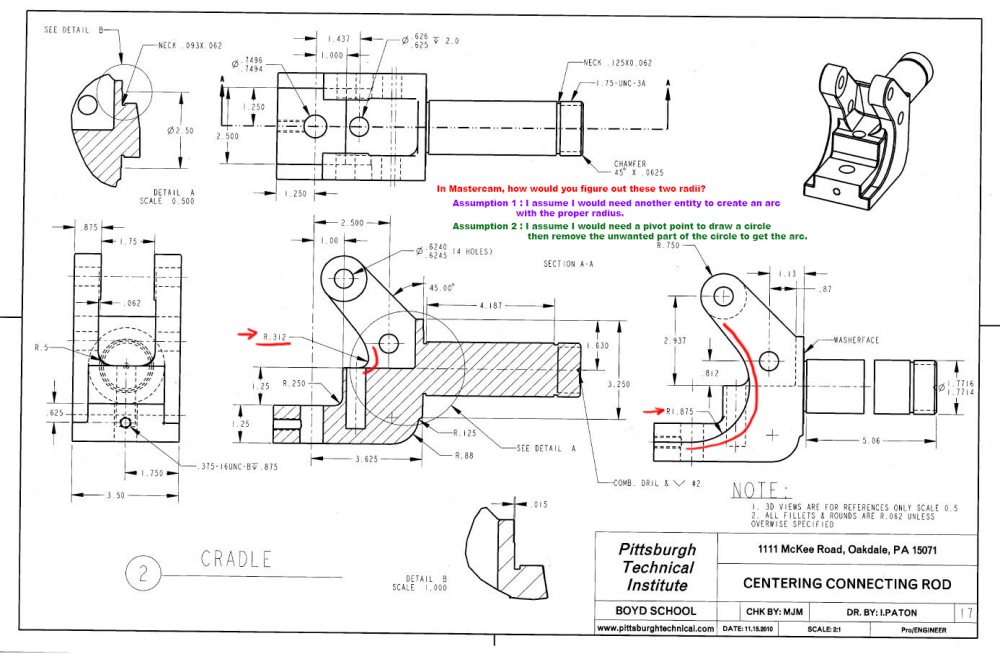
In Mastercam, how would I figure out these two radii? I had two assumptions that did not seem to work out. Assumption 1 : I assume I would need another entity to create an arc with the proper radius. Assumption 2 : I assume I would need a pivot point to draw a circle then remove the unwanted part of the circle to get the arc. I'm learning as I throw myself into this blueprint I found on the internet. Thank you all for your help.
-
I don't quit understand yet, but I'm going to learn about thread size and diameter. Thank you "So not a Guru." This blueprint it leading me into new territory. Ha ha.
-
I just now understood what you wrote, Crazy^millman. Thank you, so much. That took a long time to sink into my head. You wrote it so well, I don't know why it took me so long understand. Many thanks to you. Cheers,
-
On the internet, where would I go to learn how to interpret these annotations. I don't even know the vocabulary for these annotations. Cheers,