Guess_who
-
Posts
336 -
Joined
-
Last visited
-
Days Won
6
Content Type
Profiles
Forums
Downloads
Store
eMastercam Wiki
Blogs
Gallery
Events
Everything posted by Guess_who
-
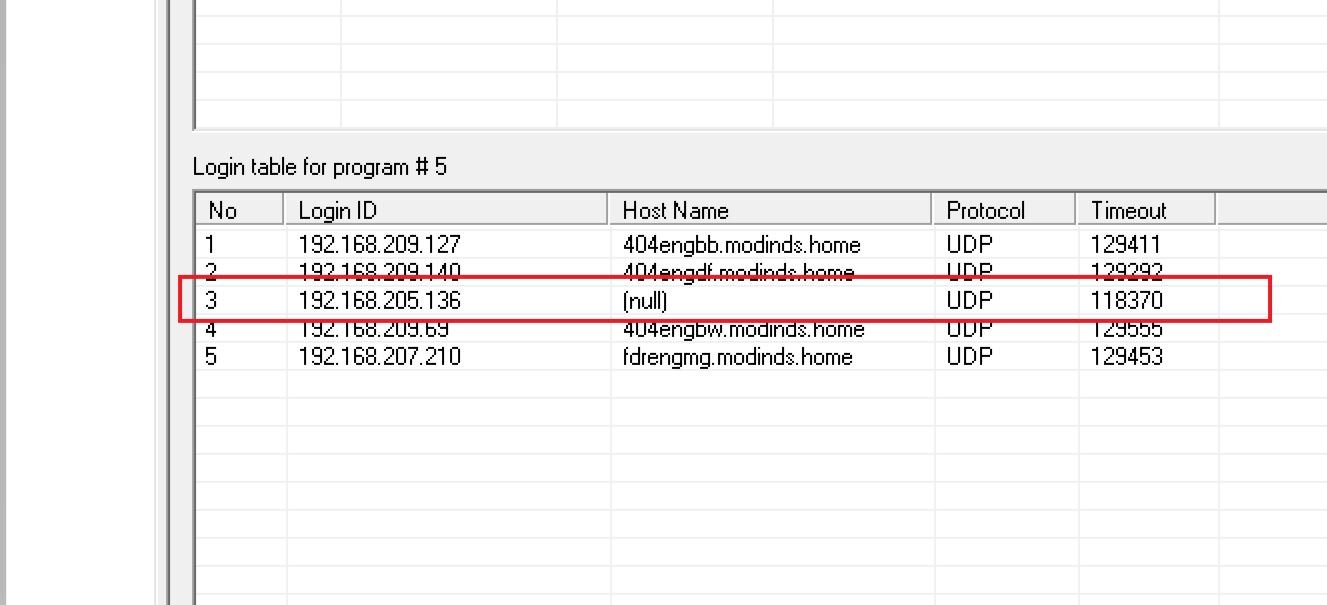
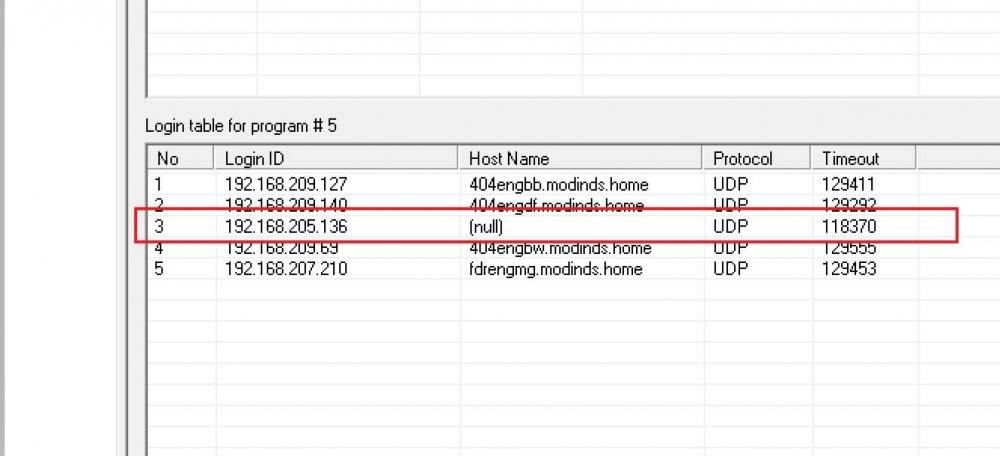
So we have a network license, and every few days we get a license hung up and shows "null" and won't go away until we restart the server, Does anyone know of another way to fix this?
-

Ideas for threading highly abrasive material
Guess_who replied to Guess_who's topic in Machining, Tools, Cutting & Probing
We'll look into PVD. Thanks -
Ideas for threading highly abrasive material
Guess_who replied to Guess_who's topic in Machining, Tools, Cutting & Probing
The material is a special aluminum mixed with 25% silicon. That is what we are trying right now with some success. After the second or third hole, we need to start chasing with a hand tap. One hand tap lasts for about 2 holes. Maybe this is just what we have to deal with. I was hoping there were some special tools that I don't know about. PCD seems to work best but can't find anything for 6-32 sti in PCD, only diamond coated. -
Ideas for threading highly abrasive material
Guess_who replied to Guess_who's topic in Machining, Tools, Cutting & Probing
We are trying carbide. Not really the long term answer. We have a few hundred parts and maybe 8 holes per part of various sizes. -
We are trying to tap 6-32 STI thread in aluminum with a 25% silicon content. Tried Taps, thread hobs, thread mills with multiple coating, and rolling. Nothing last longer than a few holes. and we need to chase every hole by hand. PCD works for milling, but it's difficult to find PCD thread hobs. Any ideas would be appreciated.
-
You can use the toolpath editor but seems like a lot of work for not much gain. I usually only use it to fast feed during portions of my chain.
-
I can't believe I need to ask this.... Manual tool change
Guess_who replied to jaydenn's topic in Industrial Forum
Awesome tip Mike. -
Well damn, don't I feel stupid. You guys are right. Ugggggg
-
Everything looks great up until this move
-
Couldn't you use the DPRNT command? That's how we capture our probe date.
-
Ok, so I'm trying to do a cut with .035 constant engagement to get better tool life. Everything seems to be going fine until the end of this path and then the tool buries into the material for the last few passes. Can anyone tell me what I'm doing wrong? I used dynamic a few times and never had this issues. Thanks for the help. TEST_dynamic.mcam
-
Did you Turn off TCP.
-
Maybe 10 years ago, possibly more, we got from our reseller an awesome MasterCam Post processing reference guides Vol 1 through 3. But they are pretty old now. So I was wondering if there are any current versions available. Can anyone point me in the right direction?
-
Just a thought, TCPC relies on a known center point to track properly. Did you set you Parameters 19700 thru 19703? I agree with Millman, just save yourself the headache and turn off TCPC. Unless you're not rotating about the centerline, there's really no advantage that I can see in this situation.
-
Sync codes? They are actually pretty easy to use. Ours uses M101, M102, etc. So when one program hits an M101, it will stop and wait for the other program to hit M101, then they both take off again.
-
I don't believe this will not work on a Fanuc control. Only Haas.
-
We actually use a 9970 and a 9969 program that talk to each other. PM me your email and I'll send them to you.
-
Yes. We modified our post and used custom drill cycle. So whatever we put into the comment, it will convert that info and put it in the macro. Here I pick a point to start the engraving, and put ABC12345 in the comment. N1 T279 M6 ( T279 = .03125 DIA. END MILL ) ( ABC12345 ) S12000 M3 G00 G90 G53 Z26. M11 G0 G90 G54 B-3. B0. M10 X-9.175 Y6.413 G43 H1 D2 Z8. M9 X-9.175 Y6.413 Z.1 G01 Z.093 F6.16 ( ENGRAVE = ABC12345 ) G65 P9970 A0. B.125 I101. J102. K103. I1. J2. K3. I4. J5. Z8. M98 P8888 M01 M30
-
Fanuc. If you were talking to me. Our macro cheat sheet.
-
We use our own engraving macro. All I do is type the data to be engraved in the MasterCam operational comment, and our macro will print that.
-
I create the text in MC and lay it ontop of the model. Usually, engraving is just approximate anyways.
-
Well, I'm no Okuma expert, but the macro math is the same. I believe Okuma can set anything as a variable , but mainly they use VC1 thru VC199 But you can also set anything as a variable like RAY1 or RAY2. Whatever So change #101 to VC1, and change #102 to VC2, etc. And most other things are the same like EQ, LT, LE. GOTO Does that all make sense? EDIT - I think I can convert this for you if you want. Try this, I think it will get you close. Your centerlines will be stored in V63 and V64 V50= 1st X position V51= 1st Z position V52= 2nd X position V53= 2nd Z position V54= 3rd X position V55= 3rd Z position (MATH TO CALCULATE CL OF Y IS WITH 3 POINTS) VC1=[[VC50*VC50]+[VC51*VC51]]*[VC53-VC55] VC2=[[VC52*VC52]+[VC53*VC53]]*[VC55-VC51] VC3=[[VC54*VC54]+[VC55*VC55]]*[VC51-VC53] VC4=VC1+VC2+VC3 VC5=VC50*[VC53-VC55] VC6=VC51*[VC52-VC54] VC7=VC52*VC55 VC8=VC54*VC53 VC9=2*[VC5-VC6+VC7-VC8] V63=VC4/VC9( CALCULATE Y CENTERLINE) (MATH TO CALCULATE CL OF Z IS WITH 3 POINTS) VC1=[[VC50*VC50]+[VC51*VC51]]*[VC54-VC52] VC2=[[VC52*VC52]+[VC53*VC53]]*[VC50-VC54] VC3=[[VC54*VC54]+[VC55*VC55]]*[VC52-VC50] VC4=VC1+VC2+VC3 VC5=VC50*[VC53-VC55] VC6=VC51*[VC52-VC54] VC7=VC52*VC55 VC8=VC54*VC53 VC9=2*[VC5-VC6+VC7-VC8] V64=VC4/VC9( CALCULATE Z CENTERLINE)
-
From an old comment for 5th axis, but this works just as good for 4 axis. You'd change the positions from Y&Z to X&Z from this comment CHECK HERE
-
did you check the machine general parameters as I suggested? See my reply a few comments ago
-
Need help with sequential engraving macro
Guess_who replied to Roho's topic in Post Processor Development Forum
Sorry, I'm not a Haas guy, but what's a G47?