Thad
-
Posts
8,914 -
Joined
-
Last visited
-
Days Won
17
Content Type
Profiles
Forums
Downloads
Store
eMastercam Wiki
Blogs
Gallery
Events
Everything posted by Thad
-
Create an outer boundary and an inner boundary. Outer boundary should be self explanatory and the inner boundary will be the area that you want to avoid.
-
It takes some playing with to get your spacing right, but in the Create Letters dialog box, check Top of Chain, then select the bottom arc when prompted.
-
Our designers use Logopress (plugin/addon, whatever it's called) with SW when designing dies. I'm not sure if figuring overbend is part of what it does, but we use it for designing prog dies.
-
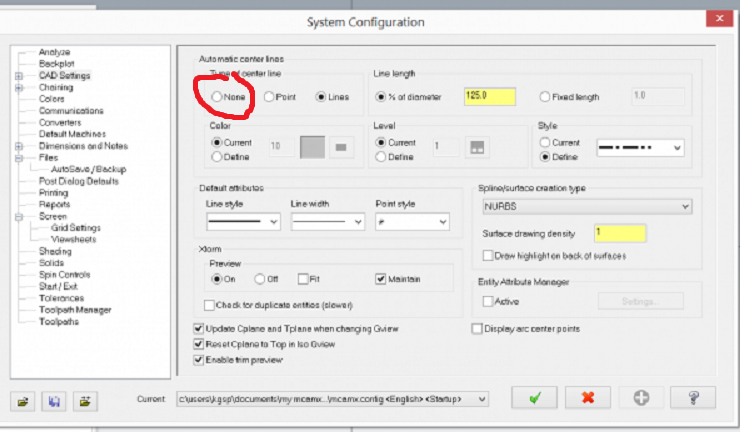
Here's your problem. Check None instead of Lines.
-
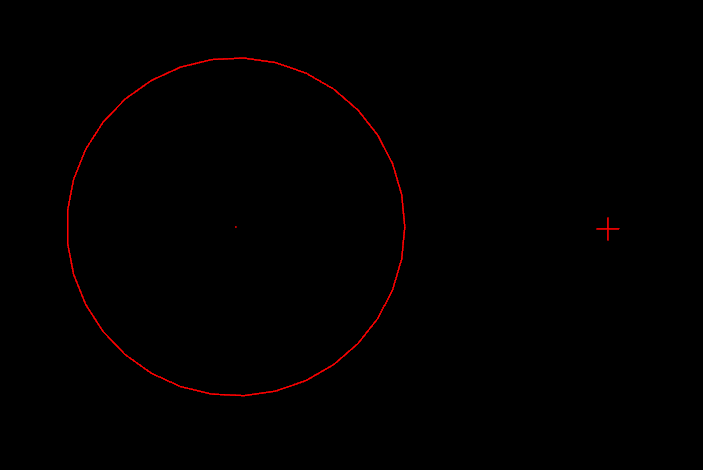
I certainly understand what a pain that would be. If they are points, which you say they are, then the display arc center points config setting won't do anything for you. Actual points are displayed differently than arc center points. See below. The one on the right is a point. Inside the circle is an arc center point.

-
Then it's not locking the selection.
-
In X9, you right click on the autocursor selection.
-
I use X9 and I don't see this behavior when creating fillets or otherwise. Are you sure they're actual points? Click Screen-->Statistics. Does it list a certain number of points? If not, then they appear to be a graphical glitch. Try Screen-->Regenerate display list and see if that makes them disappear. If it does, then it's possibly a video card/display issue.
-
I've seen this before myself. Regenerate display list always fixed it. I'm still using X9, so it's probably in the same place as X7 -->Screen-Regenerate display list. Welcome to the forum!
-
It doesn't sound like the simplest way to me. Try the method I (with the help of JP) mentioned above. Create point position-Autocursor Relative-click your corner- type in your XY position.
-
In this case, he wants to add points a specified distance off of non-zero edges.
-
JP called it.
-
Prior to the X series of MC, there used to be a Relative option. So you could use Create Point Relative, click your corner, then type your incremental XY location. Not sure what happened to that with the interface change.
-
@kunfuzed The real question is....do you still have the milk jug?
-

Carbide drill for 316 stainless - recommendations needed
Thad replied to Thad's topic in Industrial Forum
They thought it would take 20 hours. Just finished up 550 parts in 10.5 hours. Thanks again for all of your input. -
Carbide drill for 316 stainless - recommendations needed
Thad replied to Thad's topic in Industrial Forum
I'm doing that with an 1/8 coated OSG end mill and it's almost burr free. You guys RAWK! -
Carbide drill for 316 stainless - recommendations needed
Thad replied to Thad's topic in Industrial Forum
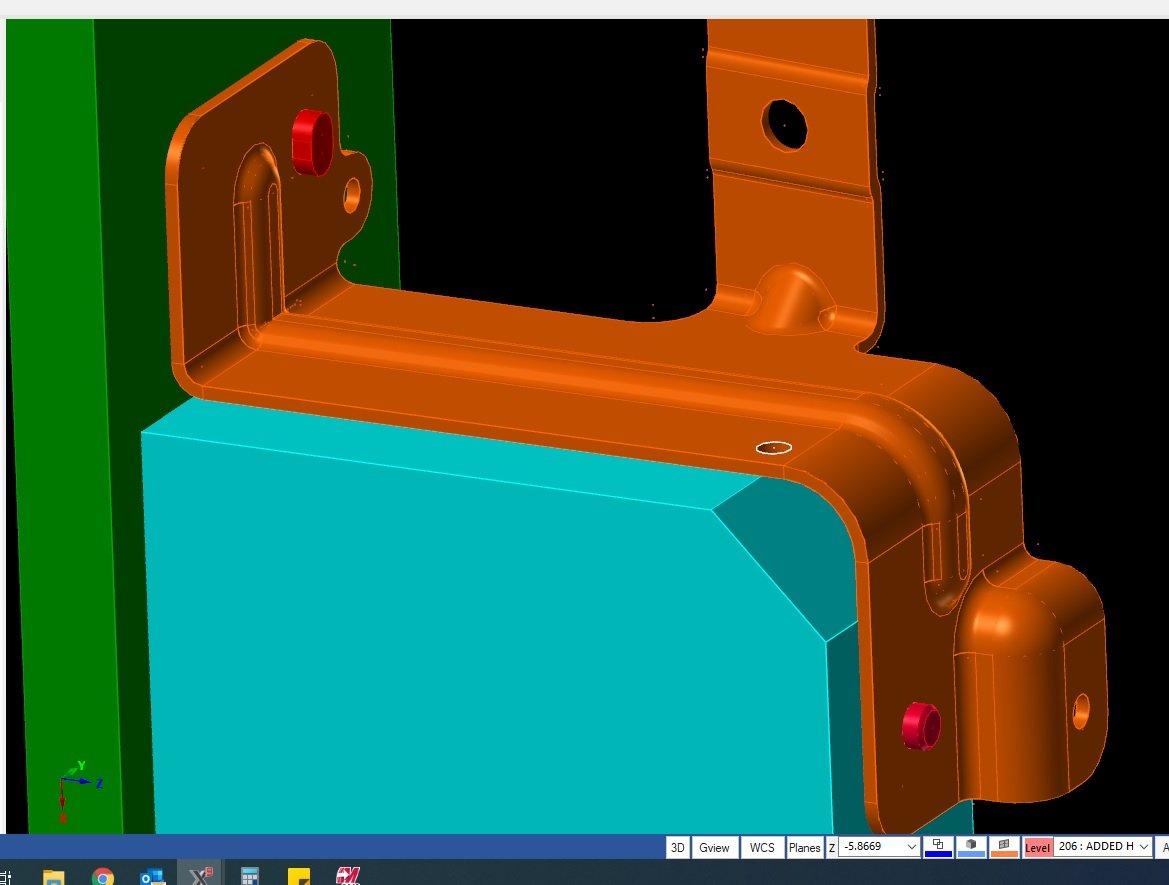
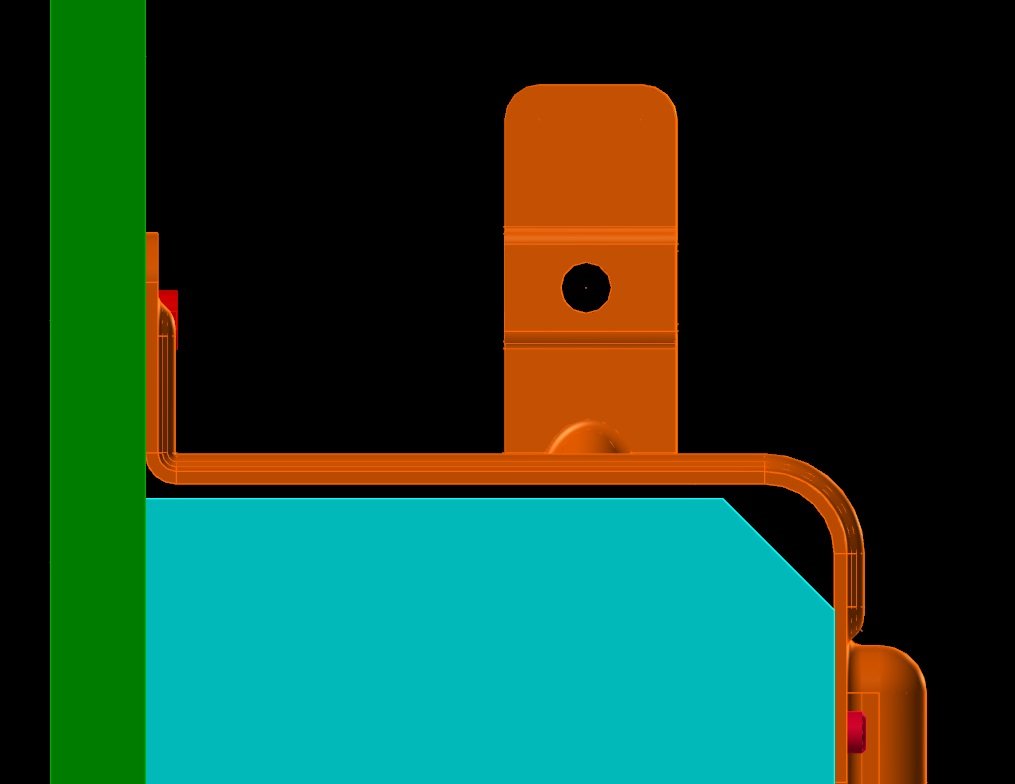
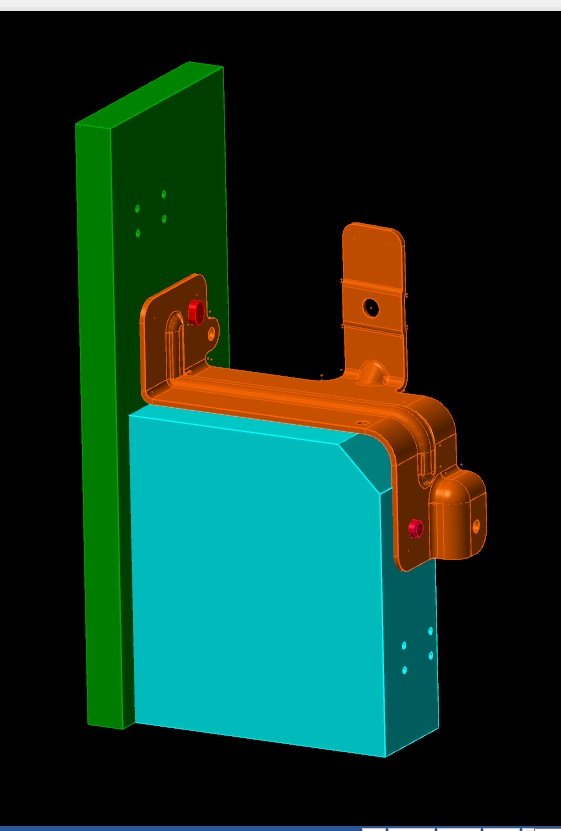
We're adding the white hole and we're making due with the check fixture as our holding fixture (clamps not shown). From the front. See the gap below? That's 6" from the top of the green plate to the surface where the new hole is going. Need quick turnaroud, no real time to order more tooling, etc. We'll have someone run a chamfer on then on the drill press if we have to. We just need to get them done and out the door.


-
Carbide drill for 316 stainless - recommendations needed
Thad replied to Thad's topic in Industrial Forum
Would the part flexing during drilling cause a larger burr? There is no support underneath the part. The part is quite rigid (has a strengthening bead) but it does flex a bit under pressure. -
Carbide drill for 316 stainless - recommendations needed
Thad replied to Thad's topic in Industrial Forum
I'll just punch the burr right in the face. -
Carbide drill for 316 stainless - recommendations needed
Thad replied to Thad's topic in Industrial Forum
Does anyone have any advice on controlling the burr? The exit burr is quite heavy. Edited to say that I'm running at 100 SFM and .002 per tooth. (1486 RPM and 3 IPM). -
Carbide drill for 316 stainless - recommendations needed
Thad replied to Thad's topic in Industrial Forum
Thanky you all. You guys are great! -
Carbide drill for 316 stainless - recommendations needed
Thad replied to Thad's topic in Industrial Forum
Can anyone offer some speed/feed recommendations for plain old uncoated, 2 flute, solid carbide, Hertel, 118 degree drill? I found a Hertel chart that says 80-300 SFM and .005 per tooth for a material type of "Stainless Steel (soft)." I'm not sure where 316 stainless falls in the Stainless Steel (soft) realm. Any advice is appreciated. -
Carbide drill for 316 stainless - recommendations needed
Thad replied to Thad's topic in Industrial Forum
Thank you all for the help. The tooling order has been placed. Certainly not a well planned out situation, but that's how we roll here. -
Carbide drill for 316 stainless - recommendations needed
Thad replied to Thad's topic in Industrial Forum
Got a link? I don't see 3 flute drills there. Now I see them. -
Carbide drill for 316 stainless - recommendations needed
Thad replied to Thad's topic in Industrial Forum
Three flute drill doesn't look an option for us. Also, we're limited to what's offered at MSC. My concern with whether to spot or not was because of the carbide drill, not the part thickness. Isn't there an issue of blown corners on a carbide drill when spotting the hole first? I'm kinda new to the carbide drill thing and production is not my forte. Oh...and hurry up, Thad.