


Brad Lisle
-
Posts
243 -
Joined
-
Last visited
Content Type
Profiles
Forums
Downloads
Store
eMastercam Wiki
Blogs
Gallery
Events
Everything posted by Brad Lisle
-
I am a big fan of Lenovo! Maybe it's because I get a massive discount through my wife's employer. The previous company I worked for used Lenovo mobile workstations and they worked flawless. Thought we had them replaced every two years, just to keep up with technology. My new employer chooses HP Zbook workstations. I can't stand them! I have not used a desktop for almost two decades due to my job requirements of being mobile. I have enjoyed my Lenovo mobile workstations! I have never used a Legion, so I could not say anything about them, but I highly recommend the Lenovo workstations. I even bought my own Lenovo P17 fully stacked ($8k+), wifey job got it down to ($3600) just to have at home.
-
This is the code I like to use for setting up Hi-Cut in my posts. Code below uses mi4$ as a toggle to output on. mr1$-mi3$ are for extended commands within the G131 line. Enjoy, Brad Lisle # -------------------------------------------------------------------------- # G131 Hi-Cut (mi4$) # -------------------------------------------------------------------------- sg130 : "G130" #Hi-CUT output string for G131 cancel sg131 : "G131" #Hi-CUT output string for G131 initiate hicut_on : no$ #flag for hicut on op_changed : no$ #flag for op_id$ change at null tool fmt "F" 2 g131f #'F' Hi-CUT Feedrate Upper Limit (mr1$) fmt "J" 4 g131j #'J' Hi-CUT Machining Mode (mr2$) fmt "E" 2 g131e #'E' Hi-CUT Machining Tolerance (mr3$) phicut_on hicut_on = no$ if mi4$ >= 1, [ phg131_out hicut_on = yes$ ] !hicut_on, !g131f, !g131j, !g131e pnull_hicut #"***", ~op_id$, prv_op_id$, "***", e$ if op_changed, [ if mi4$ >= 1, hicut_on = yes$ else, hicut_on = no$ if (hicut_on = no$ & prv_hicut_on = yes$), [ pbld, n$, sg130, e$ prv_gcode$ = -1 ] else, [ if hicut_on = yes$ & prv_hicut_on = yes$, [ #pbld, n$, sg130, e$ if prv_g131f <> mr1$ | prv_g131j <> mr2$ | prv_g131e <> mr3$, phg131_out prv_gcode$ = -1 ] else, [ if prv_hicut_on = no$ & hicut_on = yes$, [ phg131_out prv_gcode$ = -1 ] ] ] ] !hicut_on, !g131f, !g131j, !g131e phg131_out g131f = mr1$ if g131f <= 0, g131f = 1260 g131j = mr2$ if g131j > 2, g131j = 2 if g131j < 1, g131j = 1 g131e = mr3$ if g131e <= 0, g131e = 0.002 pbld, n$, *sg131, *g131f, *g131j, *g131e, e$ phicut_off if hicut_on, pbld, n$, sg130, e$ psof$ #only if first tool change is in psof$ phicut_on #after toolchange call, before cut moves !mi4$, !mi5$, !mi6$, !mi7$, !op_id$ #at end of post block ptlchg$ phicut_on #after toolchange call, before cut moves !mi4$, !op_id$ #at end of post block ptlchg0$ pnull_hicut #before cut moves !mi4$ #at end of post block pretract phicut_off #after initial retract, before home movement or tool breakage check
-
@JeremyV, Where are you located? If you are having a hard time getting training from your local Okuma distributor I would highly consider Ron (@crazy^millman) for training. He could help with the machine and MasterCam side of things. He is a great resource as well as a great guy all around. Brad Lisle
-
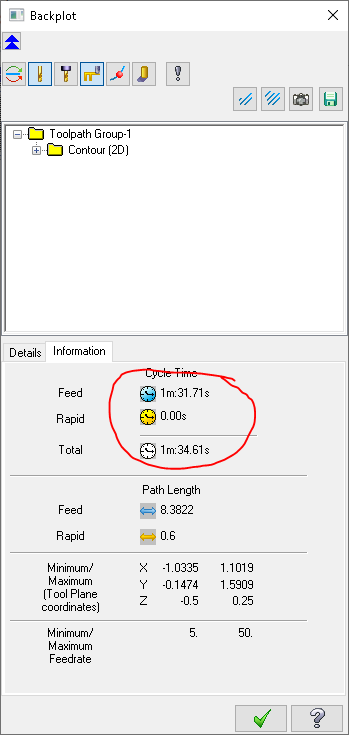
Does anyone know how to get the tool cut time? and total cycle time? Thanks, Brad
-
I can see a couple of issues here. First off you may not be probing on the outer tangency of the sphere, thus the radius measured will not be the true radius of said sphere. By shifting the measured radius you will not be in the true center of the sphere. If the sphere is always a known value, you could probe outside to find center, probe top, then probe outside again to center taking into consideration for the stylus radius. Here is the code: NPRB1 (ASSUMING X0. Y0. Z0. IS CENTER OF SPHERE) (ASSUMING 1.0 SPHERICAL DIAMETER) (ASSUMING 6MM STYLUS TIP) T99 M06 G15 H1 G00 X0. Y0. M05 G56 HA Z2. M09 CALL O9832 (PROBE ON) CALL O9810 PZ=.6 PF=100. (SAFE MOVE) CALL O9814 PD=1. PZ=-.1181 (MEASURE BOSS DIAMETER) VC1=VS75 (LOG MEASURED X POSITION) VC2=VS76 (LOG MEASURED Y POSITION) CALL O9810 PX=VC1 PY=VC2 (MOVE TO TRUE CENTER) CALL O9811 PZ=.5 (MEASURE TOP OF SPHERE) VC3=VS77 (LOG MEASURED Z POSITION) CALL O9810 PX=VC1 PY=VC2 (MOVE TO TRUE CENTER) CALL O9814 PD=1. PZ=-.1181 (MEASURE BOSS DIAMETER) VC4=VS78 (LOG MEASURED DIAMETER) CALL O9810 PZ=2. PF=300. (SAFE RETRACT) CALL O9833 (PROBE OFF) VC5=VC3-[VC4/2] (CALCULATE TO CENTER OF SPHERE) G11 Z=VC5 (PARALLEL SHIFT OF COORDINATE SYSTEM) M01 RUN TOOLS BELOW ... ... G10 (CANCEL G11 SHIFT) (NOTE: RESET WILL ALSO CLEAR THE G11 SHIFT) M30
-
Another Okuma Macro to share.
Brad Lisle replied to YoDoug®'s topic in Machining, Tools, Cutting & Probing
Please be more specific. Is this for a mill or lathe with milling capabilities? Do you need multiple passes or just a single contour pass? Any other specifics you are looking for this macro to accomplish? Brad -
@PcRobotic Would you mind sharing how you got the Z min correct in the tool table? I have been having issues getting the correct output. Almost there and yet still far away. Thank you in advance, Brad
-
You can have it at the header for each offset you want to use or at each rotation output. Either way works fine as long as you call up the correct work offset numbers. I personally like them at the header. The CALL OO88 is just a calculation tool, therefore there is no mode that needs to be cancel ed. When you change work offsets it will effectively cancel the previous offset. As you can see in Greg's sample code the post is setup to always use the same temporary offset #51 and always references offset #1. Using this format you must have it at every rotation to recalculate every time and it also calls up the temp offset #51 to be active. I have my post setup to program using different work offset numbers for various tool planes. Similar to other posts that do not use "CALL OO88" and outputs a different offset for each rotation. Using this method you only need the CALL OO88 statement only once and it can be anywhere before the offset is called, IE... beginning of program. Just make sure you always call up the active work offsets.
-
Gosiger has some of the best Applications Engineers and Service Techs on the west coast. There are quite a few great machines to choose from, but service and tech support are key. I'll put my vote in for an Okuma Multus.
-
Awesome, thank you. I already tried contour and could not find ramp option it only had 2D, 3D or 3D chamfer. I must have selected a bad chain. Got it done finally. It was driving me nuts!
-
No kidding, That is a 393.7" table with a max swing of 629.9". Can you imagine the distance between columns? I wouldn't trust the rigidity of it with that much spread. Although admittedly I have not seen pictures of it. An FPT Industries Vertigo with a 374.0" (9.5 meter) table only has a max swing of 472.4" (12 meter)
-
I must have had to much coffee this morning because I cannot think for the life of me. I am trying to do a Helix bore toolpath on an OD. I know I have done this toolpath a few times before but my mind is going a million miles per hour today and I can't get what I want. Simply want to select on an OD arc and tell it to use a highfeed mill to spiral ramp down to a desired Z depth without selecting surfaces. Thank you
-
These are a great option. I have had great success with the Lyndex SK series holders.
-
That is the wonderful thing about our industry, every part is it's own unique part and faces it's own unique challenges. I do not see how anyone could come up with a solution that could put an allotted programming time to machine cycle time ratio. This where years of experience in the workshop comes into play. Having quoted a multitude of jobs, a seasoned machinist should be able to tell you estimated programming and cycle times based of the prints fairly quickly. I think being a MASTER OF PERFECTION you would want something a little closer to an experienced estimation rather than a random ratio formula to determine whether your company stays in business or not. Just my 2 cents, take it for what its worth.
-
Thank you Jeff!!!! I had to remove the * from the tloffno$ at the end of the ptoff block so I would not get redundant D## if using an alternate numerical value offset. Love it. Thanks again
-
I understand that the *sg56 is redundant I just like to see it so I know it is forced without question. As for the D value if I use if pccdia #Cutter Compensation #Force Dxx# if prv_cc_pos$ <> cc_pos$ & cc_pos$, prv_tloffno$ = c9k sccomp if cc_pos$, tloffno$ The D## only appears at the G41 line as a numerical value. But when I change that block to pccdia #Cutter Compensation #Force Dxx# if prv_cc_pos$ <> cc_pos$ & cc_pos$, prv_tloffno$ = c9k sccomp if cc_pos$, ptoff It puts the D## value on every line, although in the correct format that I'm looking for; DA, DB, DC or a numerical value. I just want to get rid of the redundant D## values, the G56 H## logic works perfect.
-
I have modified my Okuma post logic to output G56 HA if tlngno$ = 10001 | tlngno$ = t$. Further more it will output G56 HB if tlngno$ = 10002 and G56 HC if tlngno$ = 10003. Here is the code ptlen #Tool length offset if tlngno$ = 10001 | tlngno$ = 10002 | tlngno$ = 10003 | tlngno$ = t$, [ if tlngno$ = 10001 | tlngno$ = t$, *sg56, "HA" if tlngno$ = 10002, *sg56, "HB" if tlngno$ = 10003, *sg56, "HC" ] else, *sg56, *tlngno$ !tlngno$ However, I cannot for the life of me get it to work the same for the cutter comp without getting the output on every line pccdia #Cutter Compensation #Force Dxx# if prv_cc_pos$ <> cc_pos$ & cc_pos$, prv_tloffno$ = c9k sccomp #if cc_pos$, tloffno$ if cc_pos$, ptoff ptoff #Tool radial offset if tloffno$ = 10001 | tloffno$ = 10002 | tloffno$ = 10003 | tloffno$ = t$, [ if tloffno$ = 10001 | tloffno$ = t$, "DA" if tloffno$ = 10002, "DB" if tloffno$ = 10003, "DC" ] else, *tloffno$ !tloffno$ Here is the posted code: N1 ( 1/2 FLAT ENDMILL ) G90 G17 G80 G40 G00 G30 P10 G116 T1 G15 H2 G131 F1260. J1 E.002 G00 G94 G90 X-2.4 Y-.1 S5000 M03 T2 G56 HA Z1. M08 G01 Z-1. F30. G41 DA X-2.35 G03 DA X-2.25 Y0. I0. J.1 G01 DA Y1.5 G02 DA X-2. Y1.75 I.25 J0. G01 DA X2. G02 DA X2.25 Y1.5 I0. J-.25 G01 DA Y-1.5 G02 DA X2. Y-1.75 I-.25 J0. G01 DA X-2. G02 DA X-2.25 Y-1.5 I0. J.25 G01 DA Y0. G03 DA X-2.35 Y.1 I-.1 J0. G01 G40 X-2.4 G00 Z1. G130 G131 F1260. J1 E.002 G00 Y-.1 G01 Z-1. G41 DB X-2.35 G03 DB X-2.25 Y0. I0. J.1 G01 DB Y1.5 G02 DB X-2. Y1.75 I.25 J0. G01 DB X2. G02 DB X2.25 Y1.5 I0. J-.25 G01 DB Y-1.5 G02 DB X2. Y-1.75 I-.25 J0. G01 DB X-2. G02 DB X-2.25 Y-1.5 I0. J.25 G01 DB Y0. G03 DB X-2.35 Y.1 I-.1 J0. G01 G40 X-2.4 G00 Z1. M09 M05 G130 G30 P30 M01 N2 ( 1/8 DRILL ) G90 G17 G80 G40 G00 G30 P10 G116 T2 G15 H2 G00 G94 G90 X0. Y0. S6000 M03 T1 G56 HA Z1. M51 G71 Z1. G81 Z-1. R.1 F25. M53 G00 M09 M05 G30 P30 M02 What am I missing? If I do not use the ptoff logic and use the if cc_pos$, tloffno$ line in the pccdia post block it works as expected and only outputs on a single line with the numerical value. I know it is something simple that I am overlooking. Thank you in advance. Brad
-
Sandvik Coromant Y Axis Parting
Brad Lisle replied to Mick's topic in Machining, Tools, Cutting & Probing
new technology brings new problems. The only way I have seen was to break up the y axis movements and command a S speed at each line. You still will not get a true CSS but you can get it closer than a G97. I have heard some talk about this but not sure what will come yet. -
Here is the mill version. The one Orvie posted is for lathes. Stock Graphics for OSP-M.pdf
-
I know some of the LT machines are already done in MT. You will want to use MT to get the turret syncs correct, much easier. Where are you located? Either way Gosiger will take good care of you.
-
Okuma without a doubt! oh wait... I might be biased
-
Have you contacted your Gosiger sales rep. They might be able to help you out. Not sure, but just a thought.
-
I'm pretty sure not much has changed from P100M to the P200M, but now you have it.
-
Here you go https://www.dropbox.com/s/wgbi10xxkejpvwn/ME51-326-R02a_Gauging.pdf?dl=0
-
Another Okuma macro to share
Brad Lisle replied to YoDoug®'s topic in Machining, Tools, Cutting & Probing
Thank you, new one for my toolbox

