


RyanS13
-
Posts
12 -
Joined
-
Last visited
RyanS13's Achievements
")


-
5 Axis Post Processing - August 2017
RyanS13 replied to Colin Gilchrist's topic in Post Processor Development Forum
Colin, any idea if you will have another run of this class? Or possibly something like some self-paced material/class that isn't live? I was in a class for Catia that conflicted with two of the dates in this run of the class, so I wasn't able to take it. -
VERISURF TOOLS For MASTERCAM 2024
RyanS13 replied to Verisurf - Ernie Husted's topic in Industrial Forum
I figured the error out for anyone who runs into the same issues. I needed to log out from my main account and log in on the admin account that our IT guy made me, and then run Mastercam 2018 once. When running it the first time, it creates the "my mcam2018" folder in the account's documents folder. The admin account didn't have that folder yet. Not sure why the Verisurf Tools installer would be looking for that folder since I was trying to install it on my main account, but once the admin account had that folder created inside its documents, the install completed successfully. -
VERISURF TOOLS For MASTERCAM 2024
RyanS13 replied to Verisurf - Ernie Husted's topic in Industrial Forum
Here is my install log if it helps. VSInstallLog.txt -
VERISURF TOOLS For MASTERCAM 2024
RyanS13 replied to Verisurf - Ernie Husted's topic in Industrial Forum
It isn't showing up in my control panel. Possibly because it never fully completes the install before failing? Not sure though, but it's not in my control panel. -
VERISURF TOOLS For MASTERCAM 2024
RyanS13 replied to Verisurf - Ernie Husted's topic in Industrial Forum
Yea, tried running it on my main login, using right click> run as admin, and also tried logging into the admin account directly and installing it from there. Still getting the same issue. Also getting this when I try to uninstall it in C:\Program Files\Verisurf Uninstall\2018Tools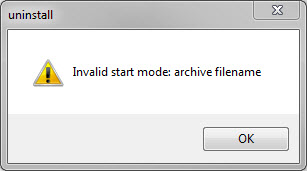
-
VERISURF TOOLS For MASTERCAM 2024
RyanS13 replied to Verisurf - Ernie Husted's topic in Industrial Forum
I'm getting the following error whenever I try to install the new Verisurf Tools for 2018. I tried manually creating that config folder everywhere that the 2017 install created one, however, I'm still getting the error.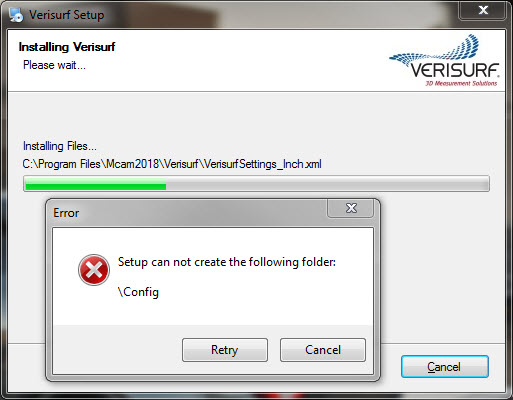
-
I addressed that in the bottom of my initial post. Adding another depth will add about 2 hours to the program because the part is so big. It also will go through 2x the amount of end mills since the amount of area that the tool needs to cover will be doubling. I need to go down to that depth so that I can remove that middle slug that is shown on the right side of the screenshots.
-
I know the title is a bit confusing but let me try to explain my problem in more detail here. We are doing a big titanium job at the moment, and I'm having some issues with the dynamic milling & tall walls being left over after the initial depth that are breaking the tools when the tool starts stepping up to finish the areas of the part that are higher than the initial depth. It is programmed with a stepdown of 2.25", and a stepup of .060" to rough the angled walls/tops of walls. Here is a screenshot of the area that is giving us issues. The red lines are the stock, the green line is the initial depth we're going to. And here are some screenshots of the issue I'm describing with the tall walls breaking the tool as it steps up to remove them. I know that I can decrease my stepdown in order to remove most of that area that it's coming back and stepping up, but the problem is it will add almost 2 hours to the program to take it in 2 depths since the part is so big. It also will go through 2x the tools due to the amount of area that the tool needs to cut doubling. Is there a way to have mastercam stepup and clear that material while it's still supported by the rest of the block or something like that? I guess it would need to go to the lowest depth and cut until it reaches a taller feature, then step up to clear that taller feature while it's still supported by the rest of the material, then go back to cutting at the lowest depth after the tall feature is cleared. Would be nice if this was possible. Or is there another solution that might help solve this? Any suggestions are appreciated.
-
VERISURF TOOLS For MASTERCAM 2024
RyanS13 replied to Verisurf - Ernie Husted's topic in Industrial Forum
Also having an issue when trying to use the Hole-Axis tool. Whenever I pick a hole, it will create the axis geometry wherever my original Top WCS's X0,Y0,Z0 is. If I use the Auto Hole-Axis tool it works correctly, however the regular Hole-Axis tool does not. -
Save Tool Arrangements In Toolpath and Tool Selection Windows?!?!
RyanS13 replied to RyanS13's topic in Industrial Forum
Edit: double-posted. -
Save Tool Arrangements In Toolpath and Tool Selection Windows?!?!
RyanS13 replied to RyanS13's topic in Industrial Forum
It will stay but only for that single time I change it. As soon as I close it and re-open it, they will reset right back to the way they are in the first two screenshots. I literally have to slide them over every single time I create a tool path, it is beyond frustrating. I also had this problem with X6 at my last job. I'm beginning to think something is corrupt or something like that with my configuration files, but I don't have any problems with anything else. This is the only issue. It seems like if there was something corrupt with the configuration files this wouldn't be my only issue. -
Have had this problem for a while, and it's driving me crazy. I know there has to be some way to fix it, I just cant figure it out. It happened to me at my last job and somehow cured itself, but now that I'm at the new company, the problem is back. The issue I'm having is, I can't get the tool arrangements to save for me when I go to pick a tool after creating a toolpath. If I move the sliders to the way I want them, the next time I open up the toolpath window they'll have already reset; same with the tool selection window, every time I open it, the top bar sliders reset and the arrangement(arrange by tool#, diameter, type, etc.) resets as well. The sliders get so small that I can't even see the information without manually fixing them every single time.Here are some screenshots for reference on whats happening. This is how I would like for it to be saved. Arranged by diameter, and with the sliders like this. If anyone can give me some insight on how I can fix this, it will be greatly appreciated and will save me from a lot of frustration. Thanks!