G Zero
-
Posts
24 -
Joined
-
Last visited
Content Type
Profiles
Forums
Downloads
Store
eMastercam Wiki
Blogs
Gallery
Events
Everything posted by G Zero
-
Unfortunately I cant get it any more centered. The parts are crescent shaped with holes equally spaced along the edge. I will try to post a pic of the setup next week. I Cant post a part or model pic because its an ITAR part.
-
I will have to look on Monday but I dont think I have a threadmill that will work. The order is low qty 3 parts 2 of each but I dont think we have room in the job $$ wise to order tools. I have tried that and I even add a few lines of (!!!!!!!!!!!!!!!!!!!!!!!!!!!!!!!!!!!!!!!!!!!!!!!!!!!!!!) to try to get them to pay attention and if I could enforce the last one we would be looking for a new operator every 2 to 3 weeks. Unfortunately this was embedded in the shop culture long before I got here. It is the belief of almost every one here that if a crash is going to happen there is nothing that you can do to stop it so just hit the button. I could write a rant that would be a wall of text on this alone. I have managed to get one setup / operator trained up fairly well but it is an up hill battle.
-
In the the shop I work for the M00 would be asking for trouble. I have one operator that has op stopped his way threw the entire program and said that my program is messed up because the facemill is going to run again (he has done this twice). I never know who is going to be running my programs so I have to shoot for Idiot proof. I like the Helix bore idea I didn't think of that. I might be alright drilling it lightly tho. I just looked up the haas spec sheet and they claim that the brake torque @ 100 psi is 100 ft/lb. I will still put some flats at my index points so if need be I can add jacks. Thanks for the reply.
-
I need to drill & tap some holes (8-32) in a part (304ss) and I would like to use the shops 4th to save quite a few setups. Unfortunately the 4th we have is a small Haas hrt 160 and I would be drilling about 3.5" off centerline. I am a little worried that I might end up pushing threw the brake. I know its a small drill but it feels like I am giving it a big lever. We haven used this 4th a lot but we have a batch of parts coming up that it would save me a bunch of time on, so any advice would be appreciated.
-
If all you need is the time. Take the path length for each op and use the feed rate to calculate an estimate. I have never had a negative backplot time but the last time backplot went all funky on me I had a back feed rate set to .1 so take a close look at your code.
-
Need help. How to create a 90 degree facemill in mastercam??????
G Zero replied to david3709's topic in Industrial Forum
interesting... I have 3 different 2" facemills defined like this and have never had that happen. It must be the mastercam ghosts I should go back and put insert radius on just so it matches the real tool. -
Need help. How to create a 90 degree facemill in mastercam??????
G Zero replied to david3709's topic in Industrial Forum
Just make the cutting diameter and the secondary diameter the same and set the chamfer to 0.0
-
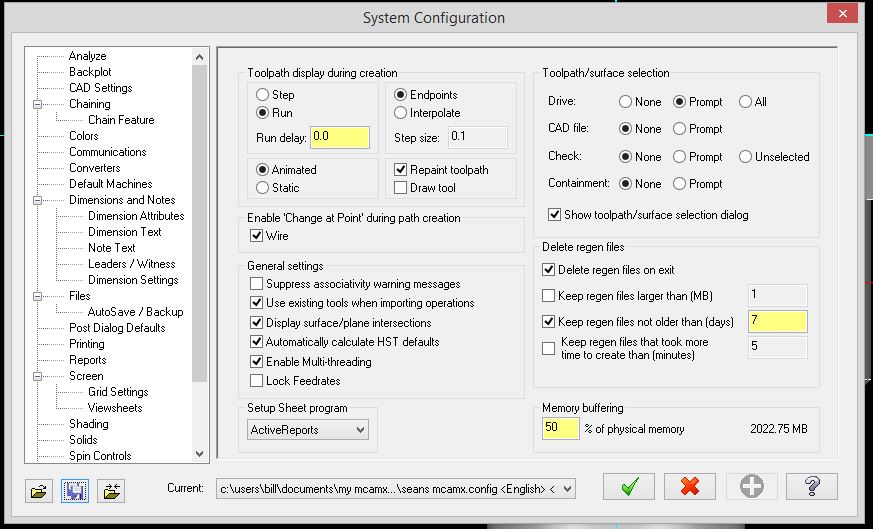
Have you tried un checking the "lock feed rates" box in your config ?
-
ISCAR has a whole line of multifunction tools .... I have never used them just was looking at getting one a while back. https://www.iscar.com/eCatalog/Products.aspx?mapp=MF&app=242
-
Colin, Sorry for the late reply. I had a fire I had to put out. I did figure out it wouldn't work for the manual entry but left it in for now "it kinda works". The coding to do it the proper way is beyond my skill level currently. I know just enough to artfully brake a post I will send you a PM for the link so I can get it coded the correct way. Currently the NC posts out like this...... again thanks for the help. % O12345 (T OP-1) (DATE - 08-27-15) (TIME - 2:48 PM) (HAAS VM-3) (GROUP COMMENT) (T1|0.5 FLAT ENDMILL) (T2|0.25 FLAT ENDMILL) (T3|NO. 4-40 TAPRH - CUT) (1 MANUAL ENTRY MANUAL ENTRY MANUAL ENTRY) N1 G20 N2 G0 G17 G40 G49 G80 G90 (0.5 FLAT ENDMILL) (TOOL PATH COMMENT #1) N3 T1 M6 N4 G0 G90 G54 X-1.525 Y-.3889 S9500 M3 N5 M8 N6 G43 H1 Z.25 T2 N7 Z.05 N8 G1 Z0. F85. N9 X-1.3305 Y-.1945 F99.8 N10 G3 X-1.25 Y0. I-.1945 J.1945 N11 G1 Y1. N12 G2 X-1. Y1.25 I.25 J0. N13 G1 X1. N14 G2 X1.25 Y1. I0. J-.25 N15 G1 Y-1. N16 G2 X1. Y-1.25 I-.25 J0. N17 G1 X-1. N18 G2 X-1.25 Y-1. I0. J.25 N19 G1 Y0. N20 Y.02 N21 G3 X-1.3305 Y.2145 I-.275 J0. N22 G1 X-1.525 Y.4089 N23 G0 Z.25 N24 M5 N25 M9 N26 G53 Z0. N27 M01 (0.25 FLAT ENDMILL) (2MANUAL ENTRY MANUAL ENTRY MANUAL ENTRY) (2 MANUAL ENTRY MANUAL ENTRY MANUAL ENTRY) (2MANUAL ENTRY MANUAL ENTRY MANUAL ENTRY) (2 MANUAL ENTRY MANUAL ENTRY MANUAL ENTRY) (TOOL PATH COMMENT #2) N28 T2 M6 N29 G0 G90 G54 X-1.2625 Y-.1945 S9500 M3 N30 M8 N31 G43 H2 Z.25 T1 N32 Z.05 N33 G1 Z0. F25. N34 X-1.1653 Y-.0972 F47.5 N35 G3 X-1.125 Y0. I-.0972 J.0972 N36 G1 Y1. N37 G2 X-1. Y1.125 I.125 J0. N38 G1 X1. N39 G2 X1.125 Y1. I0. J-.125 N40 G1 Y-1. N41 G2 X1. Y-1.125 I-.125 J0. N42 G1 X-1. N43 G2 X-1.125 Y-1. I0. J.125 N44 G1 Y0. N45 Y.02 N46 G3 X-1.1653 Y.1172 I-.1375 J0. N47 G1 X-1.2625 Y.2145 N48 G0 Z.25 N49 M5 N50 M9 N51 G53 Z0. N52 M01 (0.5 FLAT ENDMILL) (TOOL PATH COMMENT #3) N53 T1 M6 N54 G0 G90 G54 X-1.525 Y-.3889 S9500 M3 N55 M8 N56 G43 H1 Z.25 T3 N57 Z.05 N58 G1 Z0. F85. N59 X-1.3305 Y-.1945 F99.8 N60 G3 X-1.25 Y0. I-.1945 J.1945 N61 G1 Y1. N62 G2 X-1. Y1.25 I.25 J0. N63 G1 X1. N64 G2 X1.25 Y1. I0. J-.25 N65 G1 Y-1. N66 G2 X1. Y-1.25 I-.25 J0. N67 G1 X-1. N68 G2 X-1.25 Y-1. I0. J.25 N69 G1 Y0. N70 Y.02 N71 G3 X-1.3305 Y.2145 I-.275 J0. N72 G1 X-1.525 Y.4089 N73 G0 Z.25 N74 M5 N75 M9 N76 G53 Z0. N77 M01 (NO. 4-40 TAPRH - CUT) (TOOL PATH COMMENT #4) N78 T3 M6 N79 G0 G90 G54 X0. Y0. S200 M3 N80 M8 N81 G43 H3 Z.1 T1 N82 G98 G84 Z0. R.05 F5. N83 G80 N84 M5 N85 M9 N86 G53 Z0. N87 G53 X-20. Y0. N88 M30 %
-
Craig, yes I have all that I was just wanting to be able to control the comments better. Colin, Thank you that works perfectly. It took me a little bit to figure out how to get step #7 formated correctly but the comments are just where I want them. I still need to work on the tool change comments so I have a couple of further questions. 1 Would it be a bad idea to strip the manual entry comments the same way? its not a huge deal I don't use manual entry but that might change in the future. 2 Will this same process work to remove all but the op comment from before the tool change for the rest of the tools in the program? I have tried to just turn them off by # out all comment$ but they still report in the nc. I know I need to get the MP book but I am currently in the middle of my VB book.
-
I have spent the last couple of hours trying to get the "machine name" and the "Group comment" to appear in the header of the nc. I am about to go insane!!!! Can some one point me in the right direction? Here is what I have. X8 Post - Generic Haas 3X Mill ( the one that installs with mastercam) My nc needs to look like this O12345 (T OP-1) (GENERIC HAAS 3 - AXIS VMC)<-- I want to add this (how do I do that???) (GROUP COMMENT)<-- I want to add this here (how do I do that???) (DATE - 08-13-15) (TIME - 5:07 PM) (GROUP COMMENT)<-- or add this here (how do I do that???) (T1|0.5 FLAT ENDMILL|H1|D1|TOOL DIA. - .5) (T2|0.25 FLAT ENDMILL|H2|D2|TOOL DIA. - .25) (T3|NO. 4-40 TAPRH - CUT|H3|D3|TOOL DIA. - .112) N1 G20 N2 G0 G17 G40 G49 G80 G90 (TOOL PATH COMMENT #1) N3 T1 M6 N4 G0 G90 G54 X-1.525 Y-.3889 S10000 M3 N5 M8 N6 G43 H1 Z.25 T2 N7 Z.05 N8 G1 Z0. F85. N9 X-1.3305 Y-.1945 F105. N10 G3 X-1.25 Y0. I-.1945 J.1945 N11 G1 Y1. N12 G2 X-1. Y1.25 I.25 J0. N13 G1 X1. N14 G2 X1.25 Y1. I0. J-.25 N15 G1 Y-1. N16 G2 X1. Y-1.25 I-.25 J0. N17 G1 X-1. N18 G2 X-1.25 Y-1. I0. J.25 N19 G1 Y0. N20 Y.02 N21 G3 X-1.3305 Y.2145 I-.275 J0. N22 G1 X-1.525 Y.4089 N23 G0 Z.25 N24 M5 N25 M9 N26 G53 Z0. N27 M01 (TOOL PATH COMMENT #2) N28 T2 M6 It seems like I am missing something simple but I have no idea what I need to add to move the comments. All I had to do to for all the other edits I needed was # out some lines and chance a couple values. Any help is greatly appreciated.
-
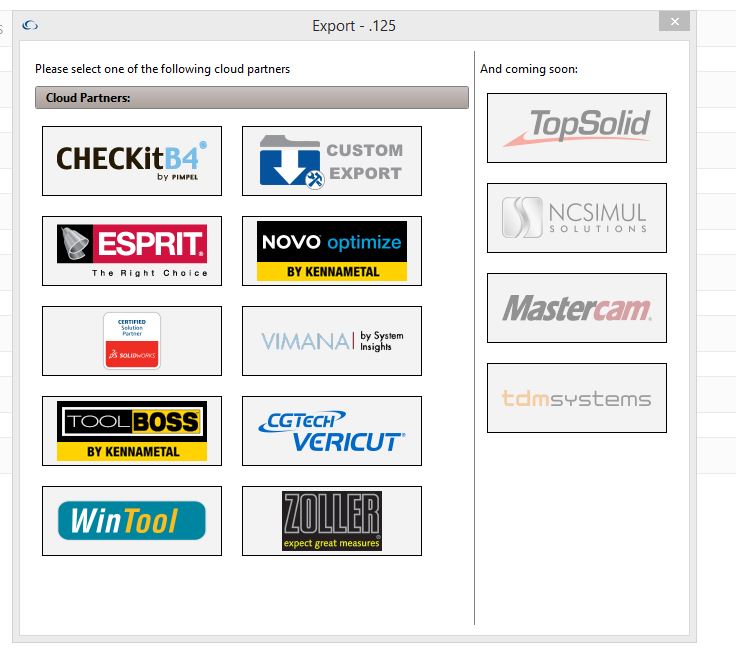
Just an FYI. I have been messing around with this app for a while now and it is starting to get good. I am looking forward to the Mastercam export update.

-
Hertz uncheck "lock feedrates" in your system config and they will change with the tool.
-
M9
-
Go to https://www.mastercam.com/Support/Downloads/Mastercam and download the PrmDef addon ... it will force the defaults to stick instead of the last used.
-
I actually have both key types ... I teach part time at a trade school & program full time at a shop. You have to set your machine at the same 0,0 point that you programmed the part from in mastercam. You got a way with it with the 2d tool paths because the geometry only controls the x,y location of the tool path not the depth (to a point). In the 3d tool paths the surface / solid controls x,y, and z Get in the habit of setting the part origin in mastercam to where you want to set it at the machine. Cam instructor teaches you how to use mastercam not necessarily how to write good code.
-
When I open the file I see no tool paths in the file .... Just the solid ....is this due to the restrictions ?? or am I just missing a toggle somewhere?
-
It sounds like you set your tool length offsets at the machine off of the top of the part while mastercam is thinking you set them off the bottom.
-
Its gone .... http://www.emastercam.com/board/topic/78705-xform-drag-mx8/?hl=%2Bx-from+%2Bdrag
-
Can you makes center points Globally on holes
G Zero replied to mike561h's topic in Industrial Forum
Yes .... Just run the DrillPt chook -
Because the machining Gods want you to learn something new.. I got handed a couple of jobs that were cut out of Invar 36 ... I learned a ton cutting them. Do you have a test report on the material?
-
Does anyone have a trick to get the value the button generates applied to the selected view? I always end up just typing it in.
-
I had this happen last week with a machine definition. If you use the tab key to find the start point of the window you can use shift + tab to navigate back to the buttons you cant click on ( 3 x for ok ). You just have to do it blind and check that your changes stick.