Frank Caudillo
-
Posts
166 -
Joined
-
Last visited
Content Type
Profiles
Forums
Downloads
Store
eMastercam Wiki
Blogs
Gallery
Events
Everything posted by Frank Caudillo
-
I mean, they're probably not wrong for some of the other programs you use, by the sounds of it. It definitely sounds like you'll be better off with a simpler, but specialized, system for Mastercam. A good single threading i7 or i9, and half the RAM would still be plenty for Mastercam. Glad we could shed some light on it for you!
-
What other programs are they running? Different programs utilize CPUs differently so it's not surprising that some programs will see a big performance boost from your new system while Mastercam will not. The bottom line is that Mastercam needs clock speed and uses single thread processing more than anything else. Those dual Xeons you have, and probably the ones in your system, are not ideal for Mastercam. I'm not surprised other programs you use might perform much better while Mastercam's performance is marginal. It's not a settings issue, it's a hardware issue.
-
I have to agree that your very expensive CPUs are the bottle neck. Here is a comparison between your CPU and mine, which has a pretty respectable single thread rating. Single thread rating is king with Mastercam so any top rated CPU on this chart is what you want. Notice that very few of them are Xeons. That looks like a very expensive box they built you, but I don't know that there's any tricks or extra configuration that will get you better performance.
-
What are your computer specs? CPU, RAM, GPU, etc.
-
Is hardware acceleration checked off for some reason? Running the correct drivers for the card? Nvidia drivers are notoriously troublesome so you may have to run drivers that are slightly "older" but more stable.
-
I remember other users discussing the priority setting for Mastercam in the task manager, but also clarifying that the priority gets reset every time you close Mastercam. If you have it open all then setting the priority first thing every morning should work fine. Otherwise, a program like Corey suggested should be able to manage that for you.
-
I do this, but the opposite. I have my config setup to pan with the middle button by default. I usually have my spacemouse but when I don't I'll hold shift+middle mouse button to rotate. Works well for me.
-
Post with more then one work offset
Frank Caudillo replied to hoa75nguyen's topic in Post Processor Development Forum
Check your miscellaneous parameters. There is probably an option to set it to lock on to first WCS. This will prevent different rotations from posting with a different work offset. -
You're probably not wrong. You have to be a little unhitched to do what we do, huh?
-
Thanks, Ron. I hardly ever deal with inverse time stuff so I didn't have any idea of what could have been wrong. That video spelled it out pretty clearly!
-
Is there any way to adjust the speed of the toolpath/level/plane manager flyout animation? I normally have it docked on a second monitor or just pinned opened in the graphics window but while running an instance of Mastercam on each monitor I would like to be able to maximize graphics real estate. I really like the ability to have my managers as tabs but the flyout animation is killing me and I literally cannot wait the .5 second it takes to open completely. I know there's adjustment for the g-view transition animation speed but I haven't seen anything yet for the flyout menus. Am I SOL?
-
This bugs me to no end. For two closely related parts with subtle differences I will often do a "zero transformation" in a new toolpath group and carry over the shared toolpaths between parts. But when I wanted to ghost something in the first group and then de-select it in the transformation it does what you're saying. Thankfully nothing horrible has happened because I compare new code to what was previously ran almost every time but it sure is annoying.
-
Correct me if I'm wrong, but is this not just inverse time feed?
-
Could use some help with a pst err
Frank Caudillo replied to motor-vater's topic in Industrial Forum
This is probably the one post issue that I can always confidently answer -
Finish Endmills for Annealed 17-4
Frank Caudillo replied to Frank Caudillo's topic in Machining, Tools, Cutting & Probing
I've also been using Harvey/Helical for some of our stainless and I haven't been disappointed yet. For what it's worth, this is for cutting Glock slide blanks and the aesthetic custom cuts on the outside, which is why we're so critical about the finishes. I try, at all costs, to avoid any extra labor going into parts for deburr work. It usually does more harm than good. -
Finish Endmills for Annealed 17-4
Frank Caudillo replied to Frank Caudillo's topic in Machining, Tools, Cutting & Probing
I see what you mean about the horizontals. The little Kiwa's do fine and they can cut quick, but they're definitely not heavy duty, even for a horizontal. Cutting stainless in them has definitely taken some finesse. Unfortunately I can't sub out to 15-5 so I'll have to make do with 17-4. We typically run 4 and 5 flute IMCO in stainless, which have worked pretty well. Honestly, the surface finish isn't all that bad but we're so particular about the finish that we've been buffing them to remove any tool marks. I may be grasping at straws to get that type of finish but I figured I would see if any had found a unicorn endmill that was the end all be all. Thanks, Nick. -
Finish Endmills for Annealed 17-4
Frank Caudillo replied to Frank Caudillo's topic in Machining, Tools, Cutting & Probing
Machine is a 40 taper Kiwa KH-45 Horizontal .5" diameter x 1.25" loc. Fixture setup is really solid on dovetails, so nothing hanging out in no man's land. -
Trying to get a good wall finish without having to take a 3M disc grinder to buff the surface to remove tool marks. The parts were originally finished with a 7 flute Melin and now we're trying a 9 flute, as well as a 3 flute, 60 degree helix endmill from Melin, as well. Any recommendations that I should try?
-
You like the change to break them into separate functions or you liked the way it was before? I don't mind adapting to new things (the Ribbon interface didn't bother me too much, but I didn't have years invested in the X versions anyways), but I just don't get why they changed it.
-
I'm just starting to put 2020 through it's paces and for the most part I'm liking it but I've noticed one thing I'm not sure I like already, though this may have changed in 2018/2019 (I've been using 2017). Why did they split up the Trim Break Extend function into separate buttons? Maybe I'm just complaining because my muscle memories tells me that I can use my custom shortcut (SHIFT+T) and access all of those functions at once and say, trim two entities together, then go over and trim divide between two other entities, and then maybe go extend a few other entities before trimming them all to one point. Now it seems like I have to click three different functions to do all of what I used to be able to do with one hotkey. /rant Maybe someone from CNC can chime in with the reasoning behind that because I don't understand it
-
Changing drill rpm at a point in progress
Frank Caudillo replied to So not a Guru's topic in Industrial Forum
A point path should do the trick. Since, as far as I can tell, you can't edit RPM in the toolpath editor, you'll probably need to create different operations for your different RPMs and select the depths to go to for each RPM/feed. You can also set up a normal canned cycle to start where the drill is safely in the piloted hole with all retracts at incremental 0. Then put point paths before and after at lower feeds/speeds to safely enter and retract from the hole. Another trick I've used for carbide drills is a 3D contour with a line along the drill axis going to the necessary depths. I'll typically set the start of the line at a point below the surface where the drill will be completely "captured" and it will end at the full depth of the hole. Set plunge rate to the feed you want the drill to begin drilling to the start of the contour, and then it will take off from there at the cutting feed rate, however I don't think you'll be able to edit RPM this way. I've done it each way I've described and they've all worked well, just depends on what you're trying to accomplish. The other option would be to probably create custom drill cycles, but where is the fun in that? Being creative is more fun -
This is my thought as well. Trying to get CIMCO MDM implemented at my shop.
-
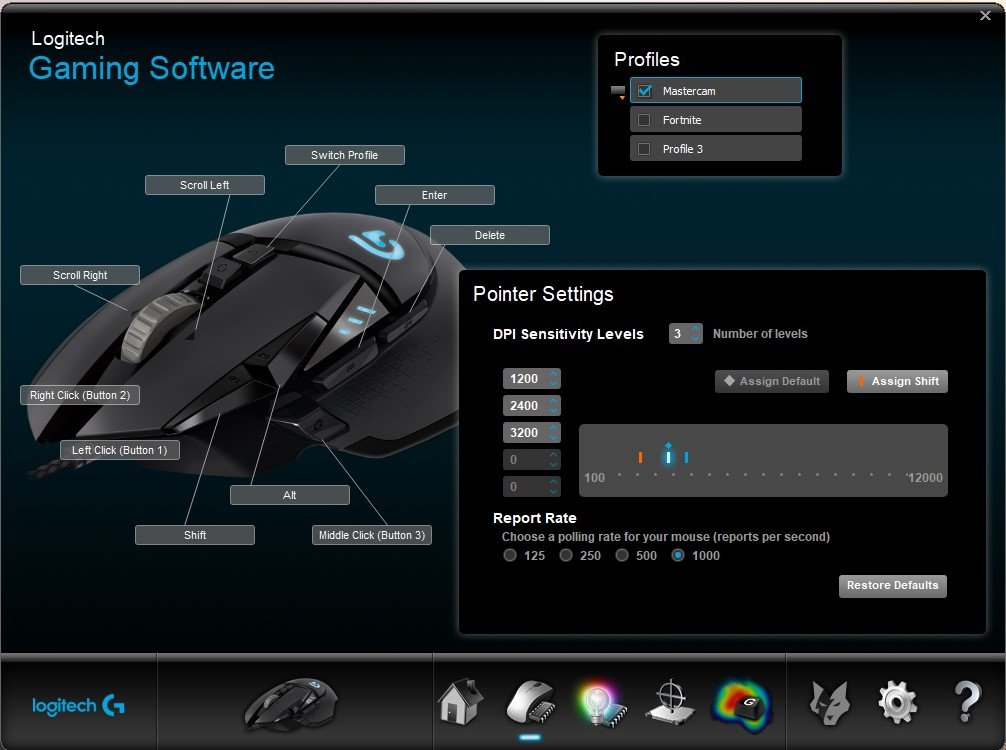
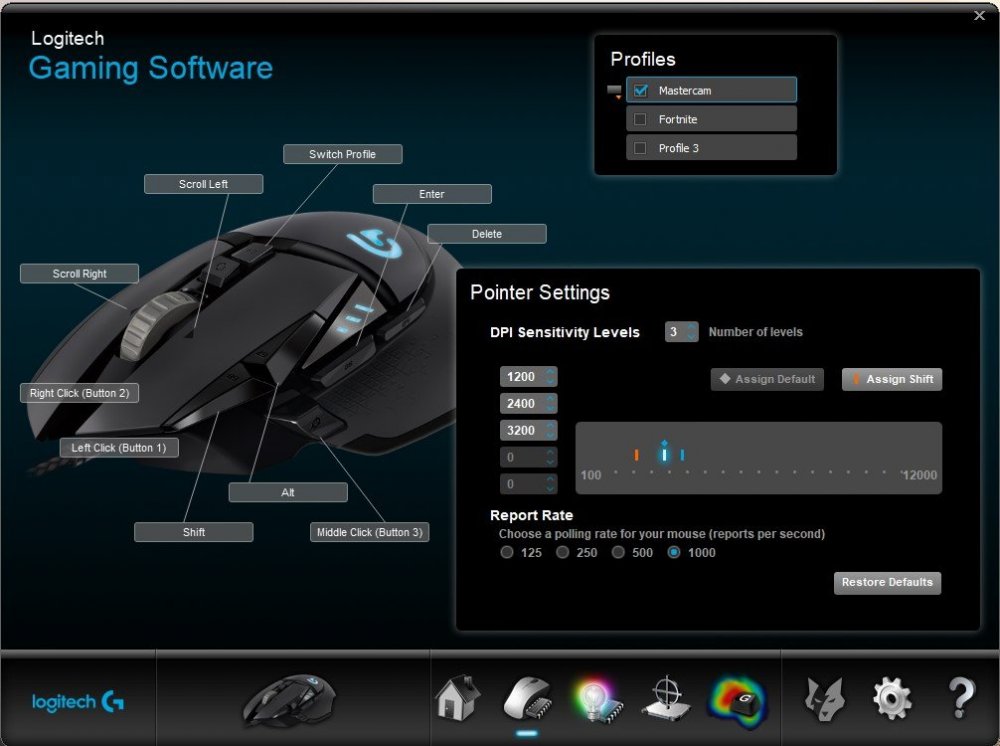
I can't live without it at this point. I would be completely lost on a system without my mouse and custom keyboard shortcuts. I like having delete right next to enter so when I delete entities or anything else I don't need, I can immediately hit enter to confirm. Makes things a breeze.
-
I'm also using a G502 and I love it. I have my shift and alt keys, as well as my delete and enter keys mapped to my buttons. This allows me to use the "shift + " and "alt +" custom keyboard shortcuts I created for my x-form functions, trim, change levels, clear colors, and stuff like that. I've also started using Mastercam's default keyboard shortcuts for creating geometry and such. I'm also using a mechanical keyboard (Vortex Race3 with Cherry MX Blues), which has been soooo nice compared to the basic membrane keyboards. I had even thought of building a custom mechanical pad and programming macros for my most used Mastercam functions.
-
I probably would have spec'd it the same way if money was no option.