


TOM S
-
Posts
46 -
Joined
-
Last visited
Content Type
Profiles
Forums
Downloads
Store
eMastercam Wiki
Blogs
Gallery
Events
Everything posted by TOM S
-
When opening a Solidworks model in Mastercam 2023 my setup does not add my machine default automatically. When I open a CAD file it does load the machine default automatically. What setting am I missing? I have looked into config file but can't see anything but witchcraft. I did not have this issue with 2022. Any ideas from the hive mind?
-
Thank you Ron! For whatever reason this worked!
-
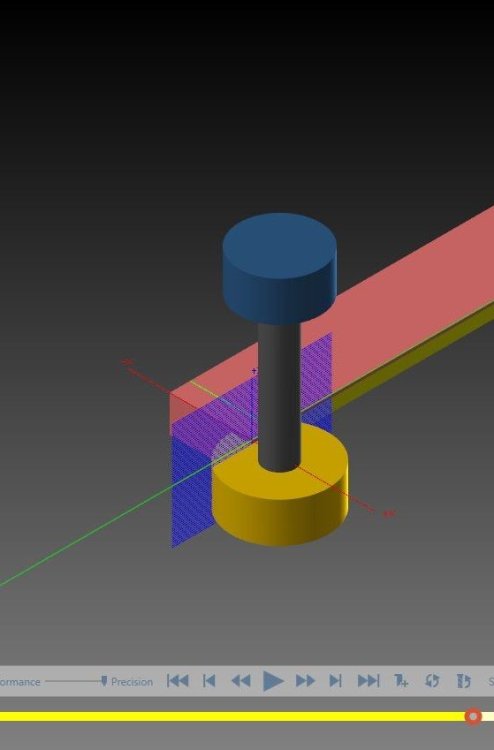
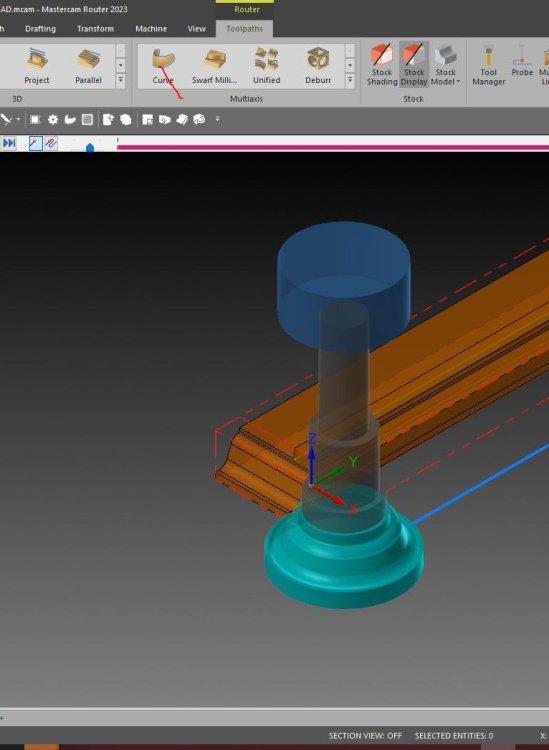
We recently updated to 2023. Now when using tools with custom geometry imported from another file, Verify and Simulation show them only as straight mill tools or slot mill tools. When using backplot, the custom geometry shows up. Is there a setting somewhere that I have missed? I've tried updating the geometry file and resaving as 2023 but to no avail. I have poured over the configuration file, and simulator options but can not find the issue.
-
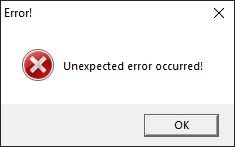
Has anybody else had trouble viewing verification presentations in Mastercam 2023? It extracts the presentation and processes to 100%. Then gives the error: Unexpected error occured! It's happened on Windows 7 and Windows 10 machines. Even our Mastercam PC's won't play them... Mastercam 2022 and 2021 worked fine. Ideas?
-
Wow! I just switched to 2023. Why is this so complicated now? Before you could create a solid and click it and MC would use its dimensions to define the stock for posting. I can figure out how make an awkward shaped stock model and use it to verify, but it won't post the overall dimensions. Only if I use a bounding box, which is an inaccurate representation of my actual stock. So now I have to verify with a stock model then change to a bounding box before I post? Am I missing something???
-
The SW parts and assemblies are all in the same folder. The design team was using SolidWorks 2013 and this process worked, recently they upgraded to 2022 service pack 2 or 3. Now it seems it's not as simple.
-
But will this approach not make the entire assembly a single part? I need all the parts separate (or occasionally a collection of the parts). When doing this in the past the design team was using SolidWorks 2013, and I could open their assemblies and erase the parts I did not need. They recently upgraded to SolidWorks 2022 service pack 2 or 3 and now it seems Mastercam 2022 is behind. Thanks for this. This is what we are doing for now. I assume this issue may disappear when Mastercam 2023 comes out. But if not this is a handy work around.
-
Looking for some help or insight into a new problem. Our Design team creates assemblies (.sldasm) in SolidWorks 2022. When I try to open these assemblies in Mastercam 2022 only one of the parts shows up. The other parts seem to be completely ignored by Mastercam. I am not sure which end the problem is on. Assemblies that were created by the older SolidWorks (2013) program open all parts. I have a feeling it is an issue on the solidworks end as nothing has on my Mastercam. Does anybody have some insight?
-
We bought ours here: https://www.ricocnc.com/products/217-HSK63F-Spindle-Runout-Test-Bars-Calibration-Arbors-Tools.html Actually the most inexpensive we could find, and it is accurate.
-
Is there a way (or format) in which I can save a model with multiple parts (an assembly) so that it is readable by Solidworks as an assembly. When I save as a .step file or .iges file SW treats it as a part, not an assembly. I am trying to bridge a gap for operators on the floor to be able to look at assemblies I have created in Mastercam. But also to dimension and take apart the assembly to see how it fits together. The operators currently use eDrawings to view assemblies and parts created in SW. Any ideas would be helpful...
-
We run the same on our SCM. But pay for a tech to do it. Had just seen videos about it being automated and simplified in the metal industry and wondered why I haven't seen it in Woodworking
-
I have seen millions of videos and ads for Renishaw (et al.) that use software, and probes for calibrating 5 axis machines. I have only seen this exclusively in the metal working industry. I have been in the woodworking industry for 20+ years and have never encountered it being used. Has anyone else seen / used this tech on a CNC router?
-
I know this 3 years too late. In my experience with SCM machines (15+ years) you need to put the tool back in the carousel/magazine. You cannot put the tool back in the spindle manually (you can physically do this obviously) because the machine will not recognize what tool it has. There is no way that I am aware of to tell the machine which tool it has. The machine needs to pick the tool up itself to recognize the parameters.
-

Mirroring toolpaths without mirroring direction of cut
TOM S replied to TOM S's topic in Industrial Forum
I am running Mastercam Router 2021 with Curve 5 axis I don't know much about chooks or nethooks, but will start looking into them. The Toolpath Transform the pullo (Gracjan) suggested worked perfectly. It seems to me though that perhaps Mastercam should automatically do this, or prompt you when mirroring geometry associated to an existing toolpath. But perhaps I am a rare exception... -
1-3/4 HP seems a little under powered. 10" Cabinet saws more often start around 3HP. Have you looked at King, or Grizzly? https://www.kingcanada.com/en/products/woodworking/table-saws/?per_page=20&sort_by=1&displayMode=grid https://www.grizzly.com/table-saws I think you'll get more bang for the buck with these.
-
I need to machine 2 parts which are mirror images of each other. I have programmed the first one. I will mirror the geometry to create the second one. Is there a faster / easier way of changing the toolpath? I usually "reverse" and "change side" each operation individually, alternatively I have exported and imported the toolpath group and rechained the geometry. Both methods can be time consuming. It seems to me there must be a better way when a complete part is mirrored to automatically reverse the chaining. Am I missing something?
-
D'Oh! That was it. Thank you!! That's what I both love and hate about this program. It's so plastic and versatile and customizable. But that means there is so much to overlook! Thanks again!!
-
So I followed that and discovered the version is Open CL 1.1 CUDA. So there is my problem. I will refer this back to our I.T. guy and see about getting a new graphics card. Thanks for the help!
-
No, It's a desktop. No onboard graphics. Actually running dual Quadro 2000D's to run 3 monitors. Worked fine with 2020.
-
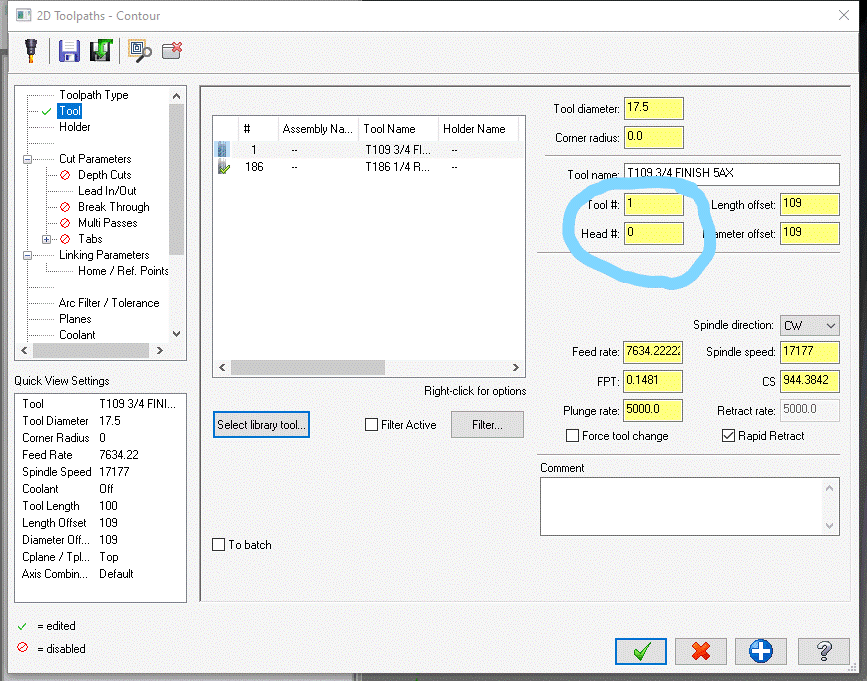
I just installed 2021. The information doesn't seem to carry over from the tooling file like it did in 2020. When picking a tool from the tool library the Tool# doesn't carry over. I have to input it, and if i don't it overwrites the library and changes the tool number in the library. In the picture that tool number should be 109 and the head number should be 1. This is a change since 2020, so I don't if I am missing a setting somewhere?
-
I just installed 2021, and everything went as smoothly as in previous versions. When I start Mastercam it gives me this warning: I am running NVIDIA Quadro 2000D 1.0 GB dedicated memory. The driver is up to date, and my research tells me this graphics card supports Open CL 1.2. Our I.T. guy is looking into upgrading the graphics card. But I don't see what the problem is.

-
I have a newbie question... In Mcam 2019 in Stock setup I could set the stock values by clicking rectangular in the shape box, then All Entities and the numbers would propagate. Then often I would go back and choose an STL File, so that it would simulate my actual part when verifying. But the overall part size would remain (the numbers that propagated from the rectangular stock). These numbers carry over into my post so I never had to enter of change them. Now, with Mcam 2020 this doesn't happen. I can set the stock value the same way, but when I click to use a File instead of Rectangle the values change back to zero. Am I missing something? A setting somewhere that didn't carry over when I upgraded to 2020? Or is this just how it is now, and I need only readjust how I do things? Any help is greatly appreciated.

-
Yes! I did get this figured out. Thanks everyone for the help!
-
Where did the Multi Axis Drill toolpath go? It was there in 2019. And seems to be missing now. It never worked for me, the post kept spitting out way wrong numbers. So just used the curve toolpath to achieve same result, or a quick few lines by hand. Just curious if it's actually gone, or has been moved somewhere I haven't noticed yet.


