dmaier
-
Posts
71 -
Joined
-
Last visited
Content Type
Profiles
Forums
Downloads
Store
eMastercam Wiki
Blogs
Gallery
Events
Everything posted by dmaier
-
Is there an existing chook that will accomplish what I am looking for? Your comment didn't really leave me anything to work with. I did find a another thread that gave me a solution to what I am looking for. Instead of linking to the thread (which all seem to be dead when I click on them) I will recomment. Mill.set post has working buffer code to add z min and z max to the tool table.
-
I would like to add the z min value that outputs in my tool comments section to post in the tool table. I have done a few searches and have not found a solution. I have found a couple posts refer to other threads but the links are dead when I click on them. Can somebody point me to a thread with the solution that does not have a dead link. Thanks
-
I have a misc integer that is only used when there is a forced tool change but not on all forced tool changes. I would like to be able to use the mi without having to check the force tool change box but still be able to check the force tool change box when the mi is not being used. Is it possible to trigger the forced tool change code using misc intergers?
-
The engraving tool path did exactly what I was looking for. I had tried the engraving tool path before creating this thread but was using a chamfer mill. I was unable to generate a tool path. I took the geometry from the chamfer mill and created a new engraving tool with the same tool geometry and it worked. Thanks for all the suggestions. It helped bring me back to try different parameters on a tool path type I had given up on. I never engraved anything before with different depths so I have stuck with the 2D contour paths for engraving. I will definitely be using the engraving tool path more often now that I am familiar with how to make it work. Once again thanks for all the suggestions.
-
I am aware that there will be a radius. I do not have a tolerance to hold for this project. It is purely aesthetic I am hoping the radii will leave a nice blend.
-
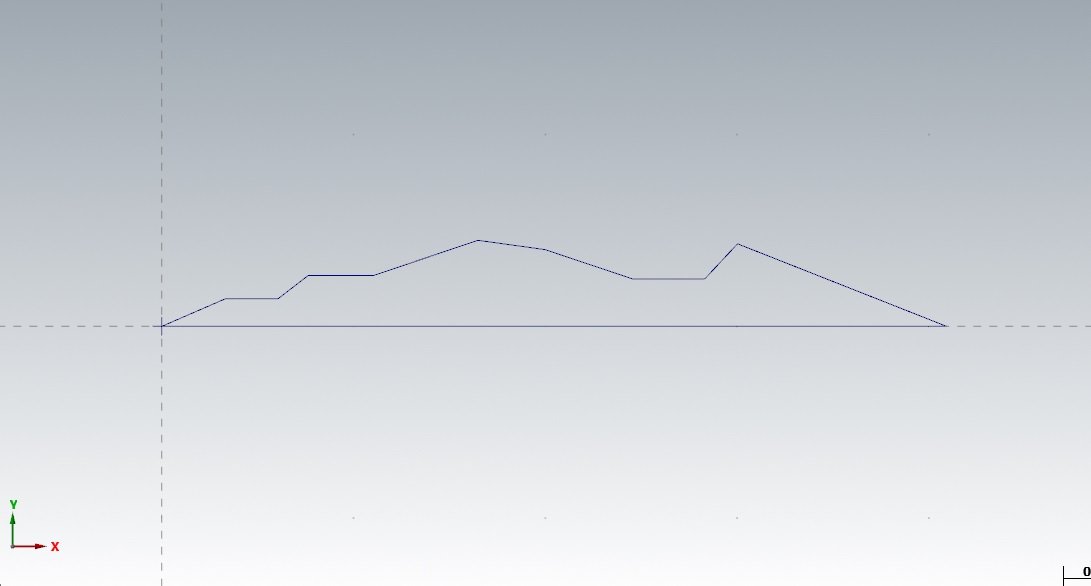
I am looking to engrave a pocket with a 1/2 45 deg chamfer mill. This pocket is about an inch long and roughly 1/8 at the widest point. Is there a way to make a one pass cut where the z depth will change to accommodate the profile width of the pocket? I am attempting to engrave a logo with lots of these pockets.

-
By adding a second machine definition to the operations, all my toolpaths were able to regenerate and I am now able to export them out to another file now.
-
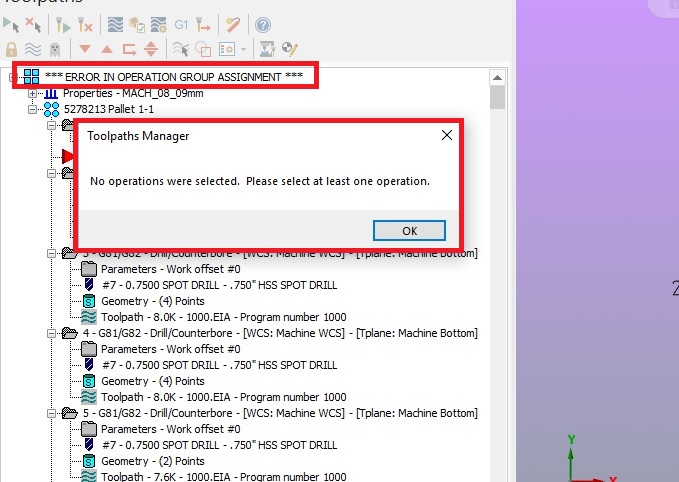
I received the error "ERROR IN OPERATION GROUP ASSIGNMENT" while opening a file that has toolpaths that I would like to export out. The file was originally created with 2018 and was accidently saved in 2019. The 2019 save is what created the group assignment error I am guessing. If I try to click on an operation I receive the message, "No operations were selected. Please select at least one operation." The screenshot does not show it, but I did have the green arrow selecting the folder icon next to the operation when trying to open an operation. Is it possible to assign a group back to an operation or do I need to recreate my toolpaths?
-
Bummer, thanks for the info. I guess I can stop looking at how to remove it now.
-
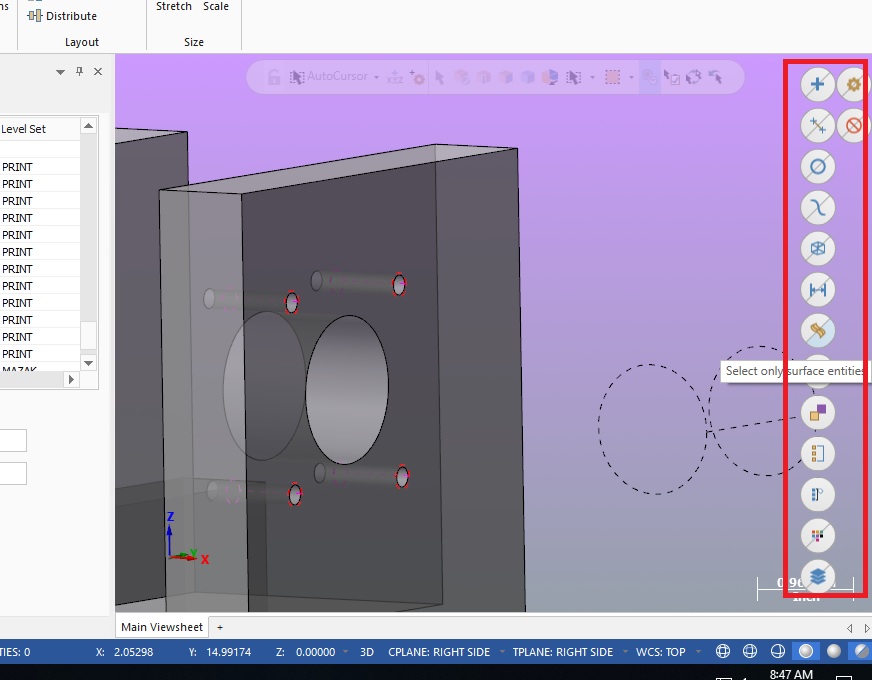
Is it possible to remove the side bar? I do not use the side bar so it is just wasted screen space for how I navigate around Mastercam.
-
Lots of valuable info crammed into two pages. I am going to print this one out for quick referencing. Thanks for sharing.
-
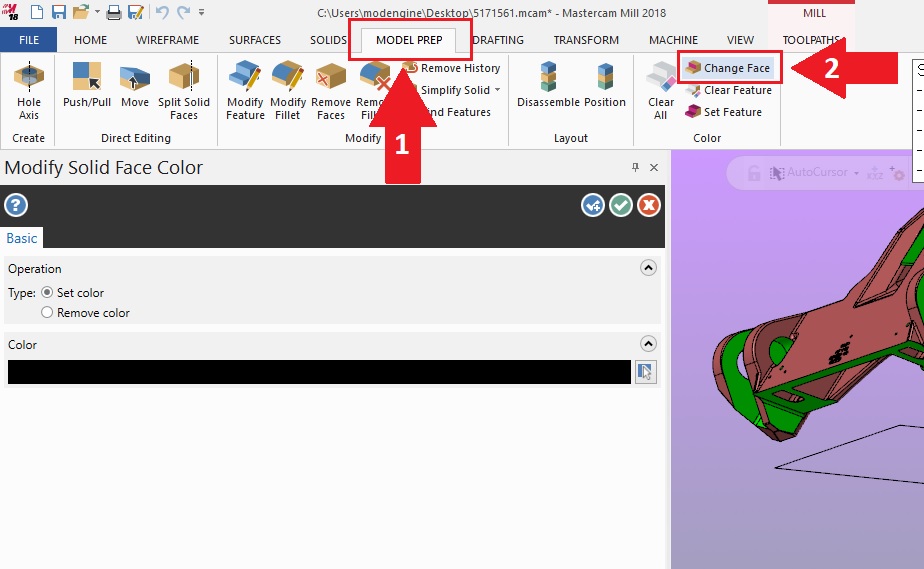
Goto the Model Prep Tab and choose "Change Face". This will allow you to change solid surface colors. If that does not work you may have to click on "Clear All" next to the "Change Face" button and then it should work for sure.
-
Is making the alteration in a mastercam post, posting out to .nc and reverse posting it back into .nci format an option? I have never tried it but if you have the correct g-code format it should generate back into the desired nci format from my understanding.
-
I did this with my MPMASTER post. Go into post block "ptlchg_com". Move "ptoolcomm" from its existing line to the line after containing "t$"
-
Changing the op default page did the trick. I was not aware of this page. I still have lots to learn I guess. Thank you very much.
-
When selecting a coolant code when creating a toolpath is it possible to default the drop down menu with options "Before", "With" or "After". I never use the "Before" selection so every tool path requires me to make a change. I would like to default to "With" because that is what I choose 90% of the time if this is possible.
-
make mastercam insert same lines before g code lines
dmaier replied to kognos's topic in Post Processor Development Forum
I am still pretty green at this but I had to do something very similar within the last week on a 840C Siemens controller post I have been working on. I had R2 = value prefixes vs. your P2 = value. I went into the drill cycles of the post and rearranged the output of the drill cycles to the order I was looking for and formatted the variables prefix to use the R#= before the value. Using debugger really helped me out with this. For a couple variables I had to transfer the value to another variable with the R# prefixes because the format was use elsewhere in areas where the R#= prefix wasn't used. My R3= (final depth) was and example of having to transfer the value to a different variable because the variable zabs is used elsewhere in my post without the R3= prefix. Maybe there is a better way of doing this but the approach I used worked for me. -
Linking sgfeed to feed rate output
dmaier replied to dmaier's topic in Post Processor Development Forum
Agreed. I have customized a few of the post at my work place now (with help from you and others on this forum). It is nice being able to have custom M codes inserted where you want or address the proper code formats to a specific machine and have it automatically generated an edit free program. -
Linking sgfeed to feed rate output
dmaier replied to dmaier's topic in Post Processor Development Forum
if fr_pos$ <> prv_fr_pos$, result = force(ipr_type, ipr_type) The line above was spitting out a G94 at the beginning of every motion line. I changed fr_pos$ to feed and got exactly what I was looking for. if feed <> feed, result = force(ipr_type, ipr_type) Thank you Colin. I always learn a lot from the knowledge and advice you give on this forum. -
Linking sgfeed to feed rate output
dmaier replied to dmaier's topic in Post Processor Development Forum
28 Feb 2018 12:30:51 PM - PST LINE (2977) - The arguments for this operator/function are not the same type (var/string)[43] I am getting an error from the pncoutput block. If I am understanding the error correctly the force command does not work on a string? If this is the correct, should I capture the string value (in this case 0 or 1 based on mi6$) and convert it into variable that would work with the force command and add this newly created variable to my motion post blocks. Or is there something more simplistic to this problem? -
Linking sgfeed to feed rate output
dmaier replied to dmaier's topic in Post Processor Development Forum
I had thought about doing it that way but I need to be able to use G95 as well for boring and tapping cycles. I have sgfeed working awesome with the feed rate with my canned cycles. It is just my linear and circular moves that are not posting G94 before the feed rate change. Right now I am using single quotations to force a G94 only before a feed rate post on linear and circular moves but that limits me to G94 only. We are currently not using G95 for these type of moves so I guess this will work for now. I am still getting the hang all the functions within Mastercam and was curious if there was a better way of doing this without using a dependent string literal. -
I am trying to create a post for a machine that requires a G94 or G95 before every feed rate change. I am a little stuck on how to go about this. Currently if I have a feed rate change and G94 or G95 is still active it will only post the feed rate change without posting the sgfeed string. I can force the string sgfeed to post with the feed but if there is no feed rate change the sgfeed string will still post. Is there away to link the two together so that if a feed rate is posted the sgfeed is force out only with the feed rate change?
-
Thank you. This will definitely help me out. I did not want to start randomly changing color settings to find this setting and end up changing something undesired.
-
Inch to MM conversion within post
dmaier replied to PPRINT's topic in Post Processor Development Forum
I came across this unresolved thread a few days ago and it helped get me going in the right direction. I was able to eliminate the multiplication from stacking upon itself by transferring the formula statements to a new variable and having the new variable post out in the motion post blocks. I inserted the code below in the 2018 MPMaster post and did not have any issues with the multiplication stacking upon itself. I hope this helps somebody in the future save some time trying to figure this out. # -------------------------------------------------------------------------- # FORMULAS - global formulas # -------------------------------------------------------------------------- met_conv : 25.4 # Inch to Metric Conversion Amount fmt "" 30 met_conv # Inch to Metric Conversion Output Format arcrad$ = arcrad$ * met_conv #Arc/Radius Metric Conversion iout = iout * met_conv #X Arc Metric Conversion jout = jout * met_conv #Y Arc Metric Conversion kout = kout * met_conv #Z Arch Metric Conversion fr_pos$ = fr_pos$ * met_conv #Feedrate Metric Conversion # -------------------------------------------------------------------------- # Format statements - n=nonmodal, l=leading, t=trailing, i=inc, d=delta # -------------------------------------------------------------------------- fs2 30 0.9 0.9 #Format 9 decimal places for Metric Conversion # -------------------------------------------------------------------------- # Toolchange / NC output Variable Formats # -------------------------------------------------------------------------- fmt "X" 2 xabsmm #X position output fmt "Y" 2 yabsmm #Y position output fmt "Z" 2 zabsmm #Z position output fmt "X" 3 xincmm #X position output fmt "Y" 3 yincmm #Y position output fmt "Z" 3 zincmm #Z position output # -------------------------------------------------------------------------- # Motion output components # -------------------------------------------------------------------------- pfxout #Force X axis output xabsmm = xabs * met_conv xincmm = xinc * met_conv if absinc$ = zero, *xabsmm, !xincmm else, *xincmm, !xabsmm pxout #X output xabsmm = xabs * met_conv xincmm = xinc * met_conv if absinc$ = zero, xabsmm, !xincmm else, xincmm, !xabsmm pfyout #Force Y axis output yabsmm = yabs * met_conv yincmm = yinc * met_conv if absinc$ = zero, *yabsmm, !yincmm else, *yincmm, !yabsmm pyout #Y output yabsmm = yabs * met_conv yincmm = yinc * met_conv if absinc$ = zero, yabsmm, !yincmm else, yincmm, !yabsmm pfzout #Force Z axis output zabsmm = zabs * met_conv zincmm = zinc * met_conv if absinc$ = zero, *zabsmm, !zincmm else, *zincmm, !zabsmm pzout #Z output zabsmm = zabs * met_conv zincmm = zinc * met_conv if absinc$ = zero, zabsmm, !zincmm else, zincmm, !zabsmm -
When using the post debugger when I am highlighting a bracket to find the opposite bracket the highlighted color currently is a light bluish gray. I would like to make the highlighted color stand out more. I went to "Options" under the "MP"/"Fonts and Colors" section to try and change the color. What is the highlighted bracket color labeled as? I am either in the wrong area, using the wrong terminology or this isn't changeable. Can somebody clarify this for me?