Jump to content

Welcome to eMastercam

Register now to participate in the forums, access the download area, buy Mastercam training materials, post processors and more. This message will be removed once you have signed in.

Use your display name or email address to sign in:

Admiral Obvious

Members
  • Posts

    3
  • Joined

  • Last visited

Posts posted by Admiral Obvious

  1. 30 minutes ago, Colin Gilchrist said:

    I think you're looking for an option that unfortunately doesn't exist in the software.

    I also think you are over-thinking your approach. I would burn out the center in 2D, with "no-core", and then create a 4 Axis Wire Path to machine the walls, using a multi-pass approach. You could create, say 6 different 4 Axis paths, each only taking a couple of passes (use Stock to Leave), and that way you could crank up the power and/or feedrates for these passes that aren't removing a whole lot of material. As each "path" gets closer to having the wire "fully tangent" to the walls, you would adjust the power and feed to compensate.

    Sure, it can be a lot of work, but the point is that there are tools you can use to get the job done.

    When you look at what the paths would have to do, to make a 4-Axis No-Core, the use-cases quickly spiral out of control. You are trying to synchronize some type of "pocket" path, on both top and bottom, but each of those profiles could (in theory) be wildly different in overall shape. A mixed "2X to 4X" approach would be the best I think, in order to achieve what you are after in a single toolpath.

    You should ask our member "Del" for his advice, as he has been doing Wire for many years. Most of us are "mill" or "lathe" guys.

    Also, Could you just "4-Axis Wire" half of the profile, and then use Epoxy to hold the slug, and then 4-Axis Wire the other half? You would then remove the slug manually, and then use 4-Axis Wire to do your finish and skim passes.


    Thank you! This is some awesome advice! 


    Its sad this feature doesn't exist. Honestly would be awesome to be able to make the 4 axis no core setting. I have made a few attempts now doing the no-core setting, but whats unfortunate is that, because of the geometry I am trying to cut, there is such minimal overlap of the two profiles almost every position is tappered cut. Most of the material is removed from the threaded hole drill. 

    image.thumb.png.46908556d751c812f3c68e4c5d38f6a7.png

  2. 5 minutes ago, Rocketmachinist said:

    Use No-core toolpath.


    Yea I started with this one, but sadly there seems to be no way to make it return as 4-axis, just 2D. Ah, well i can at least maybe start with this then go to 4-axis. Not easy, but its a work around

  3. I have a tiny little conundrum that I am very certain can be solved by checking just 1 option, and I am an idiot for not finding it. I am programming a 4-axis wire profile but in our application, the resulting slug would be VERY large (piece is 7.48 inches in length) and our idea is to program the profile as a pocket and burn all the material out. Trouble is, I can't figure out how to have the toolpath setup to burn up the drop out slug.

    image.thumb.png.d682aa1f0050e04c99e580e1e11f116b.png

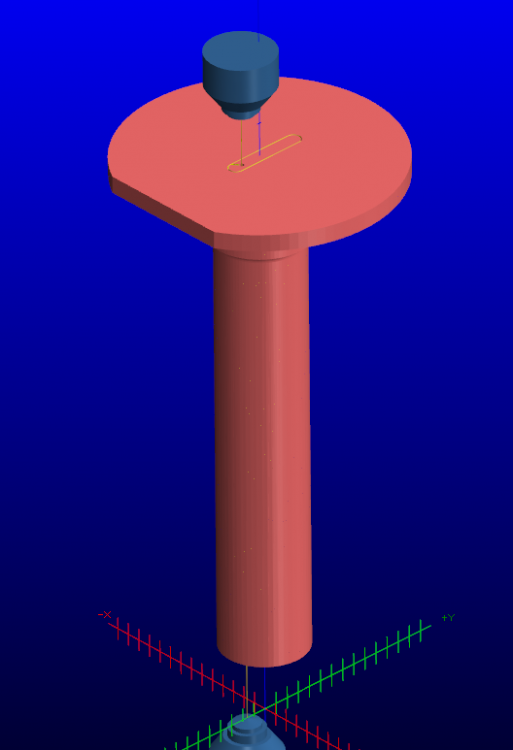
    Pictured is my current simulator view from the top. The bottom profile is smaller than the slot above so this does require 4 axis. The slot width is .100" so my thought is to manually draw out the tool paths and do separate 4-axis settings, then use the final rought and 2x skim passes to clean it up. Any ideas though? I feel like there is 1 setting I am missing that would just do this automatically. 

Join us!

eMastercam - your online source for all things Mastercam.

Together, we are the strongest Mastercam community on the web with over 56,000 members, and our online store offers a wide selection of training materials for all applications and skill levels.

Follow us

×
×
  • Create New...