


Myth Project
-
Posts
83 -
Joined
-
Last visited
Content Type
Profiles
Forums
Downloads
Store
eMastercam Wiki
Blogs
Gallery
Events
Posts posted by Myth Project
-
-
Odd, when I post only the center drill, (operation 18), this is what I get...
%
O0000(MC2022)
( T4 | 1/8 C'DRILL | H4 )
G20
G0 G17 G40 G49 G80 G90
( SPOT DRILL HOLES )
T4 M6
G0 G90 G59 X-.975 Y-.5 A90. S2100 M3
G43 H4 Z1.81 M8
G98 G82 Z.93 R1.1 P.05 F2.
X-1.25 Y.185 Z.9456 A150. R1.1156
Y0. Z1.2028 A225. R1.3728
X-.975 Y-.5 Z.93 A270. R1.1
X-1.25 Y.3536 Z.9586 A315. R1.1286
G80
M5
G91 G28 Z0. M9
G28 X0. Y0. A0.
M30
%
So, I'm not sure what's different in what we are looking at.
-
Alright, I'm trying to program a part and I'm having issues while using the techniques I've used for years. I'm attaching the file for reference. I generally program my 4th axis through Transform Rotating Toolpaths and through creating different planes at the different angles. I also will select drill toolpaths and enable Rotary Axis Control so that I can get all the holes around a part. Sometimes I'll use the other, less practical methods, but not often. In MCAM2022 I'm having issues running my verify. It will verify all operations where the Rotary Axis Control is off (1-17), or the ones where it's on (18-20), but will error out when I try to verify all at once (1-20). Any advice?
-
3 minutes ago, C^Millman said:
James do you mind if I put some Stock Model and Opti-Rough toolpaths to some of the areas of that part? I will post it back up to teach maybe you and others where and how even on something like this stock models and Opti-Rough toolpaths will allows this to run faster? I am thinking it will save some work by integrating them into your programming process that maybe you or others may not be aware of.
It will take me probably a week as I can slammed with work, but wanted to use the for an example if you don't mind.
Doesn't bother me any, I'm always on board to learn more.
.gif ":)") Did you mess with tightening the tolerances?
Did you mess with tightening the tolerances?
-
Alright, here's what I've discovered.
QC tried using my MX9 file and had the same issue and asked me to try regenerating the toolpath, expecting it would fail. They weren't sure how I managed to get a clean toolpath on that folder. They also told me that loosening my Total Tolerances in my flowline toolpath would allow the path to work. I tried, but it added way more air time to the path than I previously had. So after talking with them, I began to wonder why my MX9 would work where theirs would not... The answer, I tightened my tolerances in my MX9 configuration. After carrying over my modifications to MC-2017, it will now regenerate the toolpaths exactly like it had in MX9.
For those who would like to know, the settings I changed are as follows:
Chaining Tolerance: .0001
Planar Tolerance: .0002
Minimum Arc Tolerance: .0002
Curve Minimum Step Size: .0001
Curve Maximum Step Size: 100.0
Curve Chordal Deviation: .0002
Maximum Surface Deviation: .00005
Toolpath Tolerance: .0001
Give this a shot and see what it does for y'all! Thanks everyone!
James
-
 1
1
-
-
Thanks Millman, I've emailed QC, I'll update one I get a response from them. That is an interesting support for your 4th axis, looks nice.
-
I'll try using 50/50 and turning off the smooth setting in the future, see if that improves my results. I have started increasing the gap size for keeping the tool down, but your suggestion may work better. I'm not offended Millman, I honestly appreciate any and all input, thank you. It is near impossible to learn without taking suggestions and information from different perspectives.
The reason I'm working the surfaces from the 0 deg rotation is because of the length of the part, along with the amount of material being removed, the part will bow under the pressure of the live center. We've discovered it works better to lock the part in a vise for stability once we hit the 0 deg rotation. I agree though, it would be nice to use a shorter tool... Had some issues with the .0625 breaking...
Also, I was using 2017 to show the toolpath, I just didn't use the flowline under the geom tab. 2017 makes it look all crazy, and that's why it won't regen. It doesn't see it the same way it was seen before, which is what I'm finding odd. Why is it now incapable of creating a smooth toolpath on geometry that it has pathed previously?
1 hour ago, C^Millman said:You are having issue bringing a working file in a previous version into a newer version. I would send the file to QC and let them answer you why you are seeing the issue you are seeing.
Send the file to QC? I'm not sure who you mean, please elaborate.
1 hour ago, Colin Gilchrist said:Many people use Flowline Operations, because they don't know any other way to do it.
For these situations, my "go to" toolpath is "Surface Finish Blend".
This requires you to create 2 chains of geometry, that the tool will "blend" between. (Chains are "centerline" of the tool, so you often have to offset by at least the tool radius.)
I've never used Surface Finish Blend, but I will look into how to use it in the future to see if it improves my processes. Thanks for the tip.
-
2
-
-
I also realize the tool will not fit all the way into the tightest corners, it's a surface deburr.
-
The path wasn't that ugly, it gets wonky once you try viewing them in MC-2017...
-
I'm modifying a program written in MX9. I have a working flowline surface, but if I try to regenerate it in 2017 it says there is now a "Flowline surface conflict found, toolpath not possible"...
The only work around I've found for this is making multiple flowline surface folders and selecting only a few surfaces at a time. Turning what was once one folder into 15 folders... Help or advice?
I'll attach the file for clarity, the folder in question is folder #79.
Thanks!
James
-
Thank you so much! Sorry I hadn't responded sooner, out of town in training this week. I'll try the modification when I get back to the shop.
-
I'll upload the MX9 file, PST and the NC file. I haven't tried contacting MLC CAD, but will give them a shout if you think it'll help.
-
1
-
-
I've noticed issues when I transform toolpaths and use incremental... I think it's a post issue, which is why I am seeking help here. The issue is, when I transform translate a toolpath and use incremental to reduce program size, if I have a rotation, it will still be in incremental during the rotation and won't go back to absolute until the next X axis or Y axis motion. I've had this bite me several times and was wondering if there's a way to make it go back to absolute on the A axis motion as well? Maybe have it end subroutines with a G90 or something. Any ideas??? Thanks!
-
I apologize if I hurt your feelings... I'm used to a ball busting machine shop, and sarcasm does run rampid... There were a lot of variables, so people were having some fun while they were waiting on a response. I'm sure no one meant harm, but if ya can't take a joke.........
Good luck on finding the help ya need!
-
1
-
-
Blowtorch.
Nah, EDM...
-
I looked at the sort option, it has an unsort option as well. I didn't attempt it as I was worried it would F.U.B.A.R. my program...
-
Now the real question is... Has anyone sent any examples of this to Pete? Lol
-
Thad beat me to it lol
-
Possibly use the select option... You can put in a select only certain tool in that. It will just check all the ones with that tool number in it though, if that helps any.
-
1
-
-
As a semi-workaround to the problem... You could import whatever geometry you're wanting into a new file first, change the layer names to what you want them to be and then import them into the existing file... Or start programming on much higher levels as most people tend to work on the lower levels and that way imported geom won't be brought to the layers you're using, giving you the chance to rename and move the geom where you want.
-
I use transform toolpath (rotate) all the time on our 4th axis. Often using ghost original and sub program so that it just gives the rotations in the main code and all the other work is in my sub codes.
-
jlw, no never heard back. Also emailed Scientific Cutting Tools for a list of their threadmills, but went ahead and drafted several of them while I was waiting to hear back. SCT did respond, asking what tools I would like, I sent back a list, haven't heard back about those yet either... Lol
-
Can'r reach with Lolli, the exit width would be just over 3/8" and the reach would need to be around 8" from that side... I'm going to do a helix bore for and .825" dia through the part at 0° and 260°, (the sweep of the cone), and the just hand code the rough to plunge in at the 0° and the rotate 260° the plunge rotate back. That'll get me roughed in... My thoughts for finishing are program a contour arc (simulating a lead in and lead out, nothing between the two) and then add the rotation by hand. I think that'll get me close. (hopefully)
-
I'm currently in the route of hand coding... Decided it would be easier and faster than trying to figure out how to make MX9 do what I wanted. Though I really wish I knew how to make it do what I wanted lol.
Gunna plunge, rotate, plunge, rotate, and rinse and repeate til I have the desired part lol.
-
It rotates while cutting. I'm basically making a 5° cone shaped trough in a part...
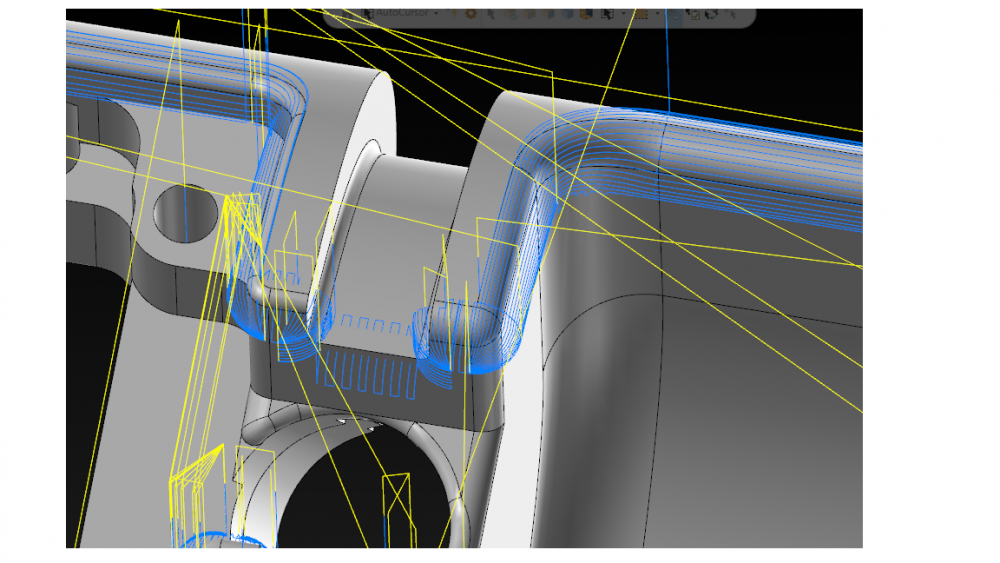
I attached a screen shot.
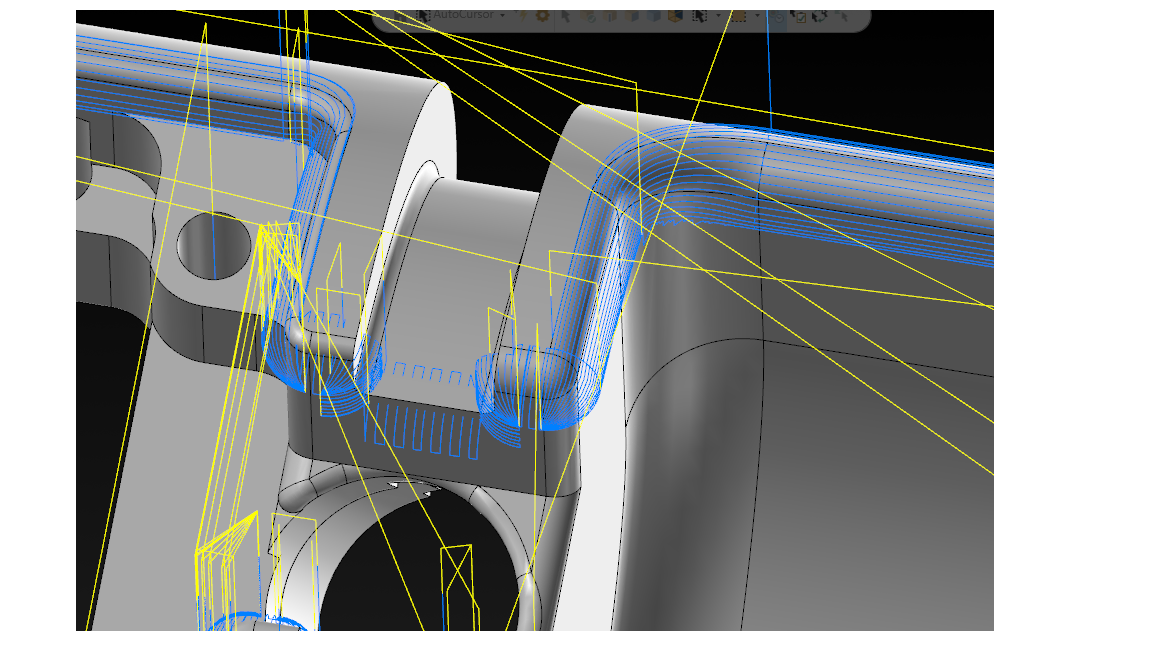
MasterCAM 2022 Verification Unknown Error
in Industrial Forum
Posted
Yeah, contouring the chamfers may be a better, just need to make sure there is enough clearance with my 4th axis and fixturing to achieve it without issue. The material is 45HRC 13-8, work holding rigidity is he issue with pushing hard. Can it be pushed harder? Yes. I need one good part for the order. If I push it and it fails, I saved no time. I do understand what you are saying, but I do not work for a production shop, we are prototype with crazy materials and tough tolerances. I truly believe most shops no quote the jobs we get...
All that said, I do very much appreciate any and all advice about machining practices, so you haven't offended me at all. I'm not the sensitive type of machinist. I will also look at Dynamic milling the faces, see what it'll look like. Thanks for the insight!