


SSS824
-
Posts
40 -
Joined
-
Last visited
Content Type
Profiles
Forums
Downloads
Store
eMastercam Wiki
Blogs
Gallery
Events
Posts posted by SSS824
-
-
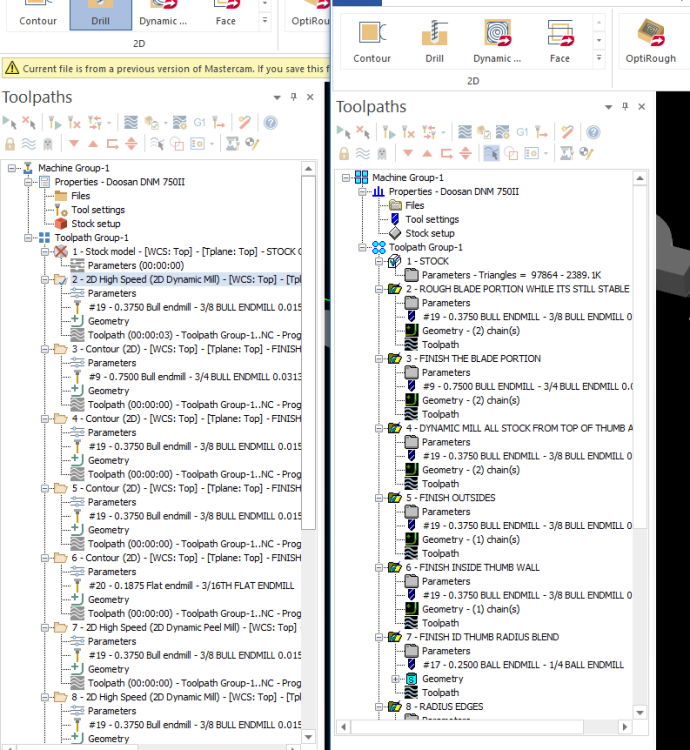
After watching 2024 tutorials on YouTube it appears everyone's toolpath manager looks semi translucent and hard to read.
2024 is on the left in this screenshot, 2020 is on the right. 2020 is much easier to focus on.
Hopefully there is a fix.
-
That's a step in the right direction, but it still looks like there is a translucency setting that needs adjusted.
Thanks for your reply though!
-
The 2024 toolpath manager looks very dim, is there a setting to make it bolder/brighter?
Thank you in advance.
-
I would like to see one of the gurus on here do a screen cap video, talking their way through programming a part from start to finish.
I think this would be very beneficial and is hard to come across, we have a million videos about a single thing, can someone show it all?
Everything from selecting the machine to the point where it is time to go to OP 20 OP 30 OP 40 etc..and how you transition between planes etc.
There are people who program hundreds of toolpaths on a single part, it would be great to see their workflow.
A youtube video showcasing this by an expert would be great! I am definitely not a Mastercam expert or I would do it myself.
Cheers -
On 3/19/2020 at 4:34 PM, Colin Gilchrist said:
It might be possible to have a Post Edit do this for you. What does the NCI output look like?
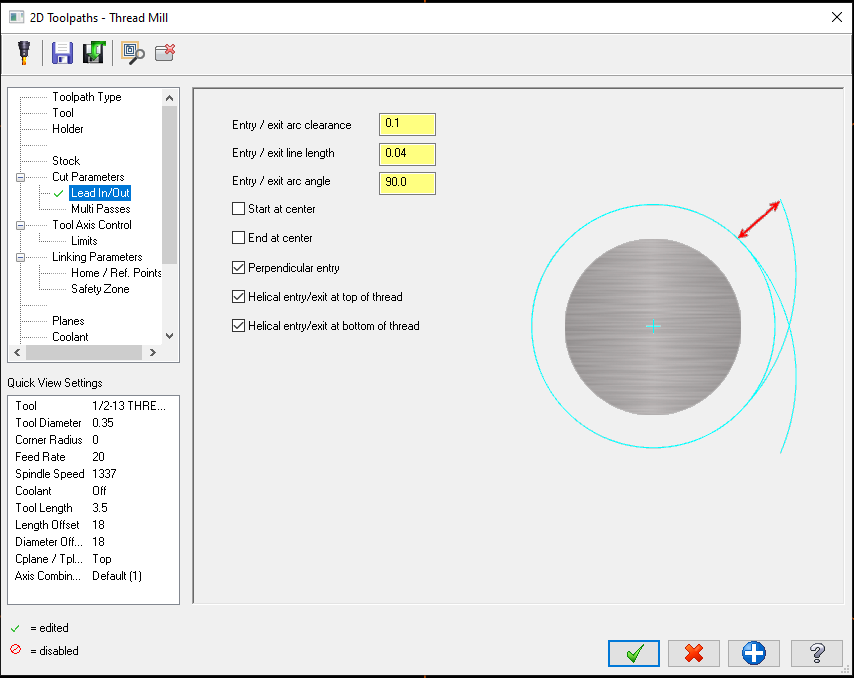
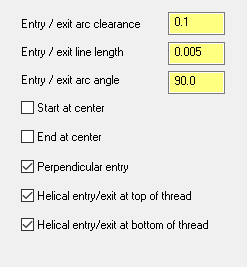
These settings make the path move left on the red line,then back to center, then arc smoothly into the cut.
I'm not sure if this is sufficient to satisfy wear comp on this control I haven't tested it.
G20
G0 G17 G40 G49 G80 G90
N1
M24
( 1/2-13 THREADMILL LAKESHORE # L1/2-13THRDZ )
T18 M6
G0 G90 G54 X.0103 Y0. S1337 M3
G43 H18 Z.1
G1 Z-.75 F15.
G41 D18 X0. F20.
G3 X.0103 Y-.0103 Z-.7404 I.0103 J0.
X.0205 Y0. Z-.7308 I0. J.0103
X0. Y.0205 Z-.7116 I-.0205 J0.
X-.0205 Y0. Z-.6923 I0. J-.0205
X0. Y-.0205 Z-.6731 I.0205 J0.
X.0205 Y0. Z-.6538 I0. J.0205
X.0103 Y.0102 Z-.6442 I-.0102 J0.
X0. Y0. Z-.6346 I0. J-.0102
G1 G40 X.0103
G0 Z.1
X.014
G1 Z-.75 F15.
G41 D18 X0. F20.
G3 X.014 Y-.014 Z-.7404 I.014 J0.
X.028 Y0. Z-.7308 I0. J.014
X0. Y.028 Z-.7116 I-.028 J0.
X-.028 Y0. Z-.6923 I0. J-.028
X0. Y-.028 Z-.6731 I.028 J0.
X.028 Y0. Z-.6538 I0. J.028
X.014 Y.014 Z-.6442 I-.014 J0.
X0. Y0. Z-.6346 I0. J-.014
G1 G40 X.014
G0 Z.1
X.0177
G1 Z-.75 F15.
G41 D18 X0. F20.
G3 X.0177 Y-.0177 Z-.7404 I.0177 J0.
X.0355 Y0. Z-.7308 I0. J.0177
X0. Y.0355 Z-.7116 I-.0355 J0.
X-.0355 Y0. Z-.6923 I0. J-.0355
X0. Y-.0355 Z-.6731 I.0355 J0.
X.0355 Y0. Z-.6538 I0. J.0355
X.0177 Y.0178 Z-.6442 I-.0178 J0.
X0. Y0. Z-.6346 I0. J-.0178
G1 G40 X.0177
G0 Z.1
M5
G91 G28 Z0.
G30 X0. Y0.
M30
%
-
5 minutes ago, JParis said:
No
Not without a hand edit
bring it up to your reseller as for an Enhancement Request
They do listen, some of the suggestions I made in 2014 made it to 2018 for lathes.
-
Just now, JParis said:
No
Not without a hand edit
So the best cycle combination is the most inefficient, Mcam 2021 update? Hope so.....
Just add a checkbox "Chip clearing" Or a field for "radius sweep angle" for gentle entry into the cut.
-
Just now, JParis said:
It clears the hole....multi-passes, it clears out of the hole...
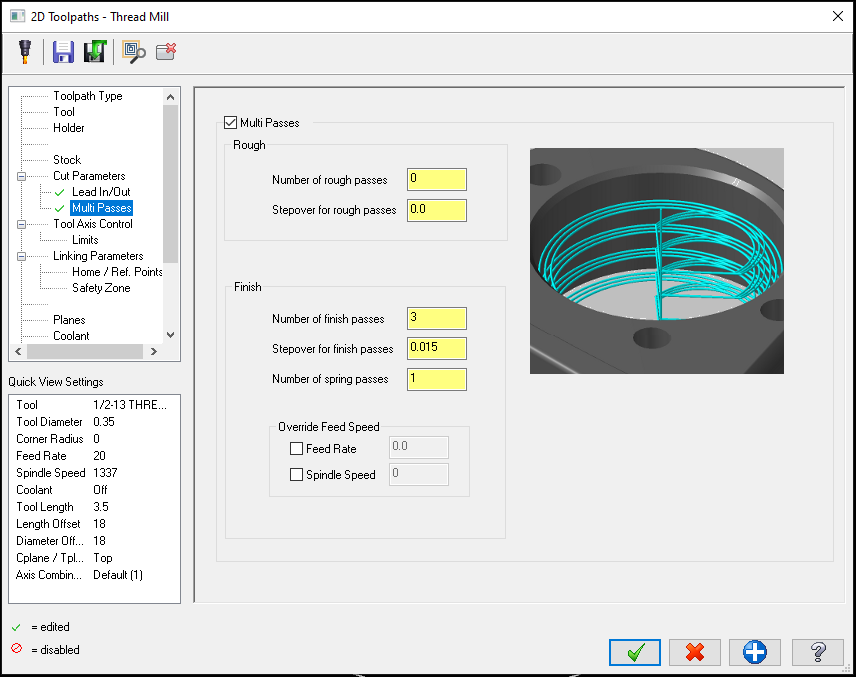
Not 1 pass on that threadmill...only has 3 threads on it, so it's a couple passes
Any way to force it to stay down with multi passes?
-
Just now, JParis said:
Not a glitch, it works as designed...
Been over this with CNC
If you could elaborate we might be on to something.
-
1 minute ago, JParis said:
Heck, I'm threadmilling some 1-72 holes in titanium at the moment...pretty stout tools
In one pass too I bet

-
Just now, gms1 said:
It never snaps. And this is for a 5/8-11 not a 1/4-20 1" deep in stainless.
But I am trying to find the absolute best Mcam setting for difficult holes not easy ones.
Try these parameters and watch it run, it has a very smooth entry, but it retracts out of the hole like a glitch.
-
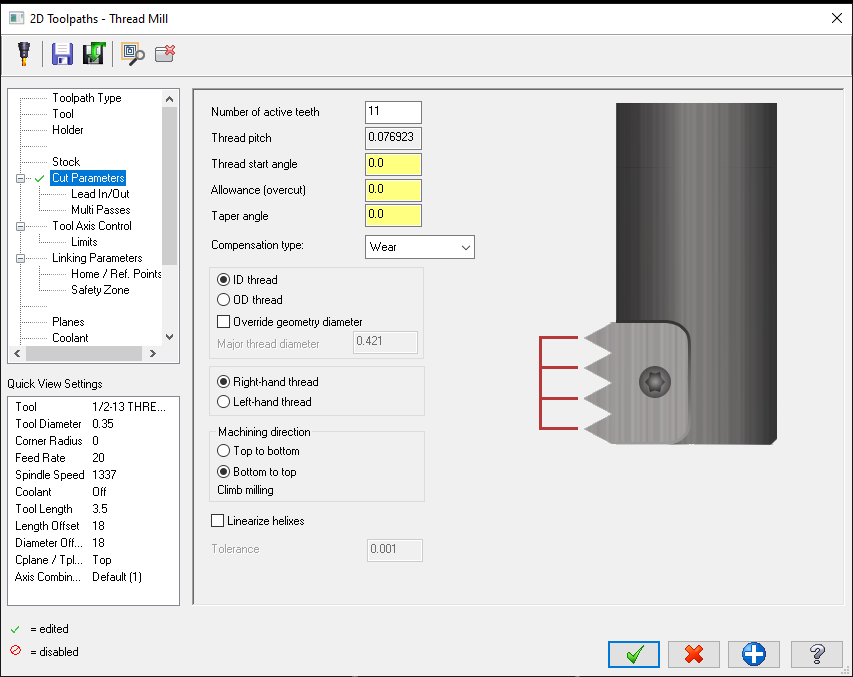
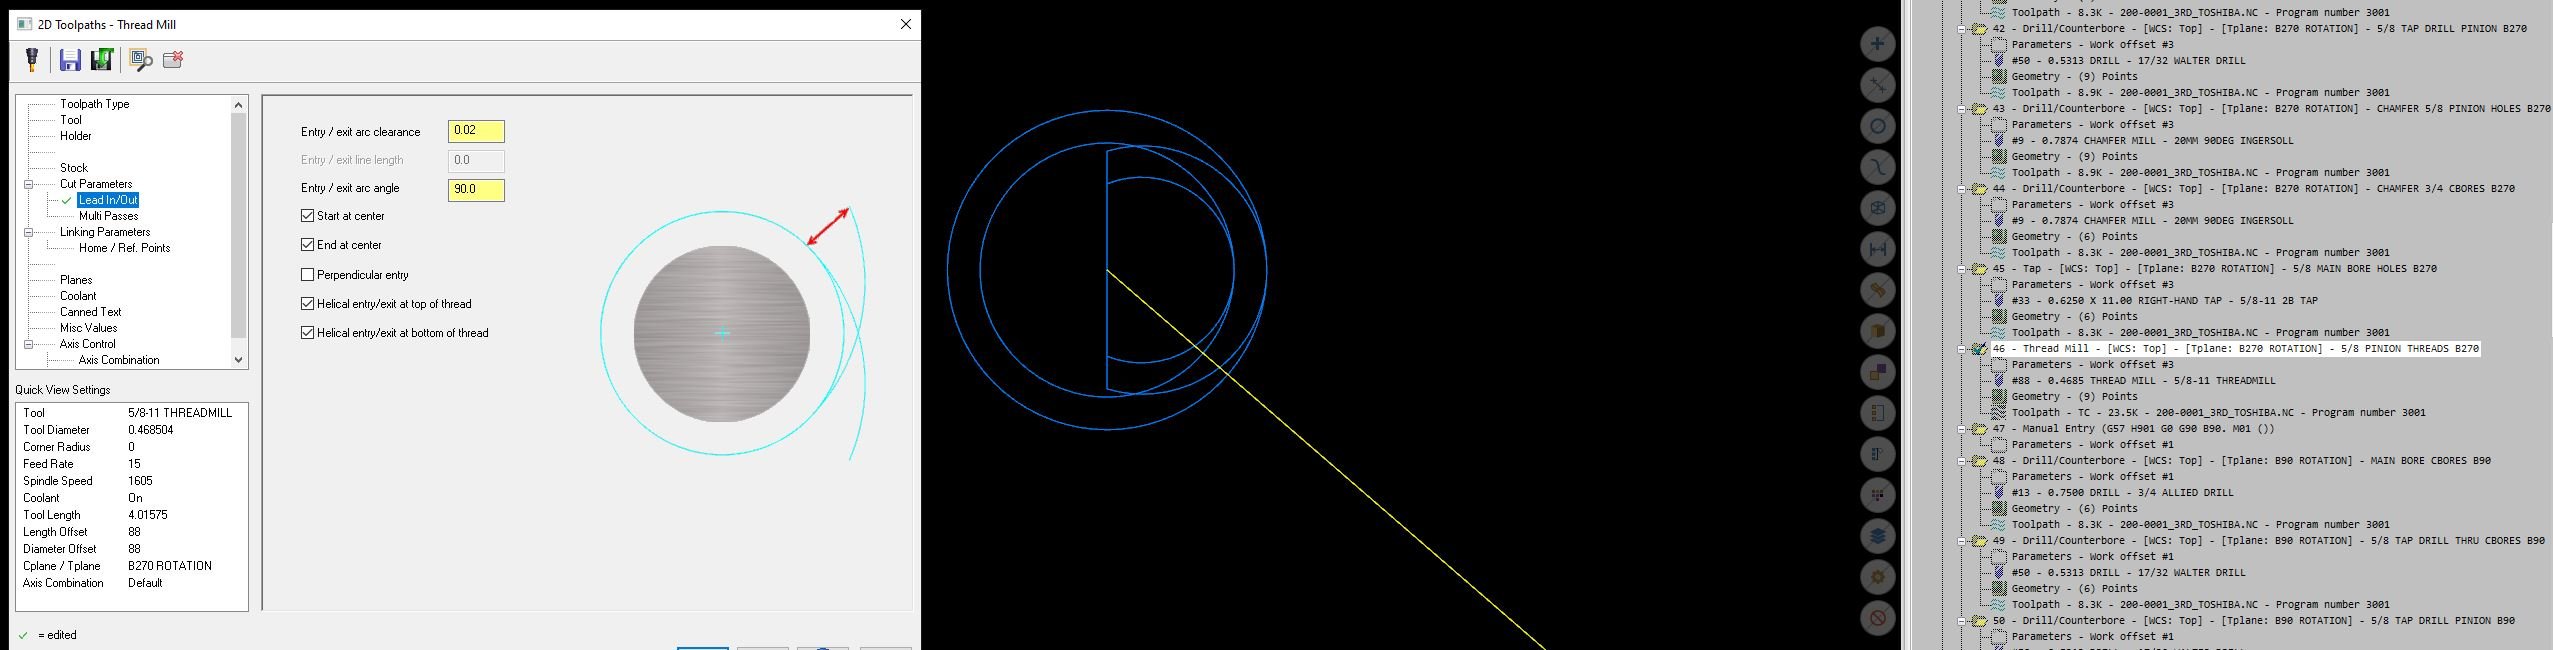
17 minutes ago, gms1 said:
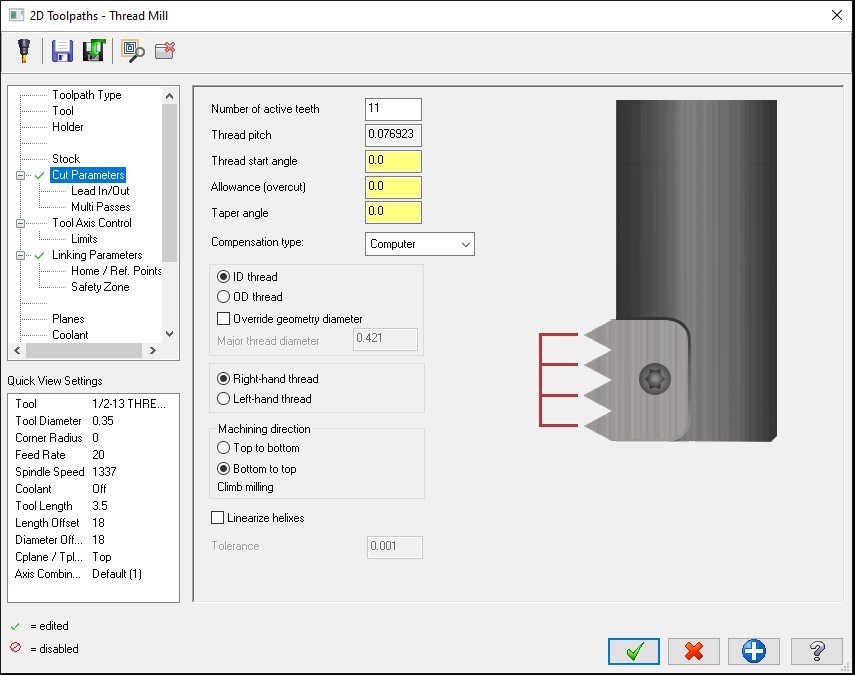
This is my 5/8-11 threadmill cycle settings. I never turn on perpendicular entry. if they need to comp larger than that .020" value I change the major diameter of the hole to compensate (and yes some machines just suck at making threads so sometimes I have to adjust that).
FYI those feeds and speeds are what we use on welded a572 plate.
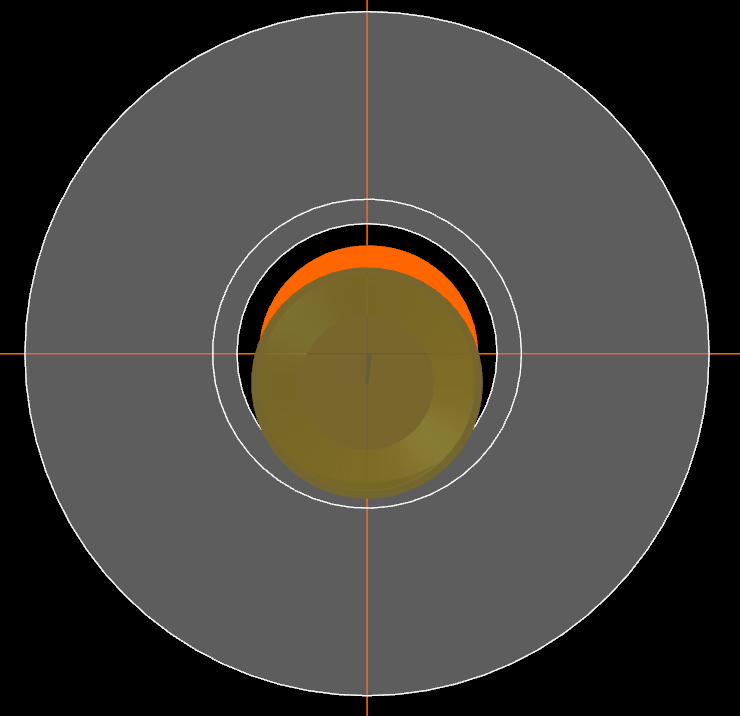
Your settings are outputting a move straight down in Y fully enveloping in the cut. I prefer not to do this especially if I am doing 1/4-20 x 1.000 deep in stainless etc..snap city.
-
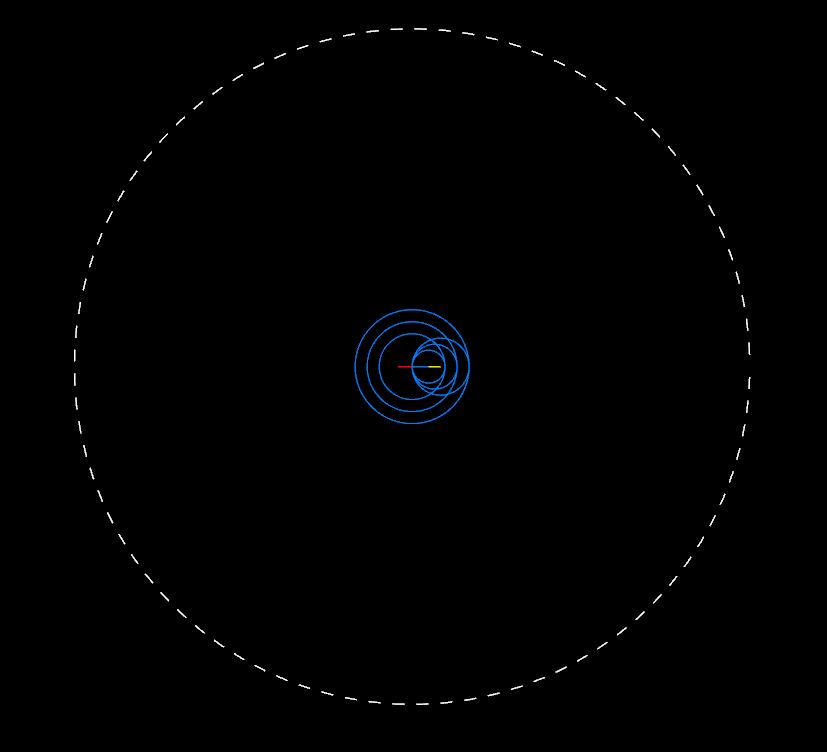
This setup gives the best control over making a linear move first, as well as a smooth gradual entry into the cut.
But it retracts out and back into the hole every pass for some reason??????
If that could be disabled somehow I would have exactly the control I am looking for over the tool.
-
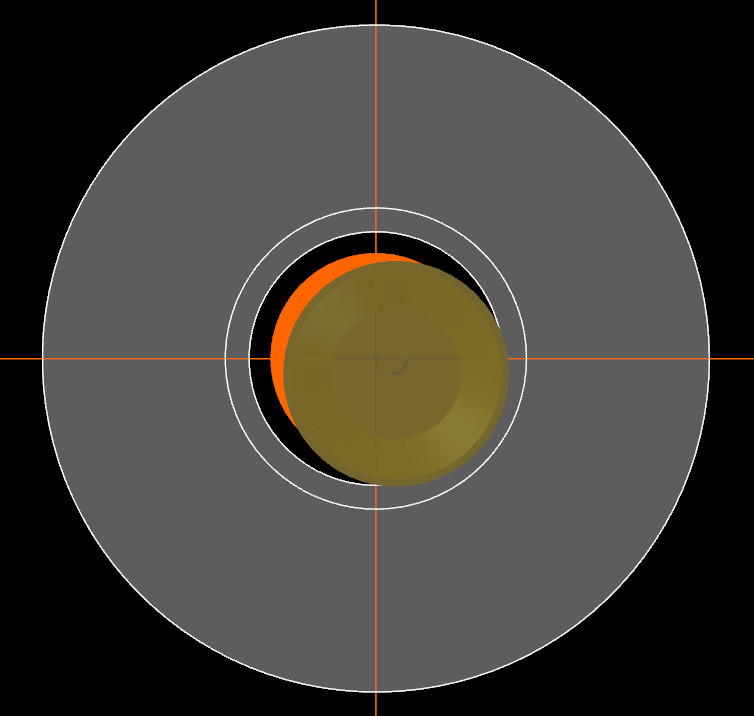
What I can't figure out now is how to get the lead in to enter the cut smoothly, it is going straight down into the material and then interpolating. Perpendicular entry gives wear comp the small linear move it needs, but then you lose the gradual entry into the cut.
Attached are the beginning moves of the cut.
Wear comp works but terrible entry into cut.
_______________________________________________________________________________________________________________________________________________________
This is smoother entry but lose wear comp

-
1 hour ago, 5th Axis CGI said:
Re read the 1st comment. With wear comp you don't need to move at least the radius of the tool. That is control comp and this topic wrong and the wording in it is wrong. He might be adjusting the wear value, but some where on the machine they are putting in a Radius value in the control for the tool. That right there is a big red flag. I will normally start at Zero with wear and then adjust from there. Not the radius of the tool that means CONTROL COMP not wear.
Turning on wear comp in Mastercam, I don't enter anything for the endmill size at the control. On the wear offset page I enter a -value to cut more from the ID I.E. -.002" for most endmills to cut on size as they are ground .002" under.
I have been using it for years this way. I think it was more of an issue of getting Mcam to output the linear movec before comp in a threadmill cycle without making odd moves.
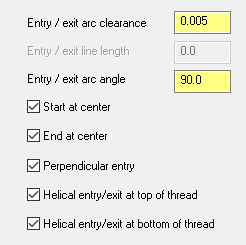
ACnitros picture of his settings are what I needed to use. Playing around with start at center and end at center do cause an odd thing though. The tool does one helix as expected, then retracts out of the hole and then re enters.

-
I would look at places like https://www.eluktronics.com/?gclid=CjwKCAiA3OzvBRBXEiwALNKDP5PfbNEIBhYp1kcEAdmn2YWPhT99OL7_WIQJyuOzaWInvitASrfwQRoCbaUQAvD_BwE
Or maingear..pretty much anywhere but dell and the big box brands.
-
32 minutes ago, AMCNitro said:
That's how I do it for the Haas. Making molds now, and I thread mill everything.
There are a lot of silly if/then things with machining because everything hasn't been updated since 1970..but we have to use what we have, thanks for the help.
-
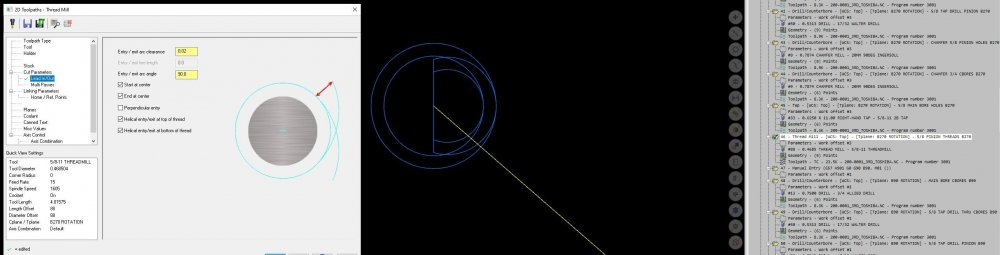
Deselecting start/end at center allows me to input a .001 entry/exit line length..but then the toolpaths retracts out of the hole after every pass WHAT!

-
I think I needed to select perpendicular entry in lead in/lead out..I see it puts a small linear move in before the g41.
-
10 minutes ago, JParis said:
Wear comp can engage with as little as a .001" move....control comp requires minimum of half the dia
Wear should not be a problem
I get an alarm ps0034 only G0/G01 allowed in stupid/ext blk
-
I have been trying to get my Doosan to not alarm when using wear comp to threadmill a 3/4-10. The hole size is .656" and the threadmill is .495" I know to engage wear comp normally a move of .2475 or more is required.
Is there a way to engage comp above the hole or some other way of approaching this? I use wear comp all the time, but not on close fit holes even though I would like to.
-
Mcam tech support:
"Yes there is a setting to change your highlight color. In mastercam go to File > configuration > colors . Then select Auto-highlight and change your color, I find that white 15 works pretty well."

Here was the issue, I never though it was this set to something other then white, I looked past it everytime. 2020 defaulted to yellow.
-
2 minutes ago, 5th Axis CGI said:
I had other programs robbing my GPU resources and I got the same warning.
I do have solidworks and multiple instances of Mastercam open, but I don't think that is causing the solid highlighting issue. I do the same and more at work, 32GB of DDR4 ram is always plenty. These cad systems only utilize a fraction of GPU anyway.
-
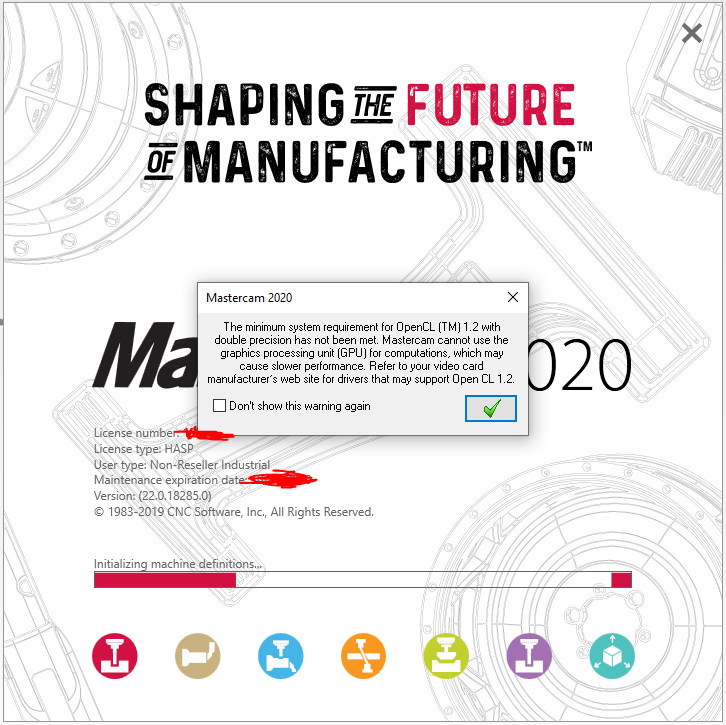
I updated to the latest drivers and they are listed as 2.2.2 not sure why this still comes up. 2020 has been a headache so far..

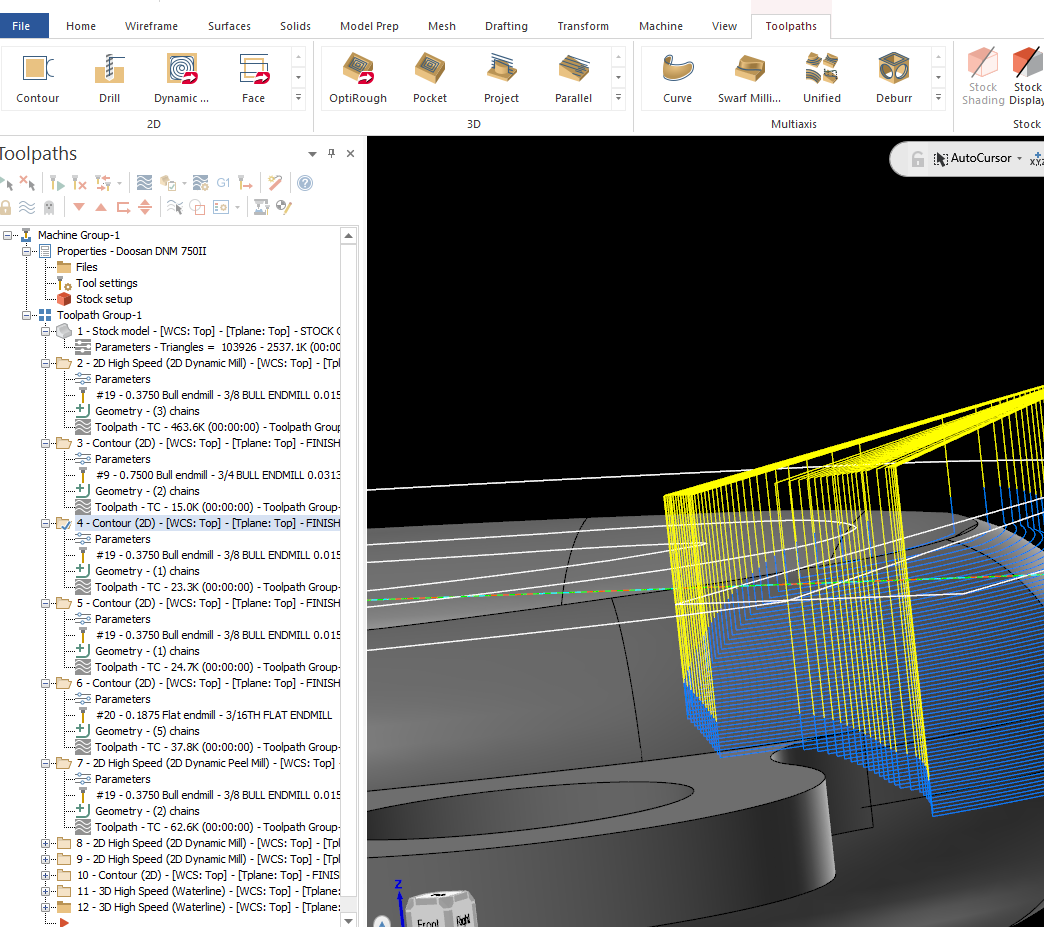

Mcam 2024 Toolpath manager display
in Industrial Forum
Posted
The bold text is a bit easier to read, but the icons still look faded and the text doesn't look high resolution. It looks like a greyed out selection compared to previous releases of Mastercam.
Its one of those issues to try and ignore for the sake of getting things done, but it will take a long time to get used to. It may just be how 2024 is, but it would look a lot better if it was the same as every other ribbon.