


Simtech
-
Posts
431 -
Joined
-
Last visited
Content Type
Profiles
Forums
Downloads
Store
eMastercam Wiki
Blogs
Gallery
Events
Posts posted by Simtech
-
-
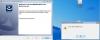
Hi all,
Doing a new install of X6 on 2 machines with 32bit Windows 7 operating systems.
On both machines, maintenance ends 31 dec 2013.
Downloaded x86 version from web.
On first machine, all went well after rebooting after various window installs.
On second machine, did the reboot and afterwards got the following error: Error 1327.Invalid Drive.U:\
No other option after that then to Finish.
Thanks ...
-
Hi all,
I think that CNC Software is in the process of switching to an SQL based tool library database structure instead of there own structure. The process doesn't seem to be bullet proof yet. I would recommend to revert back to the old database structure .TOOL-5 instead of the SQL based file type .TOOLDB until these problems are resolved.
Those looking into software solutions to manage the SQL files could look into SQLite Expert. There are other threads on the forum which discusses this.
Regards,
-
Send me a direct e-mail to [email protected]
-
How can I get the A Axis position to post out after each toolchange whether the angle changes or not?
If the post block exists in your current post, add a call to pfindex in the ptlchg section.
If it doesn't have this post block, create it using the pindex post block and adding an asterix to the rotation variable callout.
Regards,
-
I'm using Mcam_X4_MU3 and would like to create a custom drill cycle, using G01 with a feed to a depth, then change the spindle speed and feed to another depth with a new feed rate, dwell, then feed out
at a new feed rate.
How do you go about creating a custom file under toolpath, drill,cut parameters, then the cycle drop down menu,custom cyle9 ?
Or do I need to do it some other way.
Thanks,
Tom
Hi Tom,
What I would do is to create a Fanuc Macro B and assigning it to a G code, like a G183 and have the G-Code use specific addresses for the required posting. The custom drill cycle in Mastercam could relate to these addresses and be called out with a drill command.
Hope this points you in the right direction!
-
Thanks Roger ... will just have to live with it I guess!
-
Where does the drill cycle graphic get assigned in the cut parameter user interface?
The underlying question is the following: If I create a new drill cycle, where do I assign the graphic that is associated with this cycle?
Thanks!
-
Try adding the asterix as in the following:
paout # Calculate Output variables
*aabs
!xs, !aabs
-
Maybe a ridiculous suggestion - why not start a new folder on the FTP site for Machine Tool Models, by manufacturer. You all can submit and pick from what's already been done! Just my 2%
-
The mode your machine is in is not controlled by a parameter, unless I'm mistaken. This way, you cannot get Cimco DNC-Max to change the mode your CNC is in when it tries to return the program to the control. Best option, if timing is a problem, would be to activate the Wait for XON option in DNC-Max, this way the program would be transfered once the operator hits the receive option on the control.
-
In the Control Definition of your machine, edit the Text/Mill Drill Cycles associated with each G code to replace certain variables with the ones you need, ie, Feed Ovr Distance (I) and Feed Ovr % (J).
Once this is done, edit the post block for each type of G-code and associate the obtained value entered in the drill cycle dialog box.
And voilà!
Cheers!
Luc
-
You already have the paout and pbout post blocks defined, just add these into your mouvement post block, ie, startabs, etc ...
pstartabs
n, *sgcode, pabs, pwcs, *xabs, *yabs, paout, prange, pcan, e
-
Hi,
I could be writing a post for a Flow waterjet that uses ORD language.
Any idea of where I could find explanations on how ORD works? Reference manual?
Thanks,
Paul
Salut Paul,
Demande à ton client - il doit avoir une copie du livre de la machine, sinon, directement du manufacturier!!!
Au plaisir de se revoir!
Luc
-
Hey guys, So far I've been using the generic 3 axis VMC post provided and the only problem I have is with the thread output. I need the post to output TPI with an E in front (E32.)instead of IPM. Thanks for all the support guys. BTW, I don't have much experience in post editing with Mastercam and most likely a detailed explanation would be helpful.
Have a great weekend!
You could do this:
# --------------------------------------------------------------------------
# General Output Settings
# --------------------------------------------------------------------------
use_pitch : 1 #0 = Use feed for tapping, 1 = Use pitch for tapping
# --------------------------------------------------------------------------
# Toolchange / NC output Variable Formats
# --------------------------------------------------------------------------
fmt E 2 pitch #Tap pitch (inches per thread)
# --------------------------------------------------------------------------
# Drilling
# --------------------------------------------------------------------------
ptap$ #Canned Tap Cycle
pdrlcommonb
#RH/LH based on spindle direction
if use_pitch, pbld, n$, "G95", e$
if use_pitch = 0,
[
pcan1, pbld, n$, *sgdrlref, *sgdrill, pdrlxy, pfzout, pcout,
prdrlout, *feed, strcantext, e$
]
else,
[
pitch = 1/n_tap_thds$ # Tap pitch (inches per thread)
pcan1, pbld, n$, *sgdrlref, *sgdrill, pdrlxy, pfzout, pcout,
prdrlout, *pitch, !feed, strcantext, e$
]
pcom_movea
-
Have you looked at the Fryer line of machines with the Siemens control - Touch 2100.
Would appreciate your feedback!
-
This is what I'm thinking:
The #3000=1(MESSAGE) will stop the program execution with the MESSAGE appearing in the Alarm Screen Display. Once the program has been stopped, we need to exit the program, to get back in the JOG or HANDLE modes to move the machine axis to the following position.
After that, we need to re-execute a program to get the coordinates of the next point.
Thats why I split it up in 3 different programs.
Maybe there's a better way???
Smiley Face comes from the new forum app, I'm not used to it yet. Need to deactivate Smiley Faces I guess.
Not sure about the #3001=1 on the Fanuc, will look it up, it would be much easier, thanks!
-
Smiley Face comes from the new forum app, I'm not used to it yet. Need to deactivate Smiley Faces I guess.
Not sure about the #3001=1 on the Fanuc, will look it up, it would be much easier, thanks!
nice code.... although I dont think my control is new enough to take the 'Smiley Face' GCodes that showed up in the second post.
I'm not sure about compatability on this one, but couldnt you put all 3 routines together, and prompt the user using "#3001=1 [PROMPT STRING]" for the user to touch off each edge ?
-
Hi all,
I still have it on my website for download here:
http://www.simtech.qc.ca/support/PostRefGuide04.zip
Regards!
-
Oops, remove parenthesis on these lines
#131=#5021 (POSITION OF MACHINE X AXIS)
#132=#5022 (POSITION OF MACHINE Y AXIS)
Corrected below!!!
Hi all,
I recently received a request to create a macro program to extract the center point of a hole (or cylinder) given 3 points along the hole or cylinder's edge (by using an edge finder for example).
In Fanuc style, this is what I've come up with.
Run program O9101 when probe is in first position (stores X and Y in #111 and #112)
Run program O9102 when probe is in second position (stores X and Y in #121 and #122)
Run program O9103 when probe is in third position (stores X and Y in #131 and #132 retracts and moves to center)
Use machine coordinates to enter Work Offset.
Any comments are welcome!
Regards,
Luc
O9101
#111=#5021 (POSITION OF MACHINE X AXIS - POINT 1)
#112=#5022 (POSITION OF MACHINE Y AXIS - POINT 1)
M30
O9102
#121=#5021 (POSITION OF MACHINE X AXIS - POINT 2)
#122=#5022 (POSITION OF MACHINE Y AXIS - POINT 2)
M30
O9103(CIRCLE CENTER FROM 3 POINTS)
(O9101: USED TO STORE POINT 1 IN #111 AND #112)
(09102: USED TO STORE POINT 2 IN #121 AND #122)
#131=#5021 (POSITION OF MACHINE X AXIS)
#132=#5022 (POSITION OF MACHINE Y AXIS)
(#100: SLOPE OF LINE A)
(#101: SLOPE OF LINE

(#102: SLOPE OF LINE PERP TO A)
(#103: SLOPE OF LINE PERP TO B - NOT USED)
(#104: SLOPE A TIMES SLOPE
(#105: Y1-Y3)
(#106: X1+X2)
(#107: X2+X3)
(#108: SLOPE B - SLOPE A)
(#109: Y1+Y2)
(#110: X-#106/2)
(#141: POINT X OF CENTER)
(#142: POINT Y OF CENTER)
(***** VARIABLE CALCULATIONS *****)
#100=(#122-#112)/(#121-#111)
#101=(#132-#122)/(#131-#121)
#102=(-1/#100)
#103=(-1/#101)
#104=(#100*#101)
#105=(#112-#132)
#106=(#111+#121)
#107=(#121+#131)
#108=(#101-#100)
#109=(#112+#122)
#141=((#104*#105)+(#101*#106)-(#100*#107))/(2*#108)
#110=(#141-(#106/2))
#142=(*#102*#110)+(#109/2)
(***** MACHINE MOUVEMENT *****)
G91 G00 Z5.0
G53 G01 X#141 Y#142 F10.0
(***** END OF MACRO *****)
M30
%
-
Hi all,
I recently received a request to create a macro program to extract the center point of a hole (or cylinder) given 3 points along the hole or cylinder's edge (by using an edge finder for example).
In Fanuc style, this is what I've come up with.
Run program O9101 when probe is in first position (stores X and Y in #111 and #112)
Run program O9102 when probe is in second position (stores X and Y in #121 and #122)
Run program O9103 when probe is in third position (stores X and Y in #131 and #132 retracts and moves to center)
Use machine coordinates to enter Work Offset.
Any comments are welcome!
Regards,
Luc
O9101
#111=#5021 (POSITION OF MACHINE X AXIS - POINT 1)
#112=#5022 (POSITION OF MACHINE Y AXIS - POINT 1)
M30
O9102
#121=#5021 (POSITION OF MACHINE X AXIS - POINT 2)
#122=#5022 (POSITION OF MACHINE Y AXIS - POINT 2)
M30
O9103(CIRCLE CENTER FROM 3 POINTS)
(O9101: USED TO STORE POINT 1 IN #111 AND #112)
(09102: USED TO STORE POINT 2 IN #121 AND #122)
(#131=#5021 (POSITION OF MACHINE X AXIS))
(#132=#5022 (POSITION OF MACHINE Y AXIS))
(#100: SLOPE OF LINE A)
(#101: SLOPE OF LINE
(#102: SLOPE OF LINE PERP TO A)
(#103: SLOPE OF LINE PERP TO B - NOT USED)
(#104: SLOPE A TIMES SLOPE
(#105: Y1-Y3)
(#106: X1+X2)
(#107: X2+X3)
(#108: SLOPE B - SLOPE A)
(#109: Y1+Y2)
(#110: X-#106/2)
(#141: POINT X OF CENTER)
(#142: POINT Y OF CENTER)
(***** VARIABLE CALCULATIONS *****)
#100=(#122-#112)/(#121-#111)
#101=(#132-#122)/(#131-#121)
#102=(-1/#100)
#103=(-1/#101)
#104=(#100*#101)
#105=(#112-#132)
#106=(#111+#121)
#107=(#121+#131)
#108=(#101-#100)
#109=(#112+#122)
#141=((#104*#105)+(#101*#106)-(#100*#107))/(2*#108)
#110=(#141-(#106/2))
#142=(*#102*#110)+(#109/2)
(***** MACHINE MOUVEMENT *****)
G91 G00 Z5.0
G53 G01 X#141 Y#142 F10.0
(***** END OF MACRO *****)
M30
%
-
Just came back to this post after a few years of absence ... here goes the solution.
a = height of first ladder (from left corner)
b = height of second ladder (from right corner)
d = distance between walls
x = horizontal point of intersecting ladders from left corner
y = vertical distance of intersecting ladders
Eq1: f(x)= (a/d)x #equation of first ladder
Eq2: g(x)= (-b/d)x + b #equation of second ladder
when does Eq1 = Eq2, so f(x)=g(x)
(a/d)x = (-b/d)x + b
(a/d)x + (b/d)x = b
x((a+B)/d) = b
x = bd/(a+
replacing x in Eq2 we get
y = ab/(a+
Example:
a = 38
b = 31
d = 45
Intersecting point will be:
x = 20.217
y = 17.072
My son solved the problem, he's in 12th grade highschool!!!
-
Allan has answered the question ... it returns the rounded value of a variable, as in:
if fmtrnd(x) <> prv_x
-
Note:
The 2 if statements should not be in the first column
code:phood #Hood Adjustement Heightif mi4$ = 1, "E=TLLEN" #Auto height adjustementif mi4$ > 1, *mi4$ #Custom height

X6 Install Error 1327
in Industrial Forum
Posted
Problem solved - My Documents was mapped to illegal drive by system admin.