


danatoem
-
Posts
70 -
Joined
-
Last visited
Content Type
Profiles
Forums
Downloads
Store
eMastercam Wiki
Blogs
Gallery
Events
Posts posted by danatoem
-
-
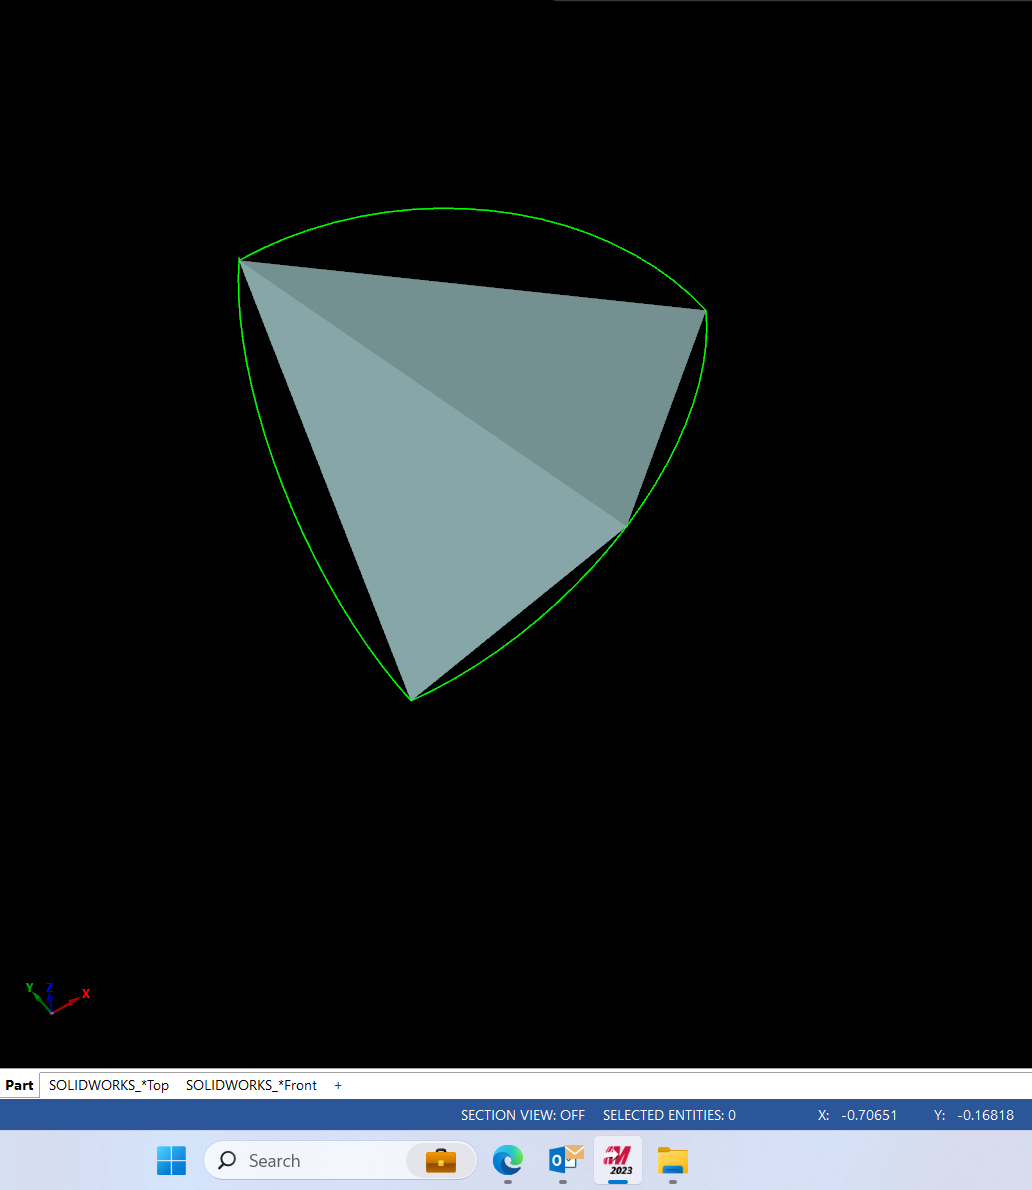
here are the 3 curves for anyone who wants to give it a go. I was unable to get anything with the coons option as well. The cures are tiny. (we do micro molding here!)
-
it did not give me what i hoped for?

-
how does mastercam handle this? I seem to recall back in the ole days we could make a "bezier" surface? Any suggestions would be appreciated.
.thumb.png.2e0d7c20b4a7b228ca86b898c67ce016.png)
-
Just to respond to the question why not go left to right, or across the face as opposed to up and down? When you go across wall that has draft on it, with a sharp endmill the result will be a finish that will resemble a stair case. When using a sharp endmill on a drafted wall and going up and down the finish will be smooth as a babies butt! You will be using the radius of your endmill as opposed to a sharp corner . It also just happens that this drafted wall had a sharp corner at the bottom or i would have used a bull mill or , say a 1/8 e/m with .03 corner rad. The easy thing would of been to use a taper cutter but this wall has odd ball draft.
-
 2
2
-
-
Because i need a sharp corner at the bottom and i am using a sharp end mill

-
I noticed when using scallop that it REALLLLLLLY tightens up around the radius! and then makes more of a step in the flat wall. Think i will stick with scallop!
Thanks
.thumb.png.979625f37ab8a0013da5547ae5adeea3.png)
-
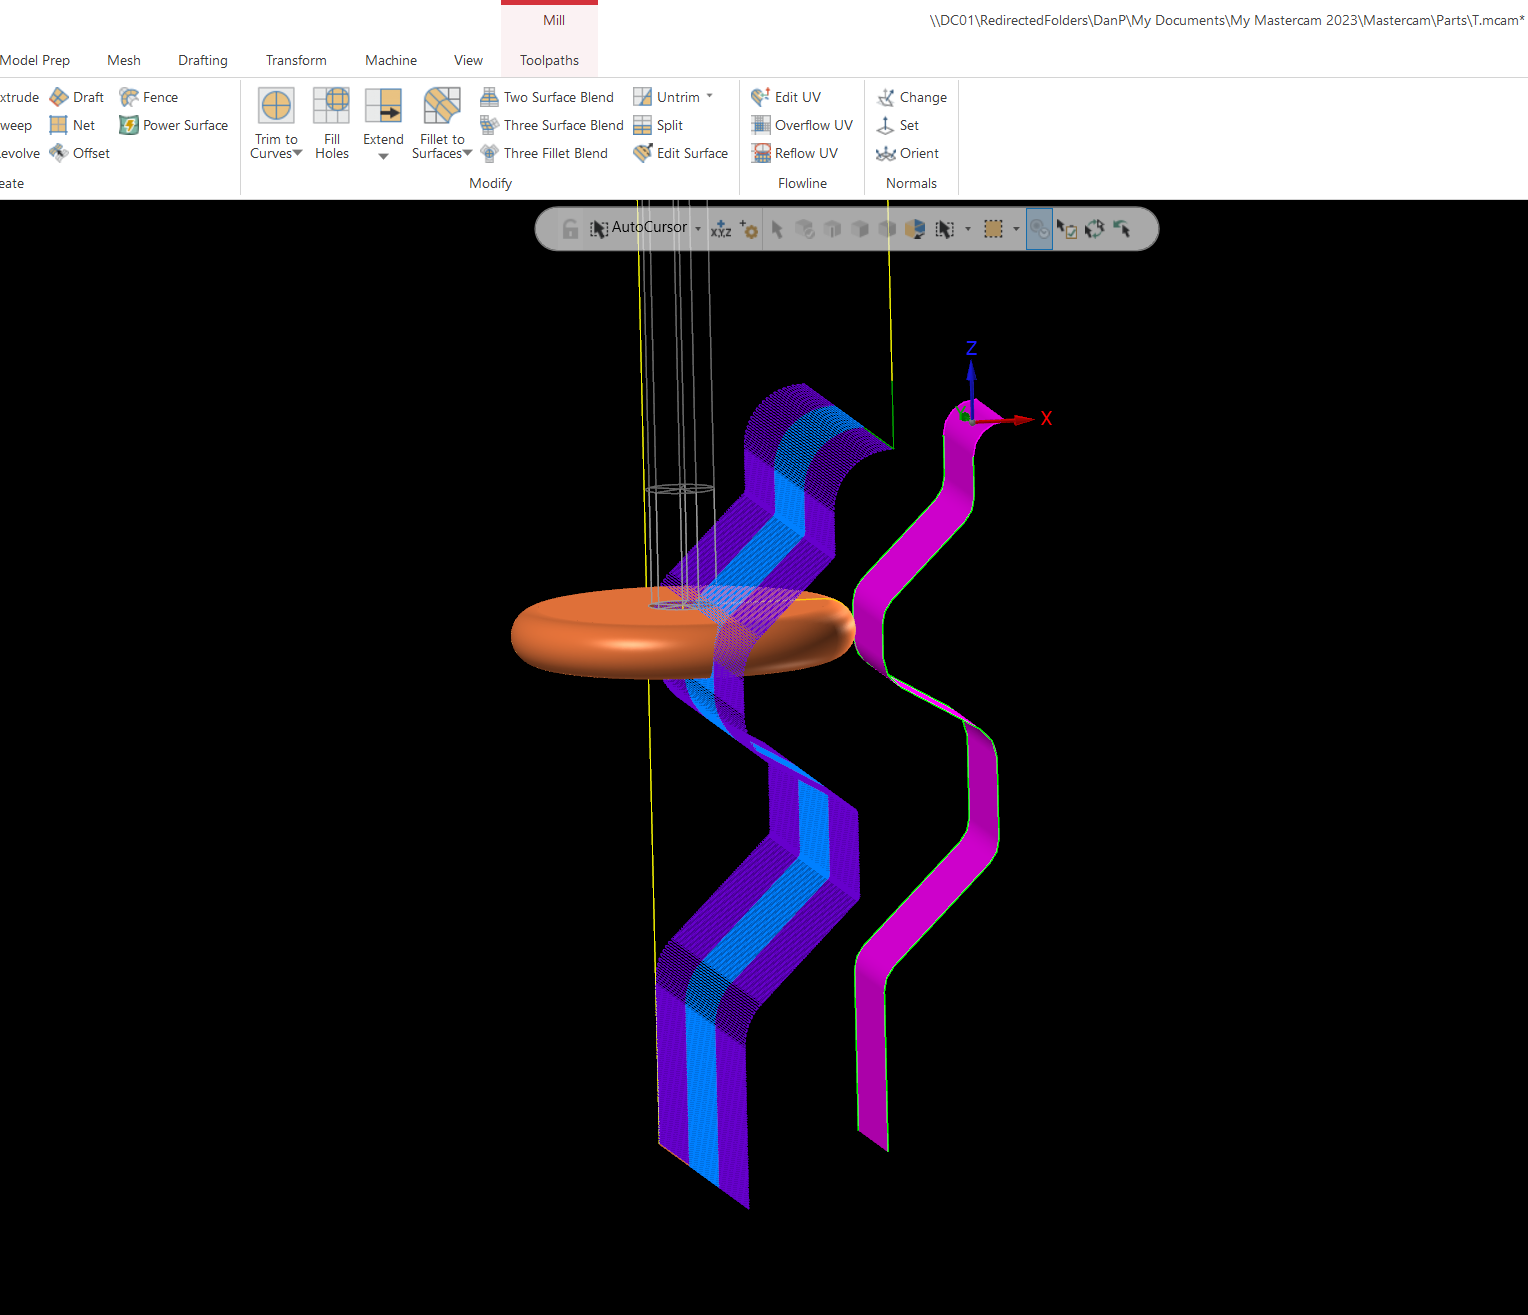
I have often noticed that when using flowline and specifying a step over, say of .002 that it will increase dramatically around a radius. I am machining a tapered wall (up and down motion in the Z axis) that wraps into a radius just now and wonder if there is a way to get a consistent stepover thru both?

-
also flowline allows you to extend the cut motion off the part by using the "gap-settings" - "Tangential line length" !
-
2
-
-
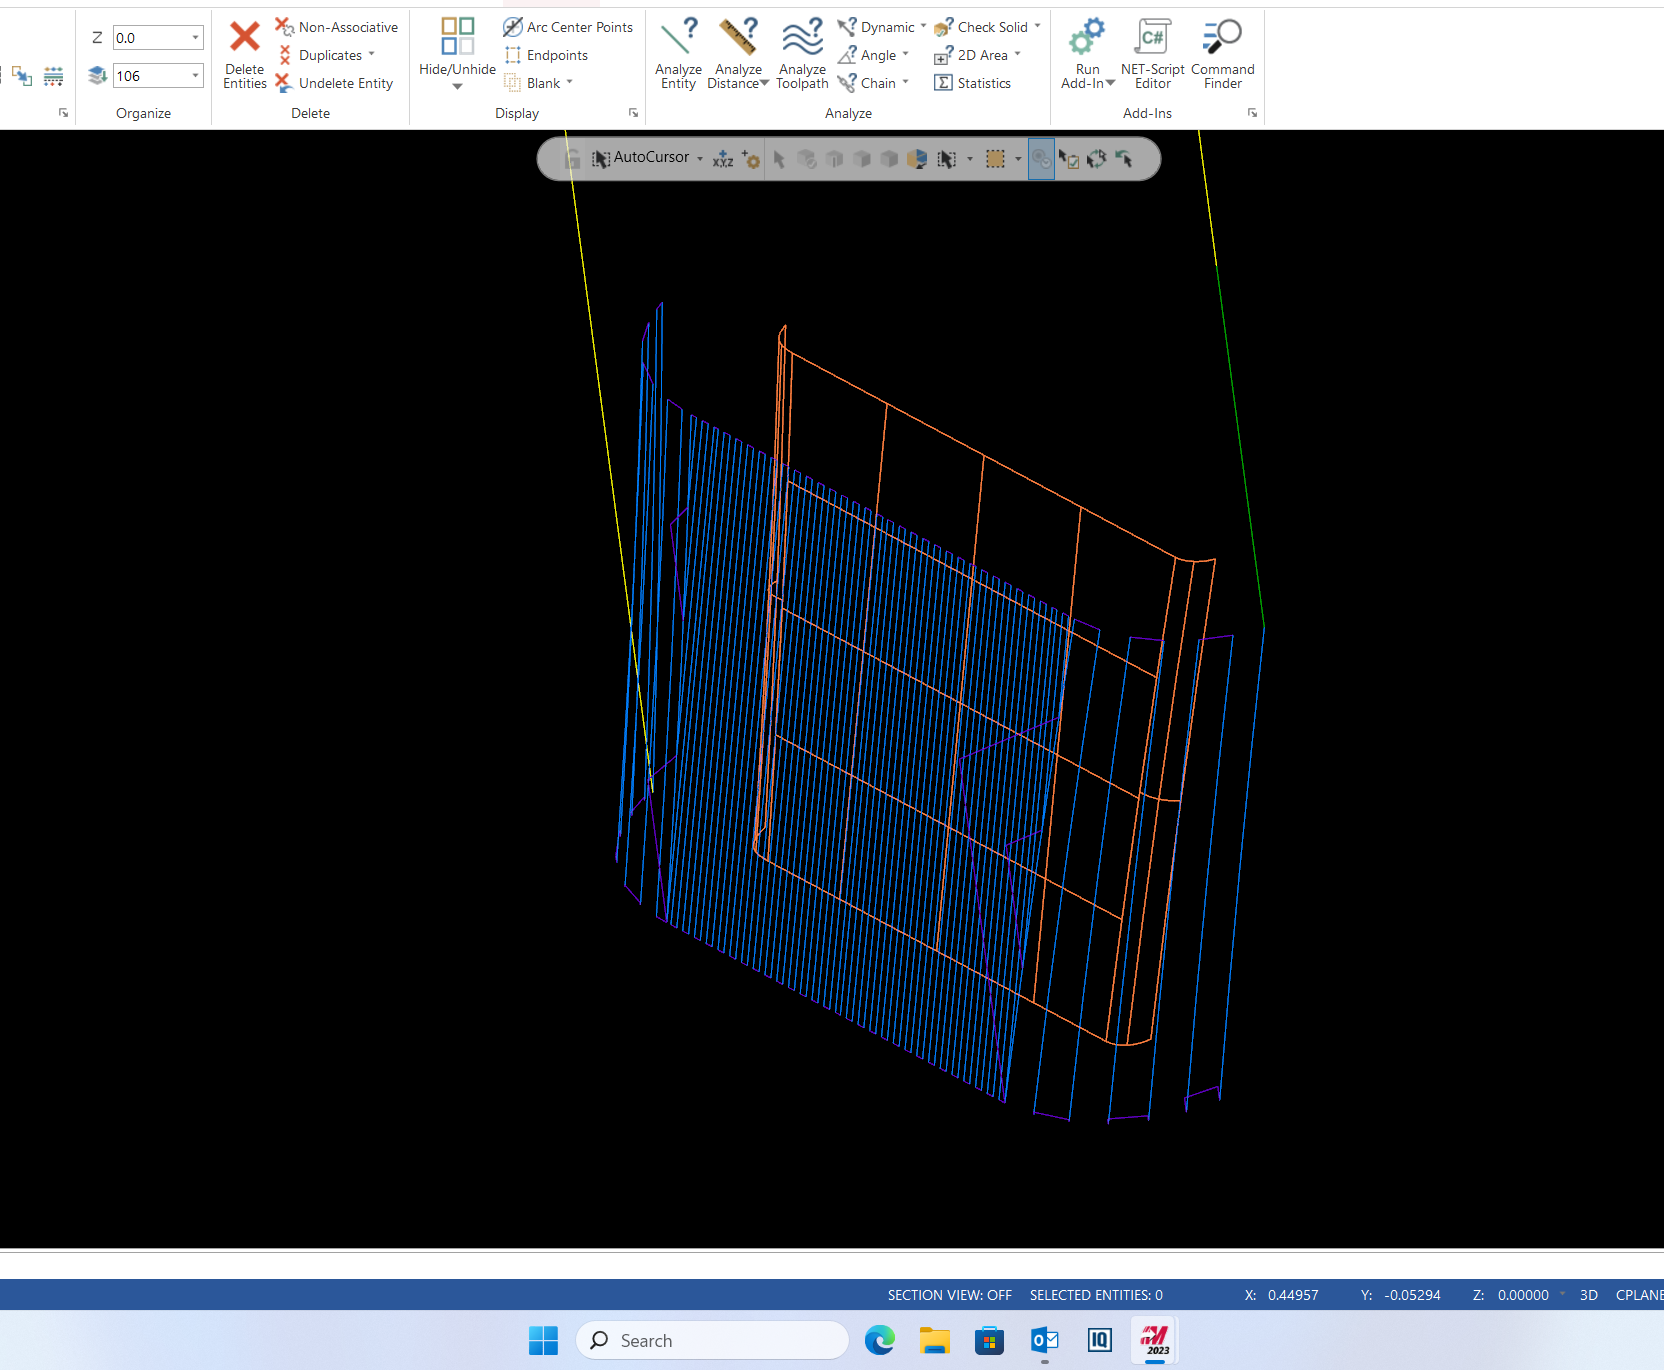
not sure what i am missing on this but I often did this kind of shape with flowline ( have to uncheck gouge check!) and had good results. See screen shot.

-
3
-
-
so this is not area mill but it kinda looks like its doing the same thing?
-
1
-
-
So Aaron, just to be clear I was actually just using a contour path when i got this to work. Makes 1 pass across lifts to clearance and repeats until depth is reached. Than it steps over and repeats until it gets to the final cut. I know what he was saying is a problem with having that thin web at the bottom if your not going to full depth before stepping over! It can damage a cutter and make quite a rucus in process!
-
So i was just messing around here with a similar situation , and finishing to the final depth before stepping over and i got it to work fine by using (inside of depth of cuts) toggle on "By contour" and it will accomplish what he wanted at the beginning of this thread?
-
1
-
-
Unable to post it actually ... it is pretty huge file anyways. I was actually surprised it wanted to regenerate the path when other toolpath strategies don't seem to ask? what is taking so long is likely having to use .019 endmill in along .002 wide channels. The cavity depth is only .034 but has tons of tiny rib details.
-
Just used optirest for the first time in V 2023. The path took soooooooo long to generate? About 45 minutes. Than upon starting my posting i suddenly remember, my collant is not turned on. No problem, go back into the path turn coolant on exit. What? It wants to sit and regenerate the path because of the coolant being off? Something really screwy about that. I just bailed,(thankfully i had just saved the part) and reopen and post with out coolant to edit after wards. Now i am posting, and its been about 15 minutes posting ...... looks like about half way through the posting. Yeah, i know i can batch post or whatever but they want this path in an hour. Okay, done venting!
-
I am using 2023 and I find that when printing a setup sheet the image is basically a dark blob? I have tried changing the settings in "images" to all the 4 options offered in set up sheet but to no avail. I also have played with the shading before printing. The curious thing is that if I just print an image (not a setup sheet image) it prints just fine? thanks for any help on this
-
okay, so i dug around and figured this out, thanks anyways!
-
I did a search on this and only turned up information going back to 2012?
When I go to stock setup (2023) the material is defaulting to Aluminum. Just below that tab is a button to edit material. My thought is, nice and easy! The difficulty lies in why is the option greyed out? Why would it give me an option to edit material and than grey it out? I would be happy to just loose "Aluminum" and make it blank. In the threads from 2012 they have you change feed to "set from tool" and than you can change stock. I don't think 2023 is working that way? I guess i am missing something pretty basic but just not seeing or finding info. Thanks for any suggestions !
-
Okay, after playing around with this for a while i now have something that is working. Seemed away easier in previous versions?
-
I am a new user to V23, just coming back from another software, My memory of V21 stock setup was dead simple. All i needed to do was use a window seletion and grab entities on a level and boom, my stock was set. With V23 I am seeing a boat load of new stuff which seems overkill? I have the option of adding from a bounding box. I do that and it throws up a dimension of the overall plate size i am using. Now i am thinking my stock size is set, and i accept it and exit to verifiy. In verify it changes the stock to a much smaller size, so obviously my verification is screwed up. Must be missing some vital link here and would appreciate any help on why its doing this. Thanks in advance
-
Thanks for the input. i'll check it out!
-
so i found the .rpx file and, sorry for the dumb question! what do i use to open it?
-
is there a particular trick to getting the setup sheet to include my comment from the opps page? i have been looking at "setup sheet (mill2-z) and it gives a general report but does not include any of my toolpath comments? thanks
-
Thanks for your input. I'll try it out here.
-
.png.cc0c8d9ef1bac1bc597de6db86aacf1b.png)
.png.1f56903210cd73a9b27d96f1a5543304.png)
How to create a surface with 3 curves
in Industrial Forum
Posted
Thanks for your help everyone! I did scale it up and than create the coons surf, and scale it back. It looks like it should work for me.