TheLordsToe
-
Posts
8 -
Joined
-
Last visited
TheLordsToe's Achievements
")


-
2023 Multiaxis Pocketing - Stock to leave issues
TheLordsToe replied to TheLordsToe's topic in Industrial Forum
Okay, so I created a large surface to encompass all the floor geometry of my pockets. Selecting this as my floor and leaving everything else the same seems to have worked. Stock to leave is correct. It's not doing anything weird. Thanks Aaron! -
2023 Multiaxis Pocketing - Stock to leave issues
TheLordsToe replied to TheLordsToe's topic in Industrial Forum
Thats a good point. My pockets all technically could share the same floor. Could I draw a cylindrical surface and use that as my floor for all the pockets? Let's find out! I'll report back. -
Hi everyone, I'm having some interesting issues with this Multiaxis pocketing toolpath. I have a large part with 24 pockets around the circumference. I create my toolpath on the first set of (4) pockets, and I just copy and paste the operation and reassign the geometry/boundaries for the remainder of them. I've noticed however that at random the toolpath will start to leave more and more stock in some areas. If I go to that particular operation and remove all the geometry for the pockets except one, it leaves the right amount of stock. I assume its a glitch of sorts. Has anyone else noticed this? For specifics I'm asking the path to leave .015 on all surfaces. and my finished part came out heavy in some pockets by .03 per surface! Again, this is the same path just copied and pasted over and over again. This is on MasterCam 2023 My only work around is to make an operation for every pocket. So essentially id have an operation tree of 24 pocketing toolpaths instead of 6. Not the end of the world but it sure is frustrating.
-
2022 Convert to 5 Axis - Plane questions..
TheLordsToe replied to TheLordsToe's topic in Industrial Forum
Dylan was able to look at my file and gave me some really good insight. Unsurprisingly there's more than one right way to set this up. My planes weren't the issue. It was my Tool axis control direction that was wrong. I posted Dylans response below so that you can see his explanation. I hope this can help others who may run into similar issues. "Hey Cristian, I actually like the way you had this set up, with Fixed Angle to Axis. The issue just stemmed from the direction you were giving it. So when converting to 5 axis, we’re taking every point from the original path and giving it some new vector, or pointing direction, for the tool. Your original settings were to say, basically, lock it along an axis (until collision control found a collision and made it tilt), and you chose the Z axis. Which direction is the Z axis? It’s your WCS Z, not your Toolplane Z. In this case, the WCS Z is 90 degrees off where the optirough was made, which means that pretty much every single point in the original path is immediately in collision. So the only thing you had to do to make this work was to flip the Z to Y, which is the direction of your feature area. Or, if your feature area didn’t align well with the direction of one of the axes of your WCS (Top), you could use the Line option and choose any edge or wireframe line to define the main pointing vector to align the converted path along instead. Angle towards tilt axis works for you here as well because you’re telling it to tilt the original vectors towards some axis, but the default change amount is 0. So the end result is it really doesn’t modify any original vectors at all, and you never get the pointing problem that was created by specifying a bad axis for Fixed Angle to Axis."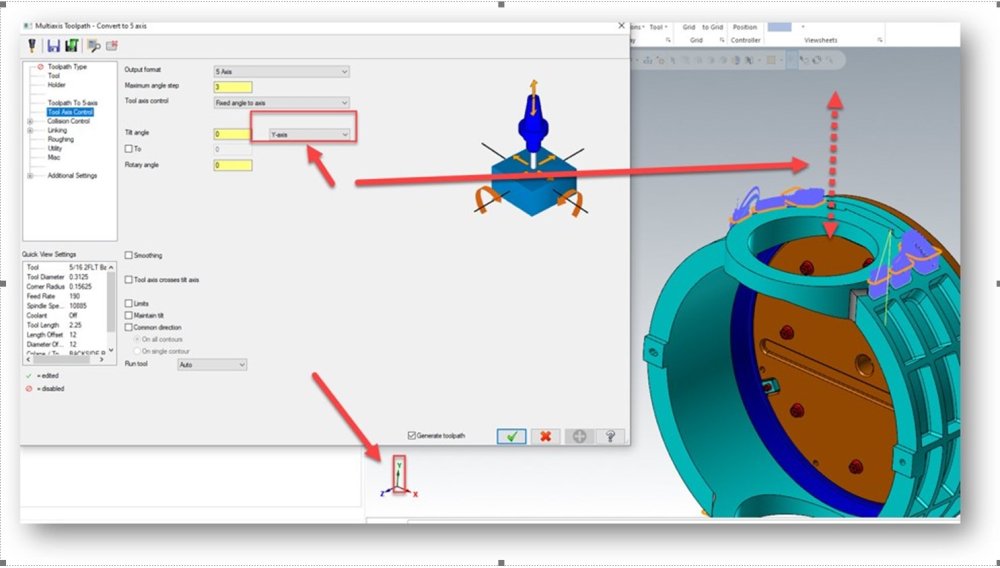
-
2022 Convert to 5 Axis - Plane questions..
TheLordsToe replied to TheLordsToe's topic in Industrial Forum
You know last week I swear I tried every which way of tool axis control. I tried angle towards tilt again today with all planes set to TOP and it worked! Machine Simulation shows the correct moves and everything. I'm so glad this is going to work. I appreciate everyone's time and help! So, in conclusion this "convert to 5 axis" utility is as useful as I'd hoped it be.
-
2022 Convert to 5 Axis - Plane questions..
TheLordsToe replied to TheLordsToe's topic in Industrial Forum
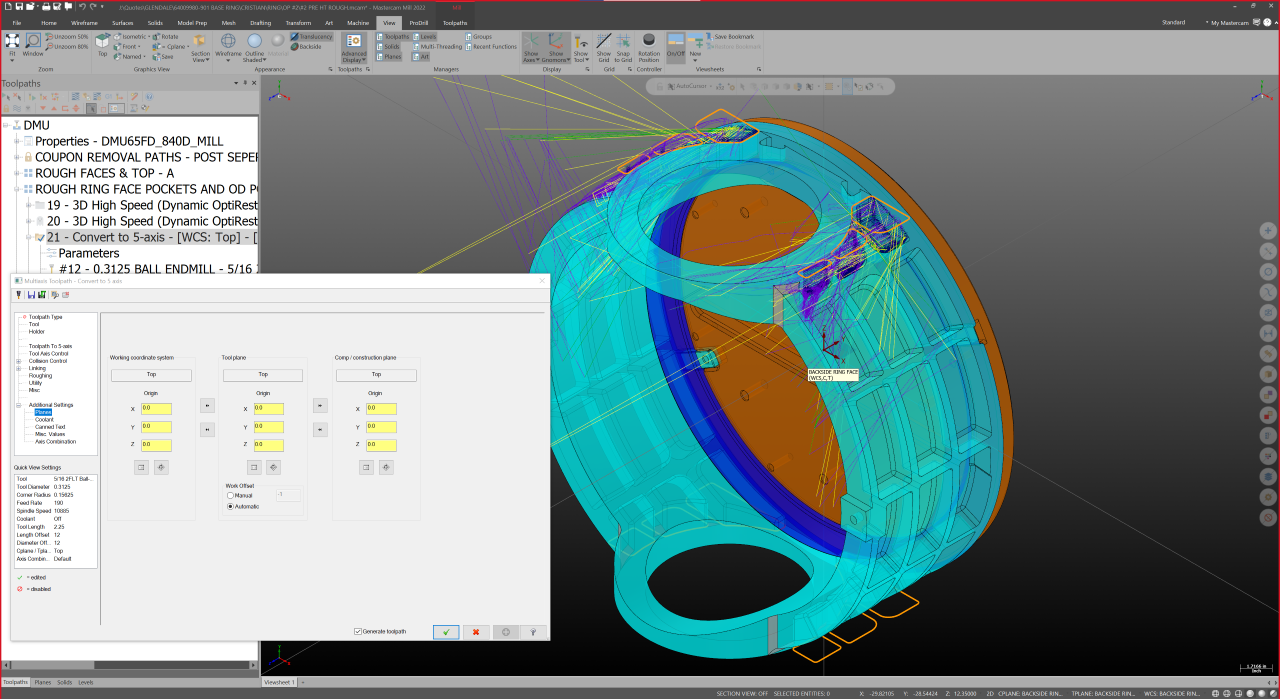
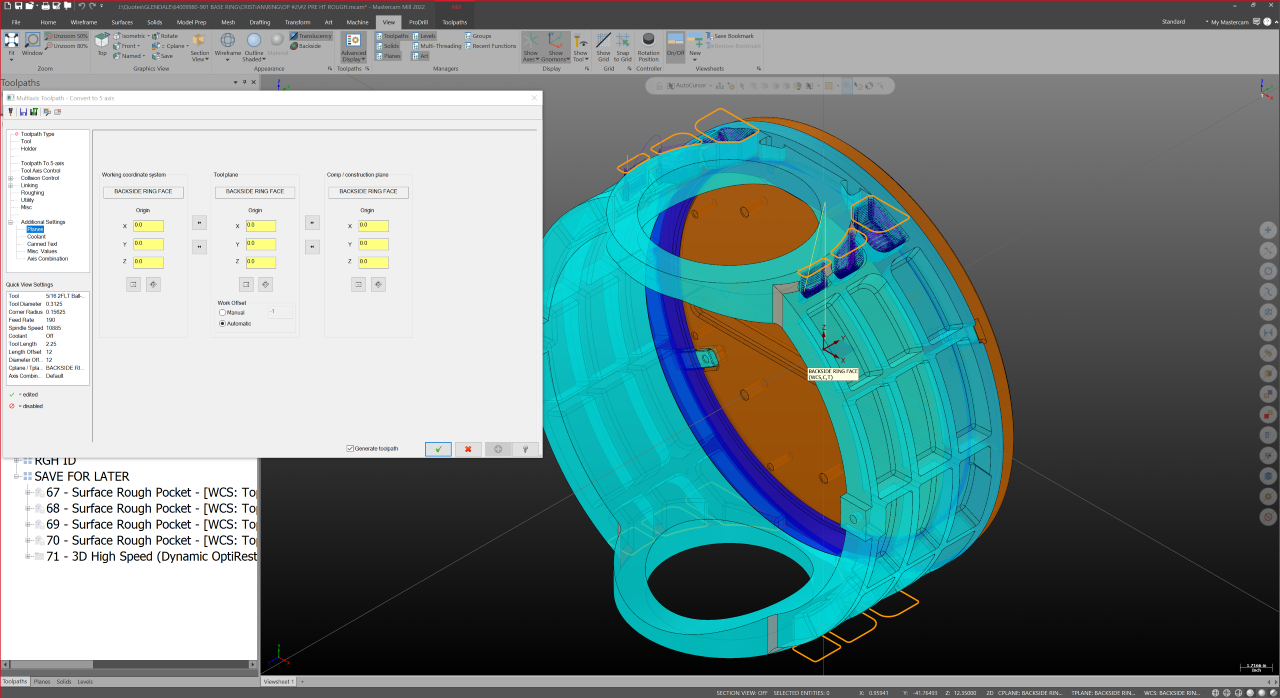
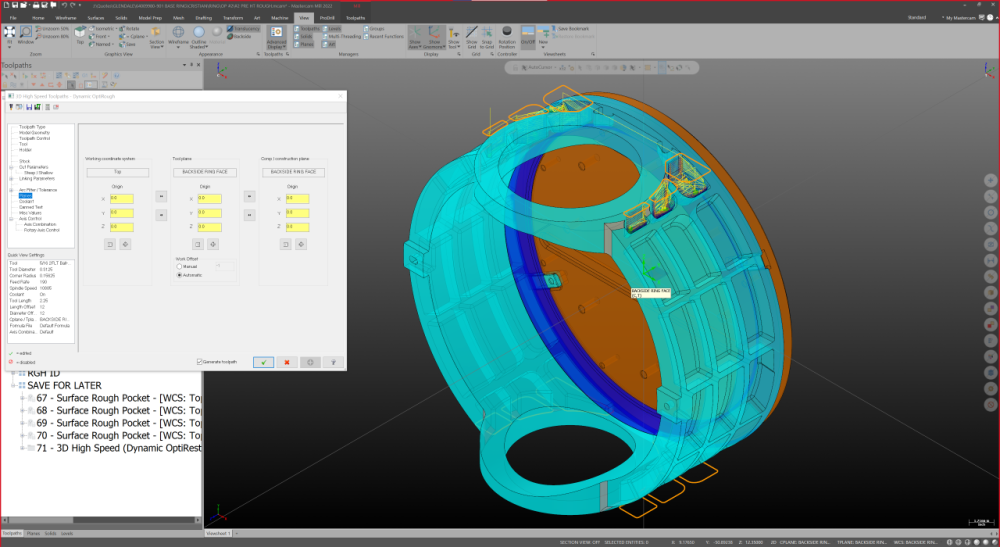
@Aaron Eberhard Here are some screenshots that may help. What I'm trying to show you: I show that my custom plane is referring back to my 5 axis home wcs. My planes in the Origin toolpath are correctly setup. (at least for 3 + 1) My 5 axis convert result with the 3 planes setup incorrectly and the toopath looking right. (Its not right cause the wcs is wrong) and the 5 axis convert path with the toolpath looking all wrong (but with the planes set correctly to T,T,T) I cant share my whole file without a lot of tinkering unfortunately. I hope I'm making sense.


-
2022 Convert to 5 Axis - Plane questions..
TheLordsToe replied to TheLordsToe's topic in Industrial Forum
@Leon82 If that's the only way to get it to work then that really sucks for me.. -
This is my first time posting on this forum so forgive me if this has been answered already. I did a search and found others with similar questions but not a lot of definitive answers. I thought I had a breakthrough when I converted an opti-rough path into a 5 axis toolpath. However when simulating I realized that the path it spit out had defaulted to its own planes. When I tried correcting this my toolpath was broken. The tool was doing all kinds of really messed up things. My original toolpath is using (WCS) Top - (Tplane) Custom plane #1 - (C-plane) Custom plane #1. I created the custom plane #1 off the part geometry by just selecting a large face on the front side of the model. This usually works fine on its own toolpath. When I normally do 5 axis simultaneous I always use Top - Top - Top. This never fails me. But now I'm using a combination of my Origin path and this Convert function and I'm not sure what I'm violating when setting up my planes for each toolpath. It seems I cant get this path to work right unless the original toolpath is using all planes set to Top. From what I gathered other users had similar issues in X6 and X7. I'm using 2022 and I find it hard to believe this awesome tool would be cucked this hard by this one little thing. Does anyone have a little advice on how to properly set up planes for this?