


FLR169
-
Posts
12 -
Joined
-
Last visited
Content Type
Profiles
Forums
Downloads
Store
eMastercam Wiki
Blogs
Gallery
Events
Posts posted by FLR169
-
-
Ok
So i changed the Z.25 To Z-.015
It ran without an alarm
So i probed all 4 corners individually to see what is what
P1 = -17.4552
P2 = -17.4767
P3 = -17.4825
P4 = -17.4657
After running the G65 P9820
The G54 Z populated with -17.4676
I'm stoked that I'm getting closer
Biggest Z is P3
So i need that + .015
Ah.... a doh moment
I need to change the minus 15 thou to a plus 15 thou
And boom I get the right #
Wish I could come spend some time with you guys to really get this macro stuff figured out.
My only other ? Is
Do I need to add the U and if so what value
And I'm not a 100% sure what U is doing
Mike
-
37 minutes ago, Colin Gilchrist said:
The first thing I notice, is that you've got 4 points (initial XY, plus 3 pairs of I/J values), but only 3 unique points.
- X0.5 Y-0.5 < [1st Point]
- I6.0 J-.5 < [2nd Point]
- I6.0 J-.5 < [3rd Point, same as Point 2]
- I0.5 J-5. < [4th Point]
Try changing that 3rd Point to I6.0 J-5.0
Also, add a "U" parameter (max stock allowance, or upper limit). I would use "U0.08", or "U0.1", or "U0.120", to give yourself some "room" to find the highest point.
Setting "Z0.25" will take the highest point, and set your Work Offset Z Value to be -0.25 below that highest point. Is that what you want?
This is actually what i ran this morning
It gave me a 1092 probe open alarm
What I want to accomplish is
Measure the 4 corners
Take the longest measurement (which will be my lowest corner)
Say Z -22.115 ( biggest Z / lowest corner)
Have my new Z offset be Z-22.130
So add 15 thou to longest Z
Hope that makes sense
Mike
-
10 hours ago, FLR169 said:
@Colin Gilchrist @crazy^millman
2013 Haas VF4 with probing and tool setter
So finally got the batteries needed for Probe and Tool Setter. I got it all setup and working.
Today the weldment job showed up so I played around with the probing of the Z surface.
I had it probe the 4 corners in Z and input each corner to a Z work offset ( G55 thru G58 )
Then i picked my biggest Z # for my G54 work offset. ( This part done by me manually inputting the new Z #)
So I went thru this post and came up with this code to try tomorrow. ( also went thru the Inspection Plus on P9820 )
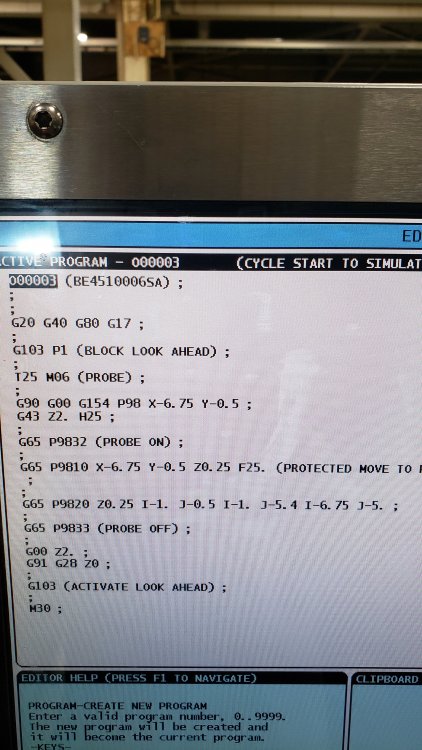
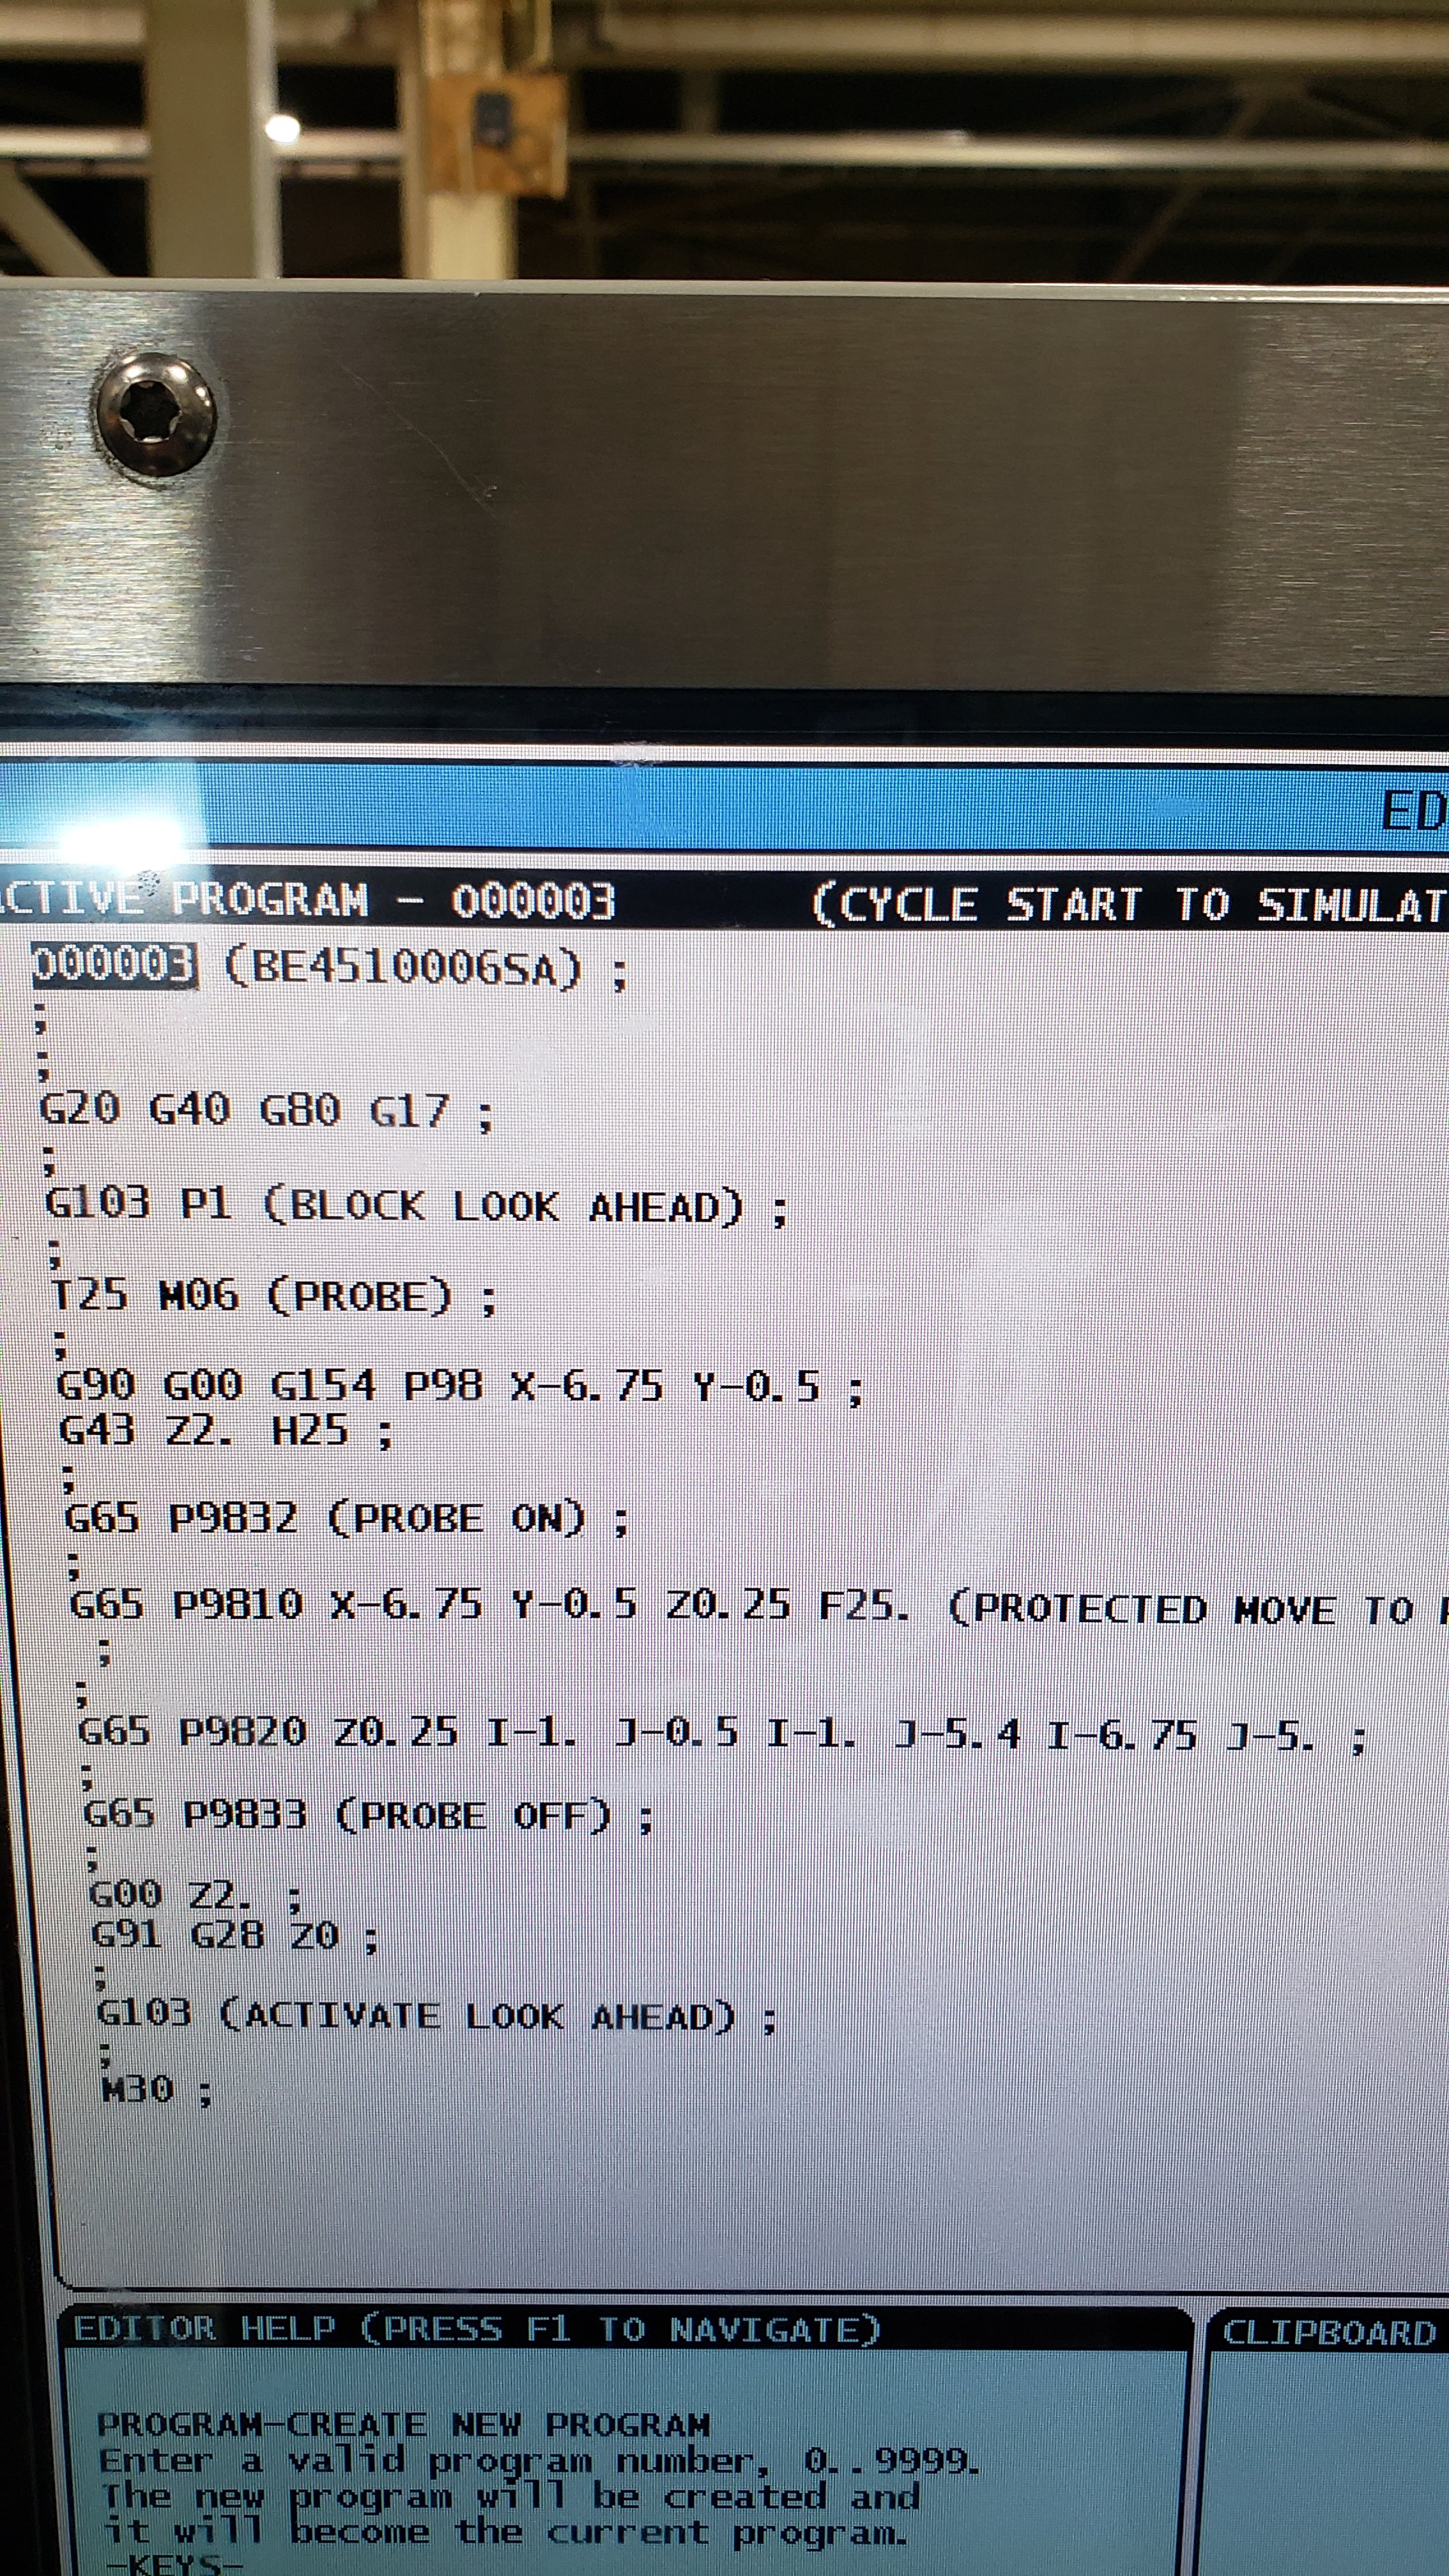
G20 G40 G80 G17
G103 P1 (Block Look Ahead)
T25 M6 ( Probe )
G90 G0 G54 X.5 Y-.5
G43 z2.0 H25
G65 P9832 (Probe on)
G65 P9810 X.5 Y-.5 Z.25 F100. (Protected Move to P1)
G65 P9820 Z.25 I6. J-.5 I6. J-.5 I.5 J-5. S1 (P2 TO P4)
G65 P9833 (Probe off)
G0 G90 Z2.0
G91 G28 Z0
G103 ( Activate Look Ahead )
M30
On the p9820 line I'm not sure what my Z should be.....the Z.25 will locate the probe .25 above the previous Z0
Am I in the ball park with this.
Just so we are on the same page. After probing the 4 locations in Z, I want the biggest Z # to become my G54 Z work offset #.
Thanks for any input
Mike
So when i ran the code i ended up getting a 1092 open probe alarm as soon as it reads G65 P9820 line
I tried to upload a pic but it errors out
File is small enough
I can email the pics if anyone has time to look
Thanks Mike
-
39 minutes ago, AHarrison1 said:
I may be wrong here but does the statement not have to read G103 P0 to cancel?
This is how it is for our DS30y. Although, in all honesty, I haven't tried it without the P0.
I hope this doesn't come across as too condescending... seems to be a common theme lately.
Nevermind, found the answer. It can be either/or
https://staging-diy.haascnc.com/g103-limit-block-look-ahead-group-00
Morning
Not condescending at all
-
On 4/26/2021 at 12:06 PM, crazy^millman said:
Get a hold of your local Mazak Dealer and ask them to send them to you. Easy Peasy.
@Colin Gilchrist @crazy^millman
2013 Haas VF4 with probing and tool setter
So finally got the batteries needed for Probe and Tool Setter. I got it all setup and working.
Today the weldment job showed up so I played around with the probing of the Z surface.
I had it probe the 4 corners in Z and input each corner to a Z work offset ( G55 thru G58 )
Then i picked my biggest Z # for my G54 work offset. ( This part done by me manually inputting the new Z #)
So I went thru this post and came up with this code to try tomorrow. ( also went thru the Inspection Plus on P9820 )
G20 G40 G80 G17
G103 P1 (Block Look Ahead)
T25 M6 ( Probe )
G90 G0 G54 X.5 Y-.5
G43 z2.0 H25
G65 P9832 (Probe on)
G65 P9810 X.5 Y-.5 Z.25 F100. (Protected Move to P1)
G65 P9820 Z.25 I6. J-.5 I6. J-.5 I.5 J-5. S1 (P2 TO P4)
G65 P9833 (Probe off)
G0 G90 Z2.0
G91 G28 Z0
G103 ( Activate Look Ahead )
M30
On the p9820 line I'm not sure what my Z should be.....the Z.25 will locate the probe .25 above the previous Z0
Am I in the ball park with this.
Just so we are on the same page. After probing the 4 locations in Z, I want the biggest Z # to become my G54 Z work offset #.
Thanks for any input
Mike
-
11 hours ago, Colin Gilchrist said:
I didn't mean my post as a slight against your skills, but just making sure you have all the information I can possibly help provide.
Knowledge is Power.
I have worked in several Union shops, and completely understand the mentality you are fighting. Nobody wants to rock the boat, or stop the gravy train. Why do a task in 5 minutes, when you can take a good hour?
Since you're already familiar with the machine and programming, check out Mark Terryberry and the Haas channel on YouTube. You'll find a lot of good tips, tricks, and demonstrations, especially on using the Renishaw Probe.
Hey Colin, I didn't take it that way...all good. Thought I should supply some info on me. I will do my best to go thru the inspection plus book. The Haas youtube channel is such a great service to us looking for answers via video. Always checking that page out.
-
 2
2
-
-
9 hours ago, Colin Gilchrist said:
Also, read this in your spare time:
(Try putting in an hour in the evenings before bed of light reading.)

You mentioned that you are not the one programming the machine. Depending on how much knowledge you have of being a Machine Operator, versus Programming knowledge, the Mill Workbook is also a good place to start. The workbook has machining and programming theory and knowledge, where the Operator's Manual kind of already assumes that you know how to program G-Code.
Morning
I'm totally familiar with g-code and can program
We are a union shop...
Machinists in one programmer in the other one...(
No one wants this tech to be used for the better.
It's been sitting in the drawer for a year +.
I'm very intrigued and interested in learning this.
I do have the inspection plus pdf printed off.
I'm very comfortable on our Haas . I'm sure there is stuff still to learn but i'll deal with that when needed
Also been machining 25 yrs and i mess around doing side jobs with Fusion 360.
So I have a good understanding
Obviously not as good as you all...;)
-
2 minutes ago, Colin Gilchrist said:
Ron just posted some links to previous threads here where we've talked about Productivity Plus.
It is a nice add-in to Mastercam, if you do a lot of Probing, and/or, you want to build custom Probing cycles, and use the Prod+ interface to write custom macro logic and add Sequence Blocks for program jumps (based on Probe results).
Yes I'm just going thru his links... To tell you the truth I'm even more confused ... LOL Also at work we have a designated programmer and he uses MC . No idea if his software has anything for custom probing cycles. What I'm doing at work is kind of all on my own with no support. We have a 2013 Haas VF4 with probe and setter. No one ever uses it and I've been the soul person running it for almost a year now. I think once I can get some of this figured and understand it, I may be able to find lots of places to use the probe other than work offsets.
-
4 hours ago, Colin Gilchrist said:
G65 P9820 X1. Y1. Z0. I20. J1. I20. J5. I1. J5.
That is using the Stock Allowance Cycle that James pointed out for you, and probes in 4 places:
X1. Y1. = P1
I20. J1. = P2 (@ X20. Y1.)
I20. J5. = P3 (@ X20. Y5.)
I1. J5. = P4 (@ X1. Y5.)
The 1st Point is given by XYZ
The 2nd Point is given by the first pair of "I and J Parameters".
The 3rd and 4th Point is given by the 2nd and 3rd pair of IJ Parameters.
The only thing I'm not sure of is this: Do you also need to include the "K Parameter", when describing the additional P2-P6 Points for this cycle? (I think the "K" values should just repeat whatever the "Z" parameter is, but I'm not 100% sure.)
I started to write that out today and when I went to try it, batteries dead in the probe...:( Now I need to wait till batteries come in.
1 hour ago, Colin Gilchrist said:I mean, it has it's place.
It also costs money (not insignificant money mind you), and requires training to use.
In this case, he needs 1 line of code to get the results he is looking for. (Not including Tool change, and startup lines, or retracting after probing.)
This is a perfect example of where both Custom Drill Cycles, and/or Manual Entry, are also great solutions.
Could you share this information...
.gif ":)")
-
I guess I should of left more information
Part is a weldment . The top surface needs to be faced. Just enough so it's a clean machined surface. I'd like to figure out how to do it with the probe.
( This macro stuff is completely new to me. )
Been messing around with #5221=-41.8508 (G54 X) as an example and have that all sorted out. So my X...Y...Z offsets are now populated via the macro.
So with this weldment I would like to probe the top surface (Z) in all 4 corners . Then have the lowest corner become my desired Z offset #.
Hopefully that makes more sense.
Thanks Mike
-
Great information here. Can anyone shed a direction to figure out how to probe 4 corners and have the lowest corner inputted into my desired Z work offset'
Thanks Mike
Probing Routine - Renishaw/Haas
in Industrial Forum
Posted
Sorry for the late response. And thanks for your help. It's greatly appreciated.
To understand correctly the U. In my above post with my probed P1 to P4 the biggest difference is P1 and P3 at 27 thou.
So if I had a U 0.02 that would have generated an alarm.
Yes I have a printed copy of Inspection Plus manual at work and a copy on my home PC. I need to read more and experiment.
We build subway and street cars for mass transit. We have a big SNK 5 face mill. When they machine the truck frames they always have so many issues and some failed inspections and then the truck needs to be reloaded and fixed. Pain in the xxxx. The SNK has a spindle probe and it has never been utilized. So hopefully when we get another contract of truck frames the probe can be used to make life a weeeeee bit easier. The other problem is, no one is experienced enough to program the probe. The shop programmer has no idea. What software would be used in conjunction with MasterCam. I think work would benefit from bringing in an outside person skilled in the area of programming the probe to do all the checks needed to make sure the truck frame doesn't fail inspections after it's removed from the machine.
Mike