


SteveReid
-
Posts
9 -
Joined
-
Last visited
Content Type
Profiles
Forums
Downloads
Store
eMastercam Wiki
Blogs
Gallery
Events
Everything posted by SteveReid
-
Hi Folks, I am using Mastercam 2019, and having a few issues with the FBM Drill; I want to Spot Drill and Drill holes, our Spot Drill has no Thru-spindle coolant but I want to use thru-spindle coolant on the Drill, I dont seem to be able to turn on the thru-spindle coolant for one tool (Drill) only, when I turn on in the Drill parameter page of the Drilling Cycle when I regenerate, it turns off (ingore) the thru Spindle coolant. I cant find how to change the Drilling Cycle, I want to use a "universal pecking Cycle" but again every time i regenerate the FBM it reverts back to a "universal Drilling Cycle" Appreciate any help!!
-
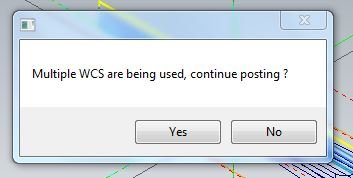
Hi jlw, Many thanks for getting back to me, See attached a copy of my Mastercam 2017 file. My issue is Stock in the NC Program (Heidenhein TNC620) uses the setup 1 Stock information and is not "flipped" upside-down. When posting Setup 2 Toolpaths, I get the Using Multiple Toolpaths message, I accept this!! When posting I have posted Setup 1 with "TOP Plane" Active (WCS) and Setup 2 with "SETUP 2" Plane active. I have not run on machine yet but looking at the coordinates in the NC Code it looks OK, Just that the details for the Stock in the NC files are not correct and therefore graphics on machine control are wrong. Thanks again for your help!! Ex-04 Setup 1 + Setup 2.ZIP Ex-04 Setup 1.H Ex-04 Setup 2.H


-
Hi there, i have created a 3-axis mill program including 2 setups/toolpath groups, to machine the top and bottom of the part. My plan is to post the toolpath groups separately, 1 to machine top and one to machine the bottom of the part. All looks great in mastercam, but when I test run on machine graphics the stock is incorrect for the bottom, I have tried creating a stock model for the bottom. No luck. Is my only option to create a second machine group??
-
Many thanks JParis & C^Millman for responding so propmtly!!
-
Hi, I am new to this forum, so hope someone can help me! Is there any way of checking for a collision when Tapping (M5), I have just noticed that when running verification with collision detection active, Mastercam 2017 is NOT detecting a collision when the hole is not Drilled with tapping size (dia 4.2mm) I have tried modifying the minor diameter of the tap from 0 to 4,2 with no success. Many thanks
-
Hi, yes when I do this the Start point is greyed out, I am using X6, could it be to do with the Inventor file, I just opened it directly into Mastercam, would i be better to import in a different format?? Thanks for your help!!
-
I chained a Solid (an Autodesk Inventor file), I am just trying to run a finish pass around 2 cylindrical bosses in the 3-d model. Thanks again!! Stevo!!
-
Hi Brendan, Many thanks for your help!! I have just tried your suggestion, but the Start Point is greyed out. Thanks Stevo
-
Hi, I have imported a solid model from inventor, I want to machine a contour around two circles (Cylindrical Boss) I need to change the "start point" to prevent the lead-in and lead-out crashing. The start point option is not available (greyed out) in the chaining dialog box. I have also tried un-checking the "mid-point option in the lead in/out dialog box.. I can reverse the chain which flips the lead in/out 180 degrees but changes the milling direction to "conventional". Any help much appreciated!! Stevo!!