Mark Reuszer
-
Posts
12 -
Joined
-
Last visited
Content Type
Profiles
Forums
Downloads
Store
eMastercam Wiki
Blogs
Gallery
Events
Everything posted by Mark Reuszer
-
measuring spindle runout
Mark Reuszer replied to kentucky1303's topic in Machining, Tools, Cutting & Probing
Our confusions are that the tool wobbles on both sides, so my brain tells me to double the runout and add it to the tool diameter. -
measuring spindle runout
Mark Reuszer replied to kentucky1303's topic in Machining, Tools, Cutting & Probing
The 0.005 was just an example number. I'll clarify the question. If my tool runout is 0.0001" on a 1/2" ball. Do I call my tool a 0.5001 or a 0.5002? -
I thought they replaced the coons with the new net surface, but a little digging and I found it. CoonsSurf C-Hook CoonsSurf C-Hook Use this C-Hook to create a surface from a grid of curves, called a Coons surface. The curves should intersect at corners to produce 4-sided patches. Each side of each patch is a separate curve that needs to be chained separately. Start the C-Hook by selecting Settings, Run user application, CoonsSurf.DLL. Mastercam prompts you to enter the number of patches to use in the 'along' direction. Enter the number of patches to use in the 'across' direction. Mastercam displays the Chaining dialog box so that you can select the curves. Mastercam automatically calculates how many curves in each direction you need to select, based on the number of patches. Follow the prompts to select the "along" and "across" curves. Click OK when the chaining is completed. Mastercam displays a dialog box where you can select the blending method it will use to construct the surface. Select the blending method from the list. Click Apply to preview the surface. Click OK to close the C-Hook, or choose the Select button to select a new set of curves for a new surface.
-
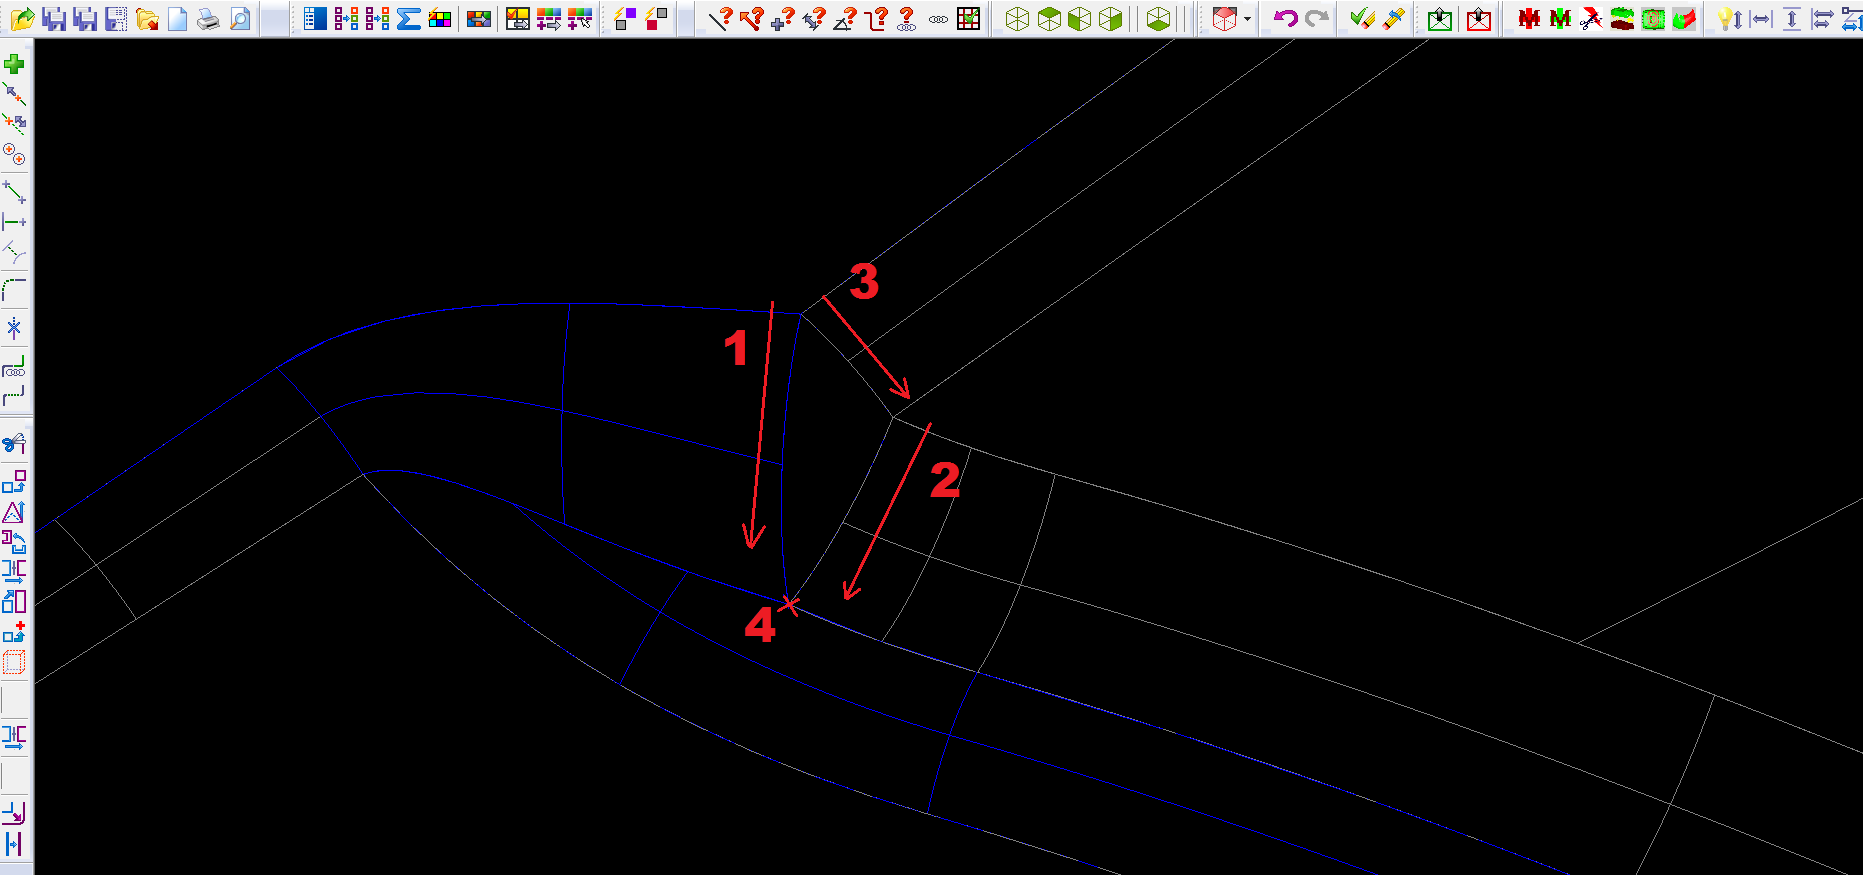
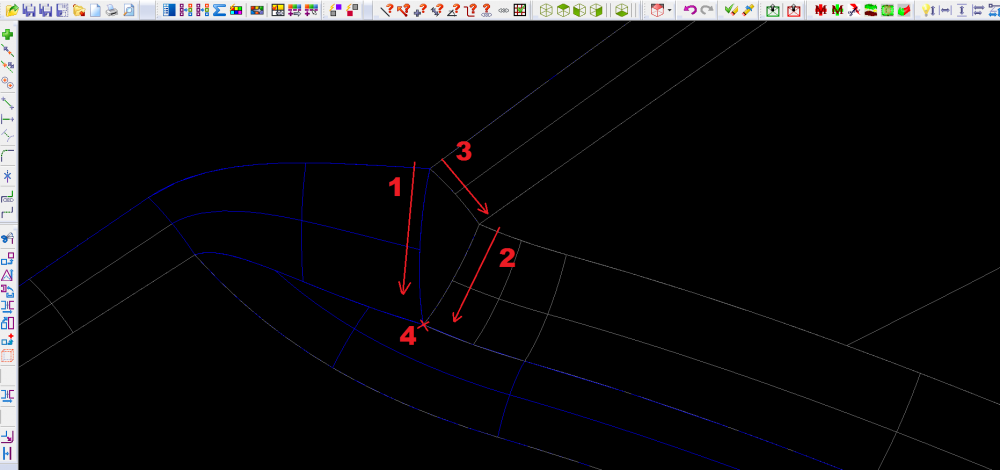
Can someone explain the proper chain order for creating a net surface using 3 splines and a point. Every combination I try fails, out of order. This image shows how I use to do it in version 9. What did they change, why doesn't this work anymore?
-
We have x4 x8 x9 and 2018, we just upgraded I'm still on x4 but learning 2018
-
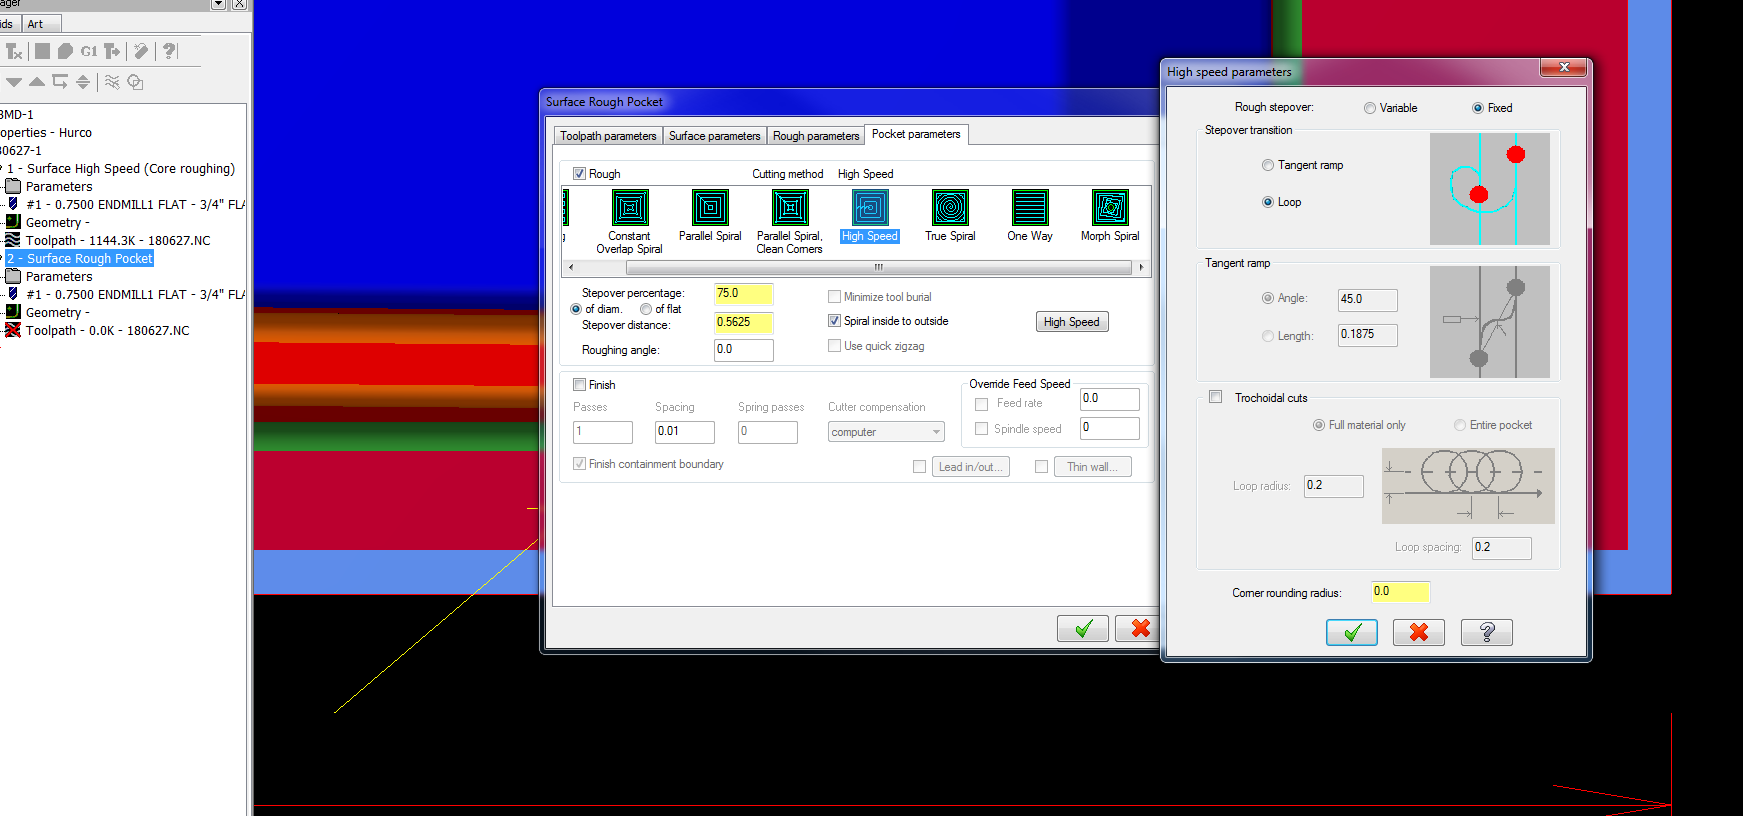
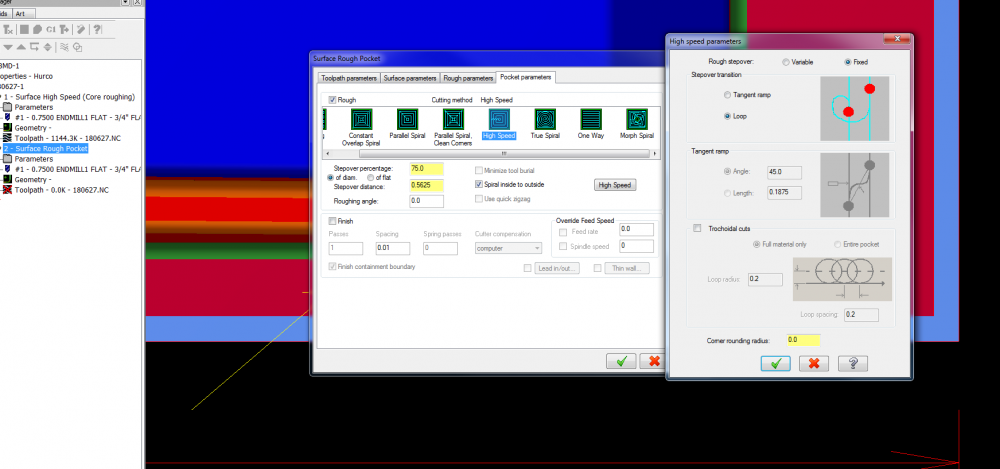
This option is available under a regular surface rough pocket.
-
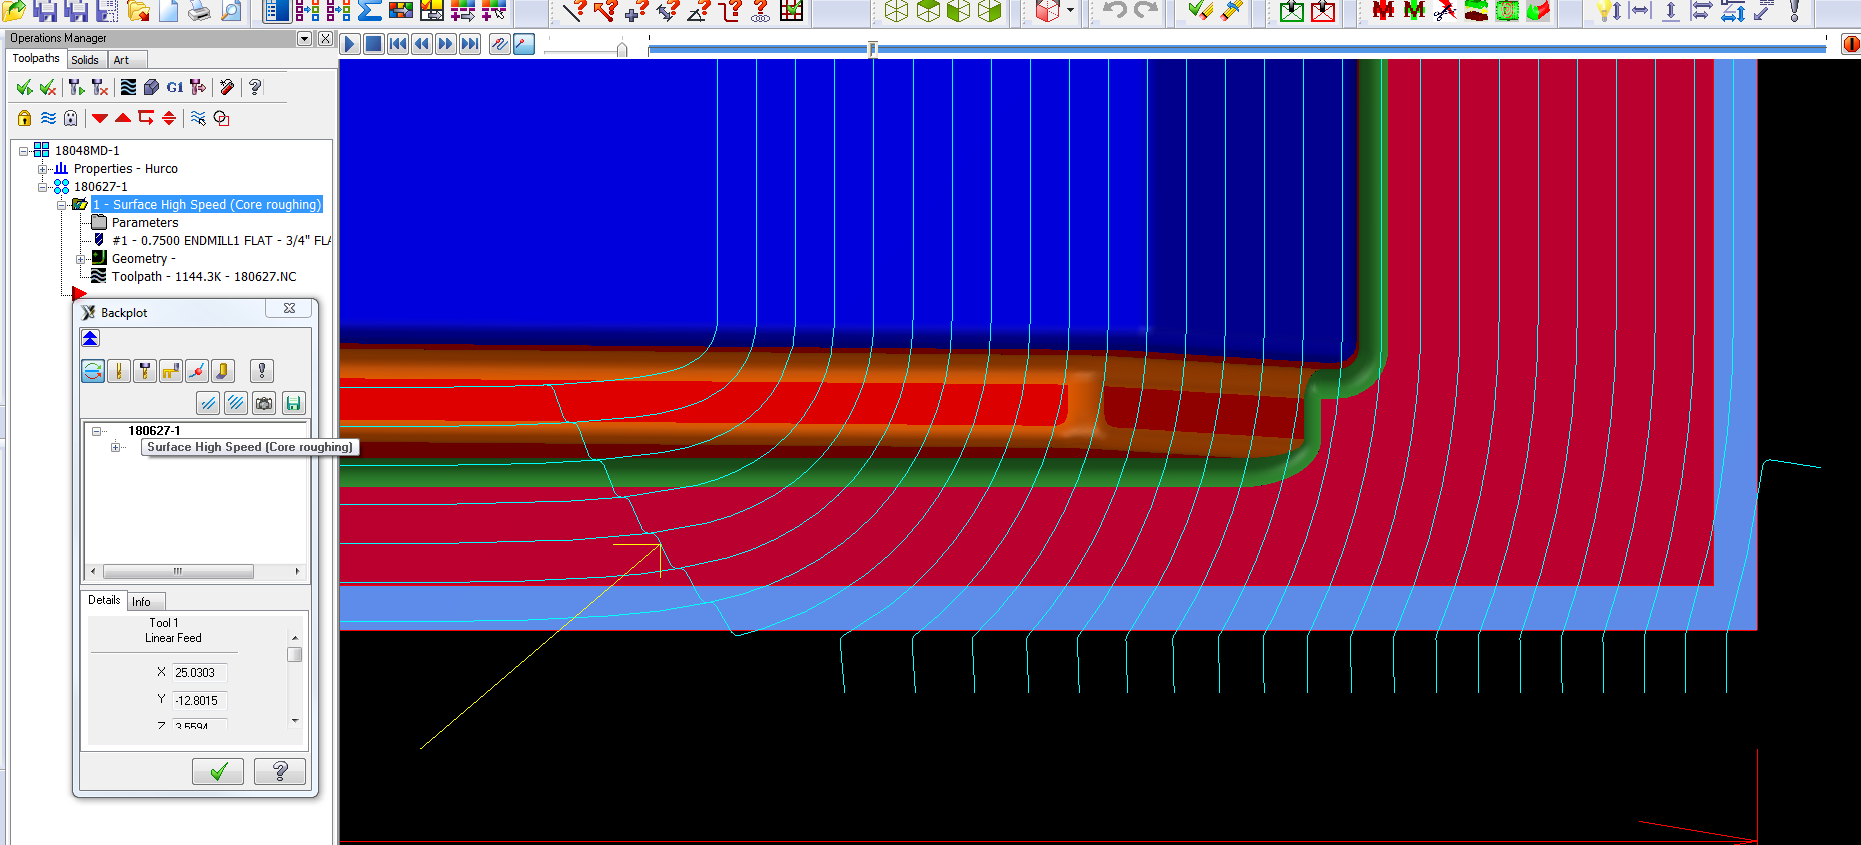
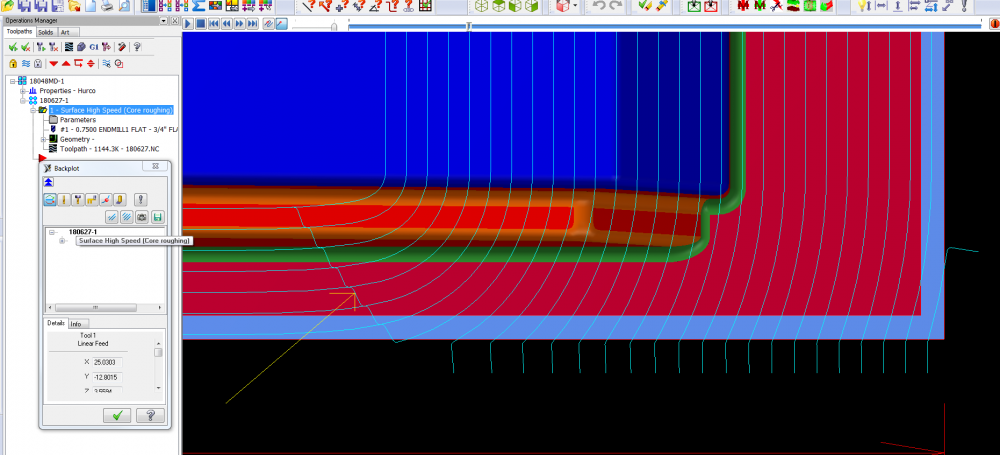
Hello, I'm writing a Surface High Speed (Core Roughing) program and wondering if there is a way to adjust the angle or radius of the path highlighted by the yellow arrow. Thanks Mark
-
Tool library tool dia. and length offset
Mark Reuszer replied to Mark Reuszer's topic in Industrial Forum
That fixed it! Thank you -
Tool library tool dia. and length offset
Mark Reuszer replied to Mark Reuszer's topic in Industrial Forum
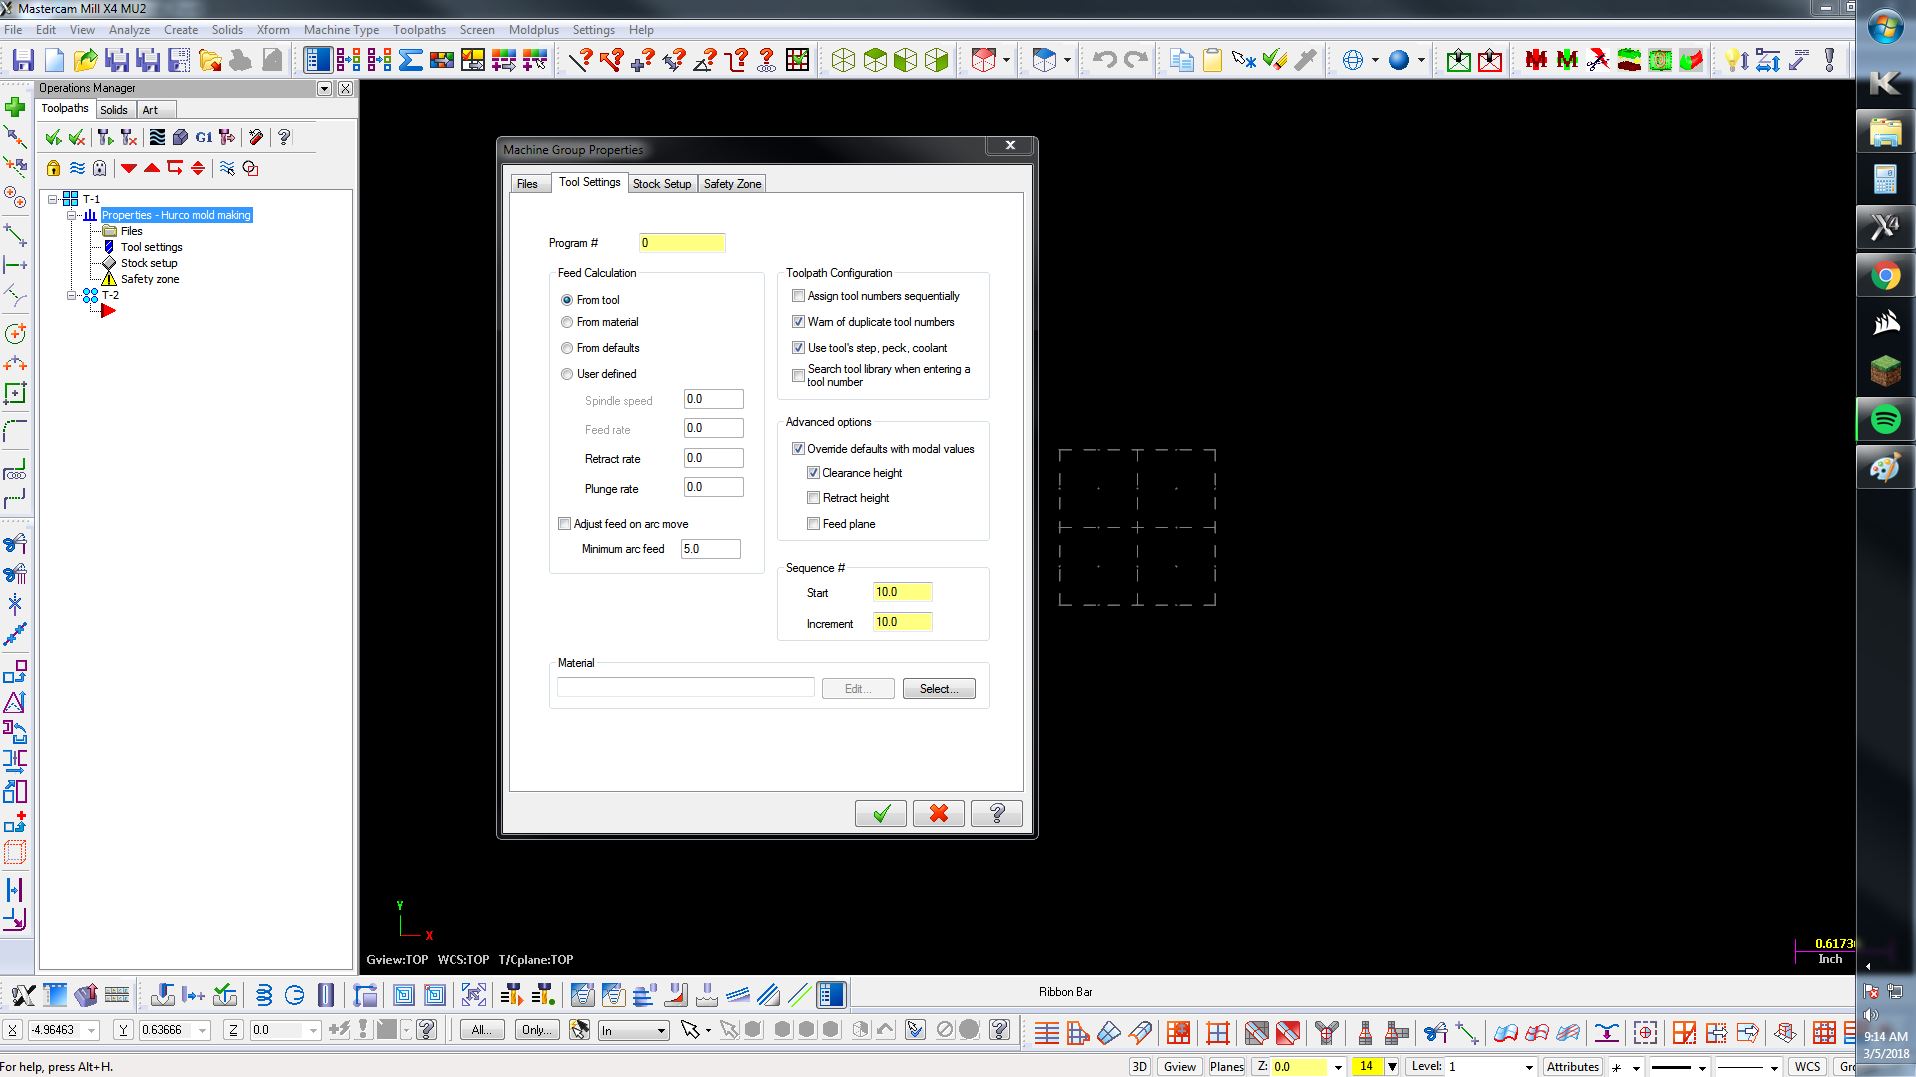
Everything's working I just need some help figuring out how to keep the "assign tool numbers sequentially" check box to stay ticked. Mastercam remembers all the other boxes I check on that page, but every time I start a new file I have to check that box again. Thanks for the help Mark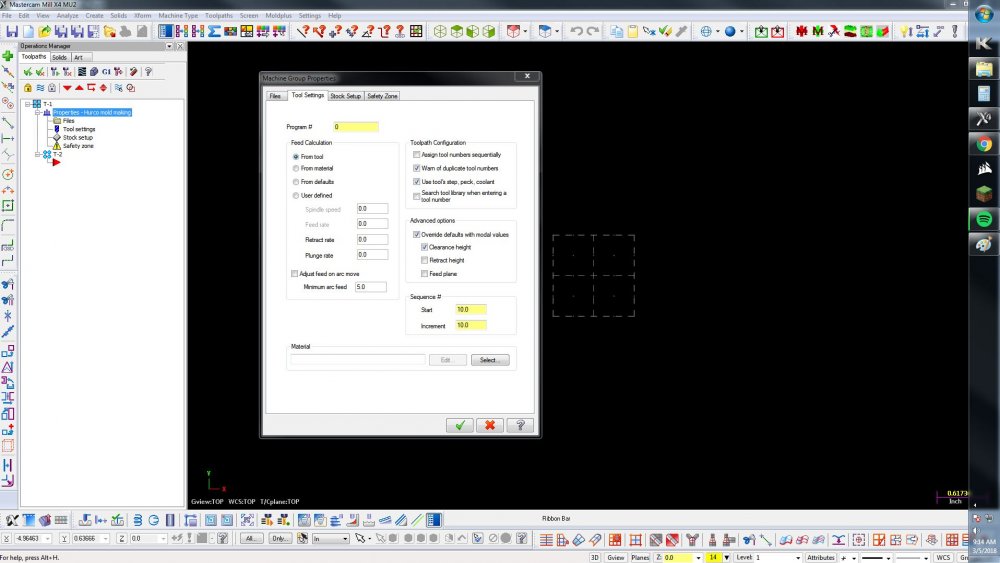
-
Tool library tool dia. and length offset
Mark Reuszer replied to Mark Reuszer's topic in Industrial Forum
Thanks guys, appreciate the quick help! -
Tool library tool dia. and length offset
Mark Reuszer replied to Mark Reuszer's topic in Industrial Forum
I know... we've been on V9 for the last 8 years I've been here. The software did everything we needed it to so... -
Hello, We've just upgraded to X4 and I've been creating some tool libraries. The problem I'm running into is that when I bring a tool in it will number the tool number sequentially but the length and diameter offsets don't get updated. Say I pull tool 3 from my ball endmill library I want to use as tool 1, it comes in as tool one as long as it's the first one I import but the length and diameter offsets still read tool 3. Thanks for any help Mark