


progaseng
-
Posts
24 -
Joined
-
Last visited
Content Type
Profiles
Forums
Downloads
Store
eMastercam Wiki
Blogs
Gallery
Events
Everything posted by progaseng
-
2018 4 axis a simple round part Machine on 3 sides 90 deg rotation
progaseng replied to progaseng's topic in Industrial Forum
Perhaps someone can give me a sample of how each works as I’m unsure ? Thx -
2018 4 axis a simple round part Machine on 3 sides 90 deg rotation
progaseng replied to progaseng's topic in Industrial Forum
I figured it out I had to turn rotary to off and then put a zero in for work offset works like a charm now thx all for your help . Ps why do I have to put a zero in for each tool plane offset ? Default is -1 -
2018 4 axis a simple round part Machine on 3 sides 90 deg rotation
progaseng replied to progaseng's topic in Industrial Forum
Yes it’s 4th axis enabled as I was able to do engraving etc . It’s a simple part could be any part where u rotate 90 so front back bottom top etc I have mr datum sat centerline of part left side with axis on right side as typical thx -
I've been struggling all day with this I'm lost haas 4 axis vf2 I can get the top tool plane no worries and the second but it won't rotate the part 90 deg I've tried all I can do in planes managers I know it's a simple solution can you guys pls help thanks so much .
-
vf2 and hrt210 setup 2018 mcam I'm backwards
progaseng replied to progaseng's topic in Industrial Forum
I figured it out I turned setting 48 on which is A axis mirror on the haas mill and now it’s right -
vf2 and hrt210 setup 2018 mcam I'm backwards
progaseng replied to progaseng's topic in Industrial Forum
I can buy another hrt210 brush model today a buddy of mine offered it to me for a decent price does anyone need one ? -
vf2 and hrt210 setup 2018 mcam I'm backwards
progaseng replied to progaseng's topic in Industrial Forum
I'm using the generic 4 axis haas post and machine definition -
So a simple engraving of letters on the round part with the 210 on right side of table the verify tool path is right but when I send to machine its backwards if I make the tool path on ccw of table it then is right at the machine . But I think it's rotating the part from the zero I set on the G54 on A axis . Is this a post adjustment? As I notice in the verify function the rotary is on left side of table , with that being the case how can I change it to right side of the table ? I use axis substitute sub Y axis and ccw to make right at machine but the verify is wrong on mcam
-
Yes thanks I will try that as right now top of stock is set to .75 and I did have keep tool down checked and my material I want to remove I had to do a stock to leave -.05 Is there any other methods I should try thanks so much for the help . That is the exact type of tool I'm looking for thanks so much
-
I got it figured out So I'm doing a contour toolpath and transforming it etc.. with a lead in and out it works ok but here is what I want to change The lead in and out work fine but I need it to rapid back to start point I'm doing two passes -.025" apart on Y depth it starts at z0 and Y.-.75 The travel is along the X axis . but it feeds back to start point at same as cutting speed when I try to change the feeds on lead in and out I can but they only do that part I need a rapid move back in x . I'm using a seco cutter with carbide inserts that was originally designed as a chamfer tool I set the center of tool on z0 with part rotated on a solid around z.75 so a 1.5" solid bar . I ran the program everything is working I did the 360/31 for the deg of rotation etc... I would just like it to rapid back to start point as I would like to make 3 or more passes before part rotates Ps a custom cutter would be nice but I have done this with this tool long ago and it does work I did it on my old anilam mill . Any suggestions for a custom cutter most splines are a 90 deg total angle . approx .05" deep .
-
I'm able to draw the part no worries in solids and I'm able to do one groove at z0 starting at z0 and y-.75 I drew 31 splines etc... I did my first tool path by stock to leave on walls of -.05 with multiple depth cuts as material very hard etc... I did this before with a dividing head buy now I have a haas with a 4th axis I'm not sure how to program this so I can rotate the part and recut etc . I'm sure many of you have done this any help appreciated thanks . I can do a drill tool path no worries as easy enough to pick the entities and do an axis substitution and do an unroll with a diameter of 1.5" . Do I have to pick each spline individually or can I do a 3d window ? Thanks for your time . Ps I've searched online for videos if you know of any pls send me a link thanks.
-
It works awesome I hope my experience I’ve had can help someone in future thx for all the help cheers
-
It was the adapter cord USB to 9 pin problem solved thx
-
I think it’s in the null modem cable or USB adapter as what I post isn’t what happens at machine , I sent the nc files to haas they ran with no issues ps I honestly thought there would be more help on this forum
-
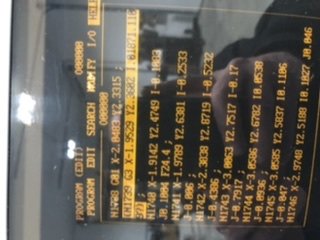
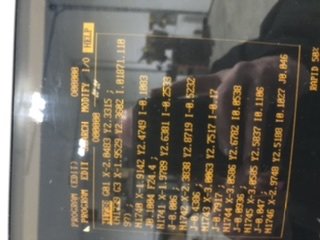
I can see it’s getting a weird numbers yet on post file it isn’t
-
I watched a video online made sure I did it best I could why is this happening ? .5” diameter tool contour hi speed pls help
-
Ps I don’t have the hsm option on the haas would this cause the problem or is there a setting or parameter in the machine that needs to be changed ?
-
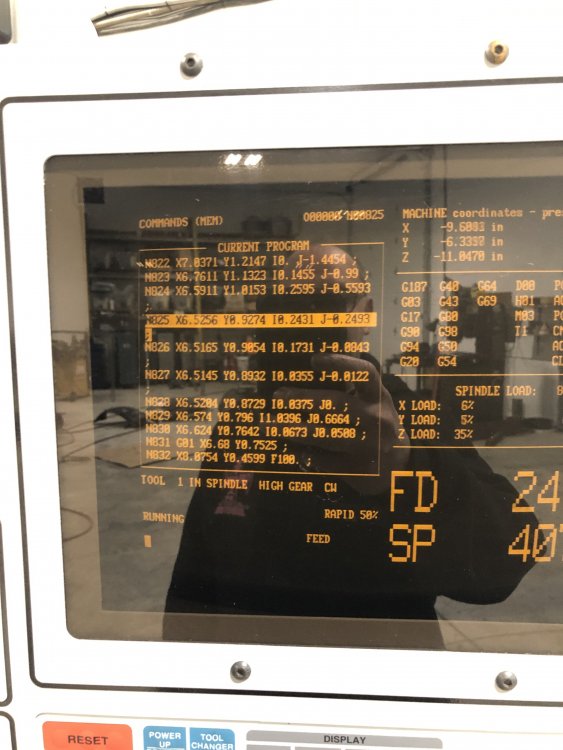
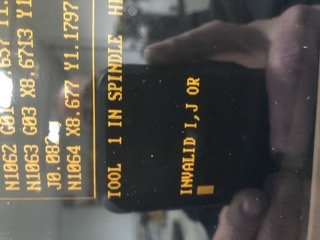
On line 1060 it errored out this tool path was a peel mill from both sides with a broken arc in centre . We also tried a dynamic mill and same results errored out . I called haas they tried to help and helped me do a program with same result it errored out Where it errored out

-
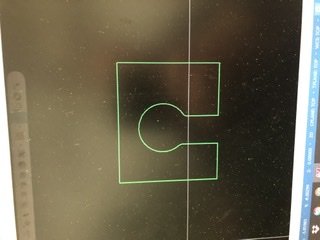
They actually both programmed it and sent to the machine , it’s an open pocket 1” wide using 3/8 endmill I just wanna cut the slot . I know I can do easily enough with a regular open pocket , but I wanted to try the hi speed .
-
I’m new to this program I’ve had two experienced guys help me but they can’t figure it out either . Haas vf2 2001 model keeps getting errors trying to add mote pics but keep getting a 200 error ???
-
May I ask how I fix it pls thanks
-
9.1 MPfan used on Haas vf2 2000 model I've got most of the bugs worked out etc... but I Need tool numbers and length offsets to correlate together as I set the Z on the Mill I have to manually edit the program and it keeps reverting back to numbers in the tool list I get an ht error on the Mill copied this part of my post but not sure if I have the right area or if this modification will work etc... thanks for your time # Toolchange / NC output Variable Formats # -------------------------------------------------------------------------- fmt T 4 t #Tool No fmt T 4 first_tool #First Tool Used fmt T 4 next_tool #Next Tool Used fmt D 4 tloffno #Diameter Offset No fmt H 4 tlngno #Length Offset No fmt G 4 g_wcs #WCS G address fmt P 4 p_wcs #WCS P address fmt S 4 speed #Spindle Speed fmt M 4 gear #Gear range
-
301. Work Coordinates [0-1=G92, 2=G54's] (mi1)? 2 302. Absolute or Incremental [0=ABS, 1=INC] (mi2)? 0 303. Reference Return [0=G28, 1=G30] (mi3)? 0 304. Default miscellaneous integer variable 4 (mi4)? 0 305. Default miscellaneous integer variable 5 (mi5)? 0 306. Default miscellaneous integer variable 6 (mi6)? 0 307. Default miscellaneous integer variable 7 (mi7)? 0 308. Default miscellaneous integer variable 8 (mi8)? 0 309. Default miscellaneous integer variable 9 (mi9)? 0 310. Default miscellaneous integer variable 10 (mi10)? 0 It looks like it was set on number 2 I know the mills home position isn't in the center of table it's x and y in the furthest most end of travels in both in the Positive direction so any advice on what I need to change to make the haas vf2 work again thx for the help . I want it to not use the g92 but it comes up in the program yet when looking here it should be turned off but I'm not the smartest when it comes to this stuff . I was able to turn the A axis off
-
I just got a new to me 2000 vf2 I'm using the generic mpfan post and it works I did have to edit to remove the A axis I figured that out but it outputs a G92 code and I don't know how to edit that out as it shows in the questions that it is set to number 2 Can someone help me pls thanks so much . I have to manually edit at machine as of now to get rid of .
