


DCOPE17
-
Posts
121 -
Joined
-
Last visited
Content Type
Profiles
Forums
Downloads
Store
eMastercam Wiki
Blogs
Gallery
Events
Everything posted by DCOPE17
-
………………………..
-
Never mind, Its the hide level properties button in the toolbar... don't know why it says hide when it was already hidden. I was afraid to hit it thinking I might lose more things. Anyway, go on back to what you were doing. Thanks. Dan
-
Both my co-worker and I lost the box at the bottom of the levels list. ( two different computers ) I did a search on how to get it back but apparently the names I'm giving it is not the actual name for it and am having no luck. Anyone know how to get that back? Thanks for the help. Dan
-
Why won't this dynamic mill toolpath regenerate?
DCOPE17 replied to DCOPE17's topic in Industrial Forum
Okay, I just figured it out, I chained the area I want to machine, not the total part. Then chained the avoidance and it regenerates and works. Thanks for the help. really I just needed to know why it didn't regenerate. since you told me to change my chaining, it then regenerated and I was able to make changes and see what happens. Thanks. EDIT: nice drawings, thanks for the great visual there too. -
Why won't this dynamic mill toolpath regenerate?
DCOPE17 replied to DCOPE17's topic in Industrial Forum
Peel Mill will have a lot of back cutting, and I took off the avoidance and just chained the machining area but it mill off most of the area I want to avoid. I can choose to "stay inside" but then I plunge in the part and don't clean out the corners. -
So, I have this toolpath that I have used a few times. I'm use to "core mill" from X4. Anyway, I have successfully used it several times but this is the second time I have had to delete it and use a different toolpath because I hit regenerate and it does nothing. I don't know if its my computer of what since I don't get any error message or anything from MCam. Anyone have an idea? The part is stepped down 1/8" from the left over to the square on the right which is left tall. FORUM.mcam
-
Haha, yep, there it is. They are hiding things from us? Thanks for that tips, this will solve a lot of my corner cleaning difficulties in the future.
-
That project toolpath worked great, however, I only have the option of High Speed Project and it is very different and actually couldn't get it to work. I exported your operation and imported into mine and just selected the surfaces and it worked.
-
Thanks for all the help everyone, this projected toolpath is new to me and if I wasn't out of town all weekend, I would have done some researching on it. I do have MCam Mill 3D hasp. ( we have 2 licenses one 2D and one 3D ) I uploaded a simplified file, I had trouble with the .IGS file and had to do a little cleanup of it to get things started. Hopefully that doesn't cause you any problems giving me an example of the projected surfacing toolpath. Thanks again everyone. Dan FORUM FILE.mcam
-
So I try surface project and I get a calculation error, contact my mastercam reseller. DOH, is it my license or am I doing something wrong?
-
I'll give that a shot too, I didn't get the swept surface exact through the part, I had about .005 variations.
-
Okay, I swept an 1/8 radius around that transition and got the surface, then did a flowline toolpath and it cuts it twice, but whatever, It does it. thanks for the help.
-
I'll give that a shot.
-
I did an edit and put in a pic... here it is again. OOPS, I did link the photo but went back to MCam while waiting for it to upload, I never came back and saved it.
-
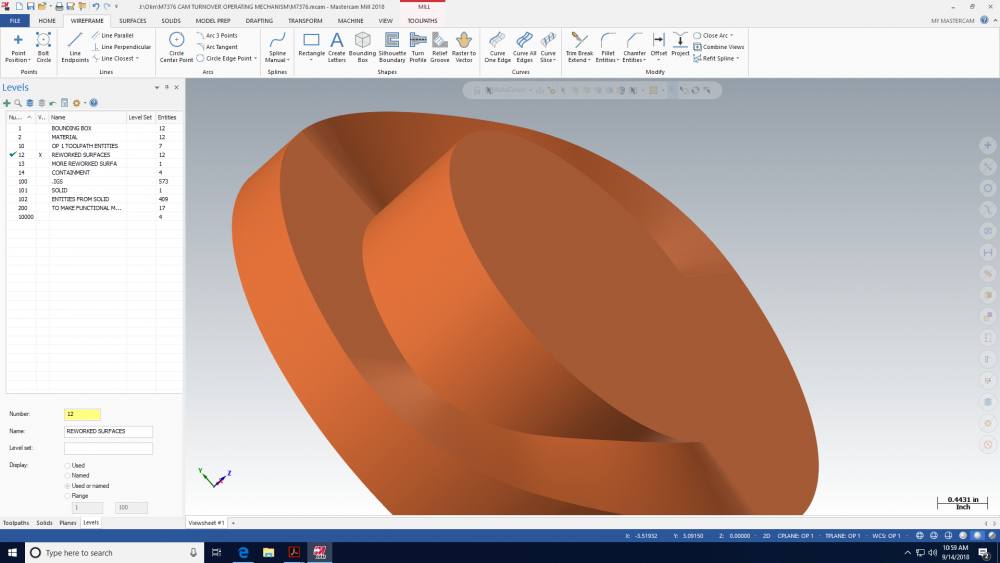
Trying to make a clean cut through a corner on a weird shape. As the surface goes around a diameter, it drops down then back up, so when the part rotates, its pumping something up and down. Anyway, I cannot get a clean cut to run through that corner. Any tips or any other ideas on getting that to clean that corner would be appreciated. Dan
-
First real part using 2018, gonna have a few questions today.
DCOPE17 replied to DCOPE17's topic in Industrial Forum
I POSTED IT AND IT RAN FINE, JUST THE BACKPLOT SHOWS THE WEIRD MOVE. ( sorry for yelling ) The retract is .05 Incremental so R should be -.45 -
First real part using 2018, gonna have a few questions today.
DCOPE17 replied to DCOPE17's topic in Industrial Forum
ALL HOLES WERE PROJECTED OFF THE MODEL TO .375 so all are at the same height. I have run MasterCam for the last 20 years and only see this happen when you accidentally put in a +.5 instead of -.5. But this only does it to the first hole. -
First real part using 2018, gonna have a few questions today.
DCOPE17 replied to DCOPE17's topic in Industrial Forum
Okay, next question... Drilling holes, Clearance ABS .25 Retract INC .05 Top of stock ABS -.5 Depth ABS -.56 Should render a toolpath starting at .25, Rapid down to -.45 and drill from there to -.56 If I am correct... why does the first hole start at .25, then up to .95 and drill down from there? all holes after the first hole are correct. I have not gone in and modified anything with each hole using "Change at Point " which I sometimes do. I posted the G-code and it looks correct, as in it's not going up to .95 and drilling from there. -
First real part using 2018, gonna have a few questions today.
DCOPE17 replied to DCOPE17's topic in Industrial Forum
One was a bit obvious, the other, not so much. Thanks for the help Dan -
First one today is... How do I use my model as my stock in verify? Also, using area rough, I see no spot to put in how much stock I want to leave for finishing, any idea where that info is put in? Thanks everyone. Dan
-
Yep, that was it. I toggled that earlier but guess it went back when selecting Dynamic Mill Thanks everyone, my first day at my new job is looking pretty good. Dan
-
I got it working, sort of. It pockets between the material border and the part... but not exactly like core mill where it starts outside of the material and completely removes all excess material with the remaining finish material in the operation.
-
Had to use x4 for some time now and can't remember what toolpath I need to be like "core mill" where you define 2 chains, the larger chain is the material and the smaller chain is the part and it does not cut air, only material. What is the 2018 equivalent to that? Thanks everyone. Dan
-
Mirroring Toolpaths but not getting correct numbers
DCOPE17 replied to DCOPE17's topic in Industrial Forum
My mirrored toolpaths worked with the fixture off set modification. I think I'll side with you and and just copy all the toolpaths and rechain to the the mirrored geometry. Was a bit nerve wracking doing it the "easy" way. Thanks for the advice everyone. -
Mirroring Toolpaths but not getting correct numbers
DCOPE17 replied to DCOPE17's topic in Industrial Forum
Thanks for the help. I figured it might be an odd one to solve, Since I already have the 20.1724 adjustment to my FO, I'll just keep running it as is and just finish the part. I guess I have never had this problem since all other parts I have mirrored all ran in one setup with one FO so it just mirrored and off I went. Thanks again Dan

