


NOTW Programmer
-
Posts
469 -
Joined
-
Last visited
Content Type
Profiles
Forums
Downloads
Store
eMastercam Wiki
Blogs
Gallery
Events
Posts posted by NOTW Programmer
-
-
Are the holes and and flange mating faces finished prior to this op?
Yes they are, I milled them looking down the axis of the big hole. I used a tilting table and pins to index to the right angles. I was able to machine most of the back surfaces with a ground sidemill. Clearance impedes this for the surface shown. Sorry I forgot to mention the file is in the X6 files folder; can we search the FTP site by filename ?
-
See the uploaded MANIFOLD.MCX file on the FTP.
Regards,
GM
-
See additional images.


No the tool gouges the outside wall of the tubes. Will setting them as check surface make the tool tilt away ?
-
Which toolpath, any other suggestions ? I can only rotate on A, off the center of the flange on the right side. I do not have 5-axis !
-
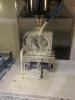
Hi Guys,
Attached is the pic of a manifold surface I am trying to finish on a 4th axis rotary, this due to tool clearance issues from the top side. I have created a plane at a random angle but get collisions against the tubes, I rotate the WCS and clear one tube but hit the other. I have seen toolpath that are pivoted from a point, does anyone here know how to apply that on this part. I want the tool to stay at a fixed point and rotate the A axis in order to avoid the collision.
Regards,
Greyman !

-
Rather than looking for a parameter for the C axis brake have you tried looking at the MCode for locking it? M11 vs M10, M76 vs M77, M77 vs M76, what codes are used for this function on your control. What machine is this on ?
-
Under config settings, then screen, then viewsheets, then Automatic restore bookmark settings. Turn this off, and all my problems solved..
dOES tHIS sTOP tHE nEW lEVELS fROM aPPEARING oN oTHER vIEWSHEETS ?
-
You should try right click->create new tool->edit diameter. Its a workaround !
-
That doesn't work "seed file" for those of us making various OPs files, my OPs vary and the viewsheets are hardly the same.
-
I also use G85 bore in/bore out, Thats pretty much what you want on a tight tolerance hole, I've used G81 when I got open tolerance.
-
Verisurf Tools for Mastercam X6 is free to use.

Here is the download link to Verisurf tools for X6.
Install - Verisurf Tools for Mastercam X6
Here is a video about What's New in Verisurf Tools for Mastercam X6
Learn more about Verisurf in 60 seconds +/-.002 seconds
My gift to all Mastercam X6 users.

More to come in X7

Ernie
Can I get the link to 64bit version of the utility. Thanks !
-
So how did this cut ? Did the parameters work ?got post tweeked and now those g values show up in program.will see how it cuts.
thanx to all for the help
-
Best you can do is perhaps right click on the operations manager and sort by tool #. That will get you pretty close to what you want.
-
I am running X5 and it works, so that may be the difference. I have my main report and subreports located in a folder together on a network drive, but my SSM.xml file is located in the default directory. Whether or not this setup works in X6 I can not comfirm, but it might just be a fault with X6. For my setup i think so long as the subreports are in the same directory as the main report I'm all apples. Let me know if this still doesn't work. I will hopefully go to X6 come the new year and it will be disappointing if this functionality is not there! Might just have to wait for X7 like CNC said.
I run this off the network too Chris, I copied the entire Reports folder to the Network location where all my libraries are. It works flawlessly, worked in X4, X5, and X6!
-
I get tools list and picture from another job. I must have saved it has a default. Dont know how aint that smart. ;o) come om you gurus whats the prob. Scratching my head
Were you editing the report, or did this happen all of the sudden.
-
You just missed our FREE webinar last wed showing how to set this up on a trunion style machine.. we will be posting this soon . this will give you some Ideas of setting 3+2 setup.
You mean the video link, right Jay? I missed this one bacause of the workload and would like to take a peek.
-
Sent you a PM. Thanks !
^^ 1 & 3 are probably the worst combination ! jeje !
-
These are just ideas. You don't have to use a facing toolpath to face a part. You could even use a pocket or a Point to Point toolpath to achieve what you want.There is more than one way to skin a bullfrog
.gif)
HTH
You eat bullfrogs ? Je je =/
-
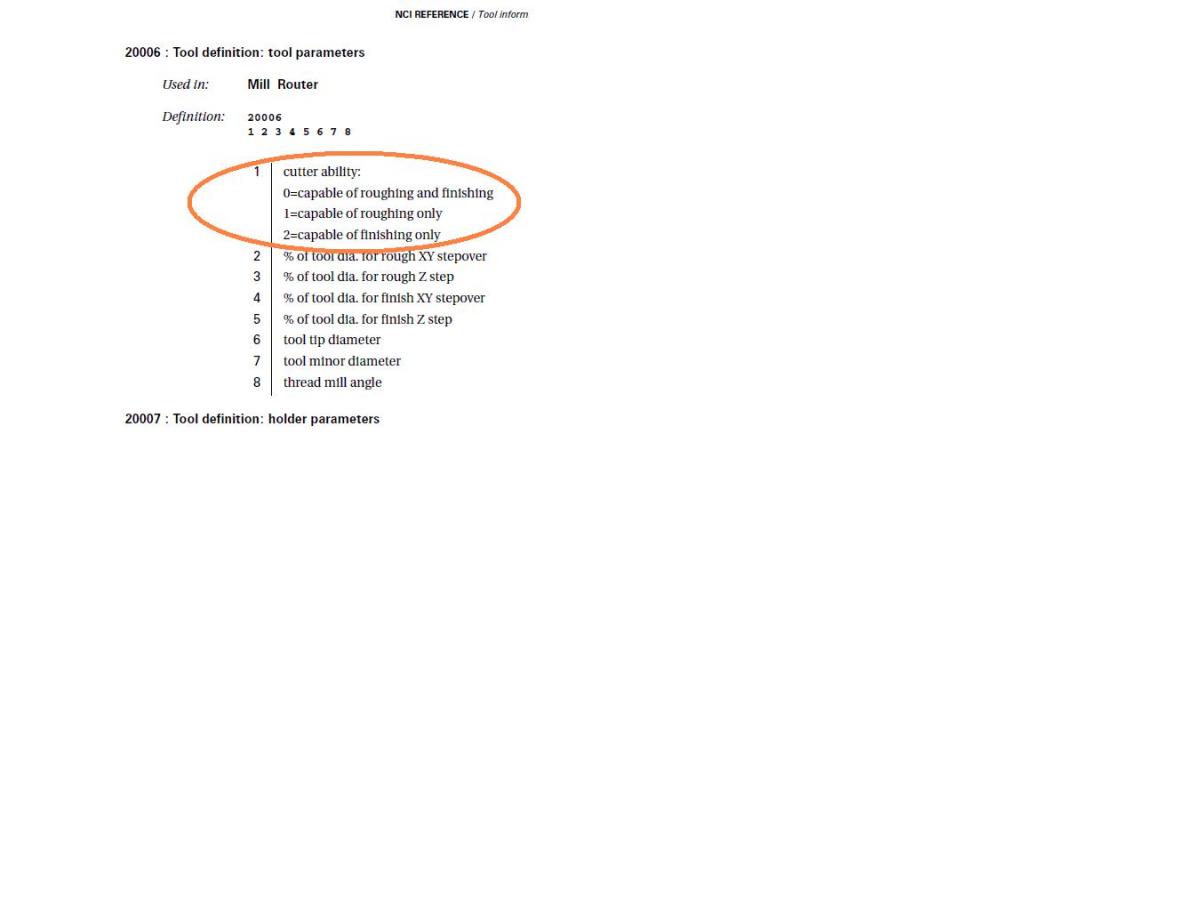
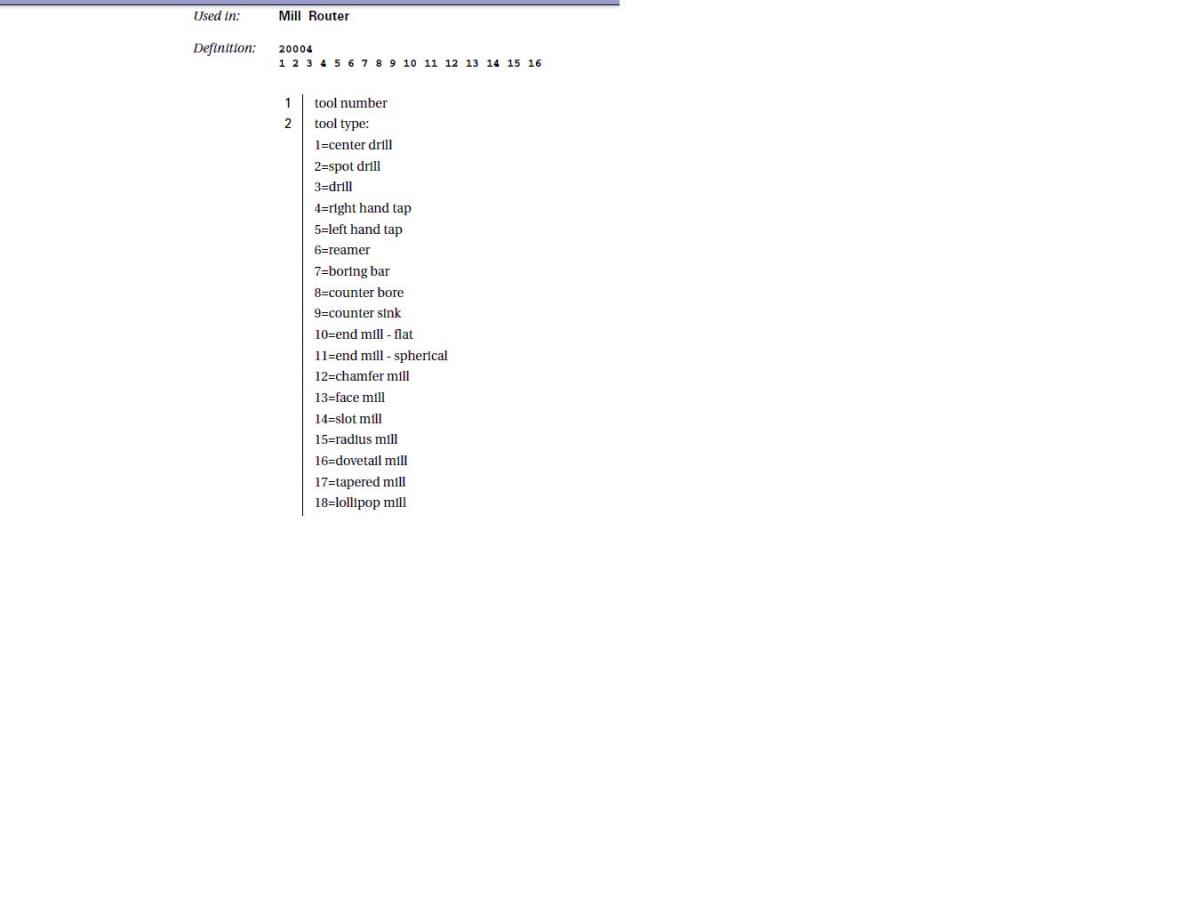
You have the ability in the tool definition to tell mcam (and your post if you pull the parameter) if the tool is for roughing, finishing, or both.
You could also pull the parameter for the type of tool (i.e. drill, tap, face mill) and use it in the post for whatever you want....

Is this the X6 parameter reference, I tried getting it from the Reseller but no good; then again they always take for ever to answer anything.
-
No there is no documentation. It is pretty straightforward You just need to set up your directories. One points to the tool folder where your Holder.MCX file is. The other points to the directory where you have your custom toolholder profiles drawn. The program basically just overwrites Holder.MCX with the custom profile you select. When you start the software it will show you a list of your custom profiles and you just double click the selected profile and it automatically overwrites Holder.MCX. Then when you go to backplot or verify Mastercam will use the selected profile.
Finally installed this, where is the Holder.MCX, I searched the entire MCAMX6 folder and nothing pops up !
-
Here is yours in X6, it Works !
-
Cool, thanks ! This will work great ! Below is my Setup Sheet.
-
This is how I do it, Works Great ! You can do it as you are creating the OPS or right click on the Operations and Edit Common Parameters--->Planes. Make sure you use the same offset number starting at 0 for G54, and select update just this operation.
-
As good as your skills, and your post processor, I assume you dont have one already !


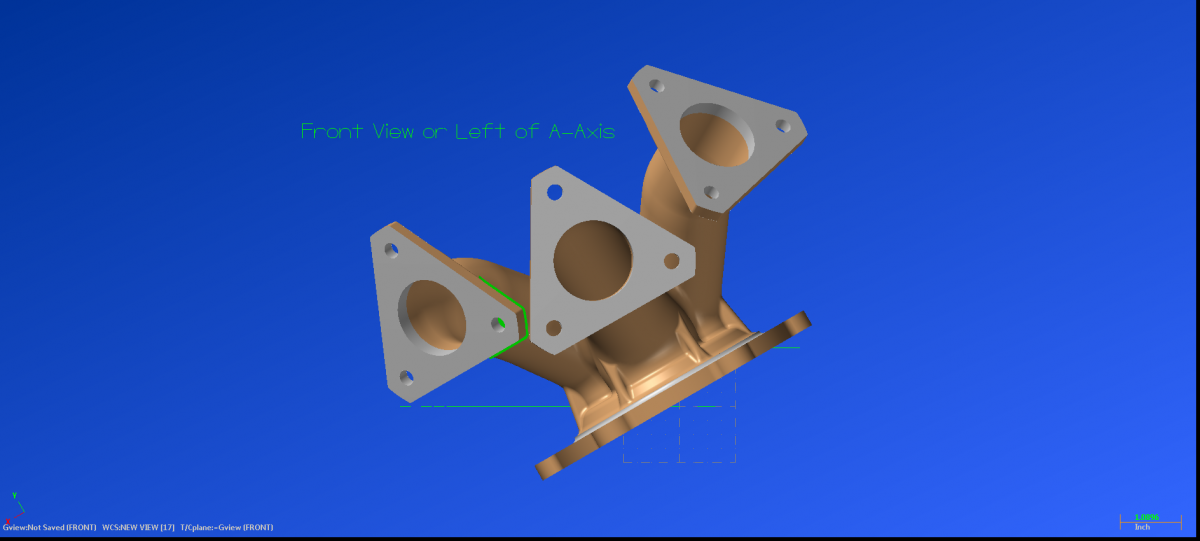
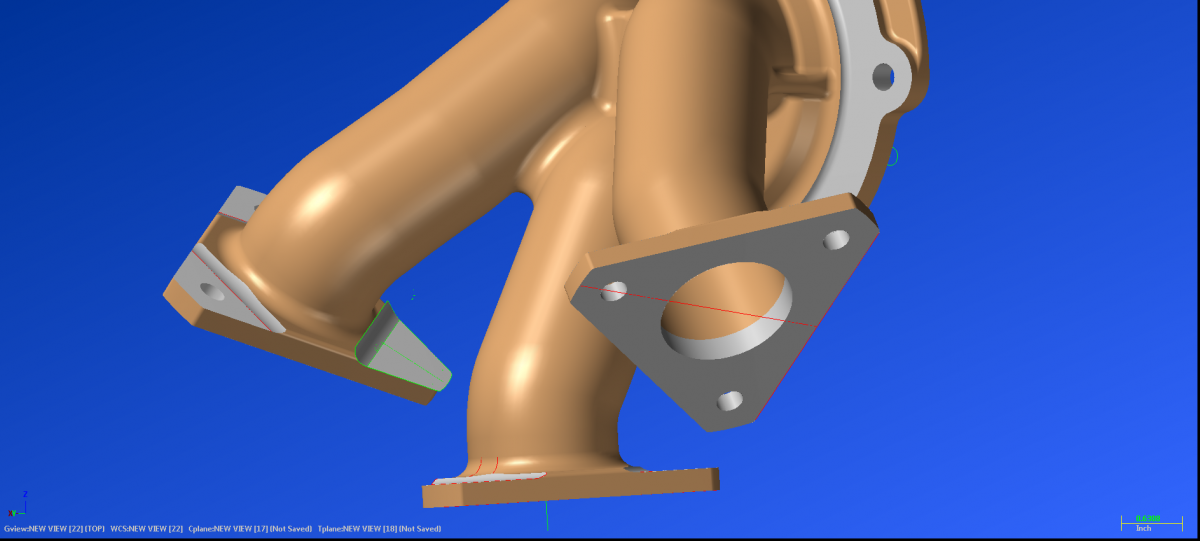

Surfacing from a Point 4th axis.
in Industrial Forum
Posted
I was looking at Flow 5-Axis locked to 4-Axis and from a point so it pivots away from the tubes, it looks very promising. Any tips on how to use that best ?