Roger
-
Posts
502 -
Joined
-
Last visited
-
Days Won
1
Content Type
Profiles
Forums
Downloads
Store
eMastercam Wiki
Blogs
Gallery
Events
Everything posted by Roger
-

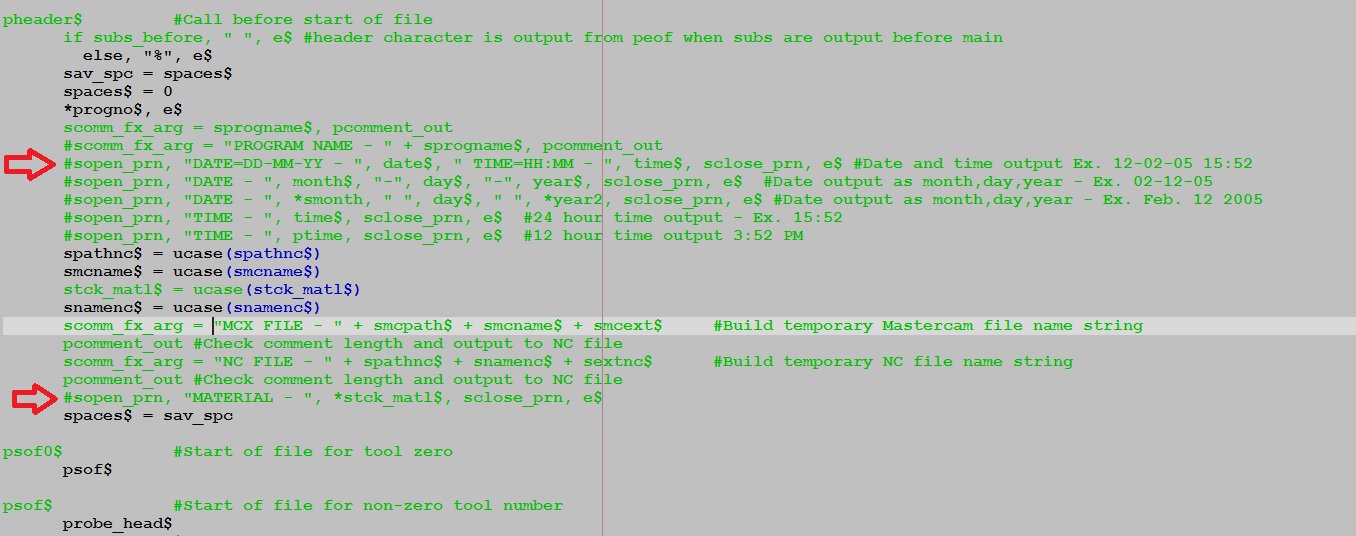
Removing DATE, NC FILE, MATERIAL from header in program
Roger replied to Roger's topic in Industrial Forum
The reason I said lunch is, I don't drink. The only alcohol I've ever had, was a glass of champagne, back when I was like 22, my older brother had won a trophy dash race and we where celebrating his win. Congratulations on the new job, I had read your post on moving to the Portland area. Tacoma is about 130 miles from here, so I look forward to meeting you, and including buying you lunch, and a beer. -
Removing DATE, NC FILE, MATERIAL from header in program
Roger replied to Roger's topic in Industrial Forum
THAT WORKED!! You sir need not say sorry! YOU HAVE DID ME A GREAT BIG FAVOR!! If your ever in this area (Vancouver, WA / Portland OR), I would love to take you to lunch!!! -
Removing DATE, NC FILE, MATERIAL from header in program
Roger replied to Roger's topic in Industrial Forum
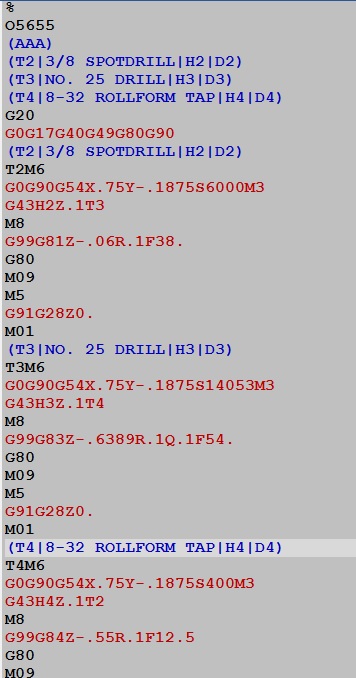
Colin, You have been so helpful on this! Thanks!!!!!!!!! It's still leaving (TOOL - 0)........... I really appreciate you taking the time to help me!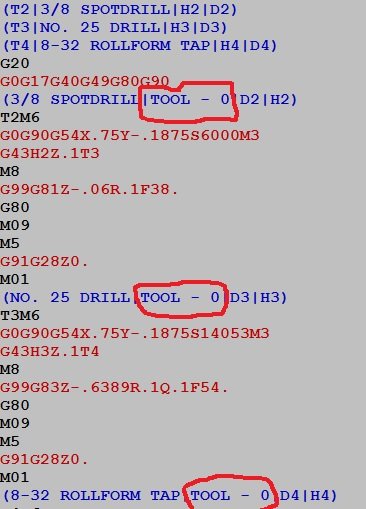
-
Removing DATE, NC FILE, MATERIAL from header in program
Roger replied to Roger's topic in Industrial Forum
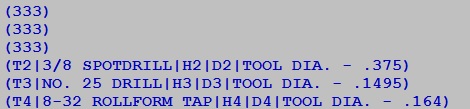
Below is what I want it to look like. This is how it is posting now.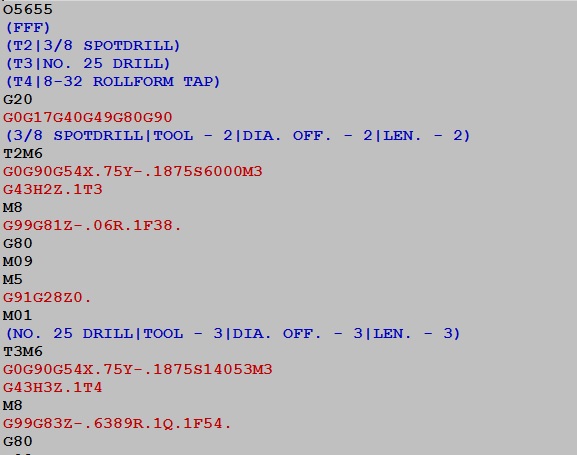
-
Removing DATE, NC FILE, MATERIAL from header in program
Roger replied to Roger's topic in Industrial Forum
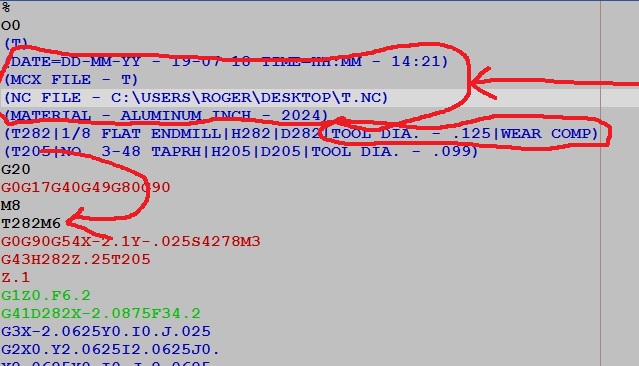
That worked for the tool diameters! I just want what is shown at the top of this screen shot to also post at each tool change. (Remove circled info)
-
Removing DATE, NC FILE, MATERIAL from header in program
Roger replied to Roger's topic in Industrial Forum
That removed it from the individual tool call outs, I would like to get rid of all this circled in red output also. Leaving ONLY the tool description H and D numbers.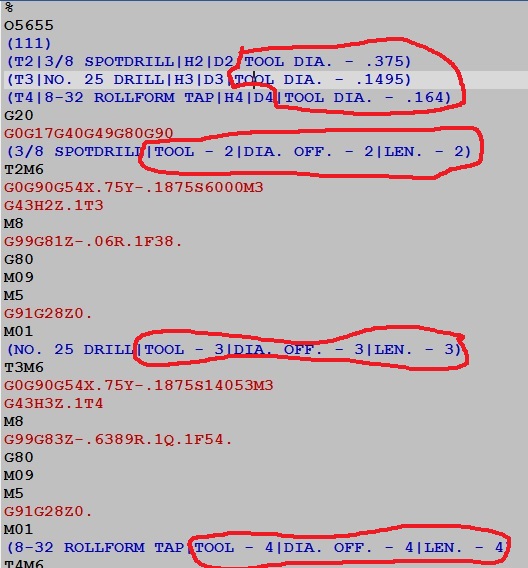
-
Removing DATE, NC FILE, MATERIAL from header in program
Roger replied to Roger's topic in Industrial Forum
THAT WORKED GREAT!!!!!!!!!!! THANK YOU AGAIN! There is only 1 more thing that I descried above that I need explained so my simple mind can understand. How to remove the tool diameter from the tool call out line. -
Removing DATE, NC FILE, MATERIAL from header in program
Roger replied to Roger's topic in Industrial Forum
I am using the GENERIC HAAS 4-AXIS VMC post. -
Removing DATE, NC FILE, MATERIAL from header in program
Roger replied to Roger's topic in Industrial Forum
Changing this to 3 WORKED GREAT!! Thanks Colin!!! -
Removing DATE, NC FILE, MATERIAL from header in program
Roger replied to Roger's topic in Industrial Forum
Millman, I thought I would start with getting the header information removed 1st. So I put the # in front of these two lines. THAT WORKED on removing the material, and date. But didn't work when I tried it with the NC File, or the MCX file. It would generate the program name in parentheses 3 times.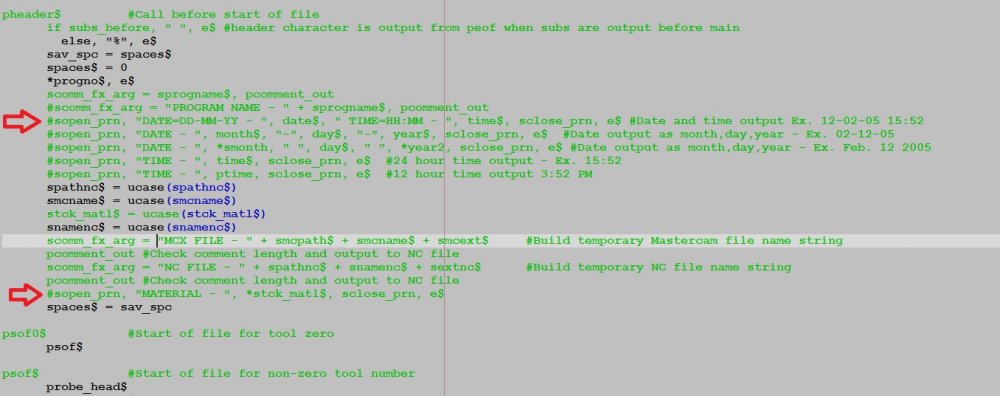
-
I would like to know how to stop posting this information at the top of my programs. Also I would like the tool list to appear at the top of the program, and at the corresponding tool change in the program. And if possible the tools NOT TO SHOW the diameters. Today I've been trying to get the posted code more to my liking, and the people on here have already been VERY HELPFULL! Thanks everyone!!
-
THAT WORKED GREAT!!! Thanks again!!!
-
THANKS! That works. But.........The default mill will give you 4 decimal places. 3 or 4 decimals is what I would like to see.
-
Millman, Is this where I should change it? It looks to me as though it's set for 3 places????

-
I'm using the generic Haas 4 axis post, for rigid tapping it rounds it to one decimal. 1st question, is this accurate enough to use? If not, where can I change it? Post? or Machine definition? I've been hardcoding to 4 places.
-
Colin, I gave your last post a LIKE and a THANKS, where I really should have gave it a HUH? reaction...LOL!! Though I've been using Mastercam for a long time now, I've never really had the time or the brain to figure out the post processer side of Mastercam. Or using macro variables. I did however purchase a book on it back in 1997...... I'm getting close to retiring, (3 more years maybe??), And this OLD DOGS brain don't work like it use too. THANKS GOES OUT TO EVERYONE WHO POSTED!!! It really helps to have this forum, and all this knowledge at one's finger tips!!!
-
Not by hand. With the tool changer. For now, I'm doing a manual entry tool path BEFORE each tool change. I would still like to know of other ways.
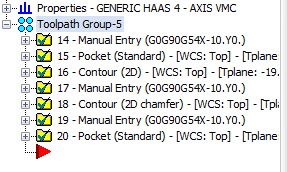
-
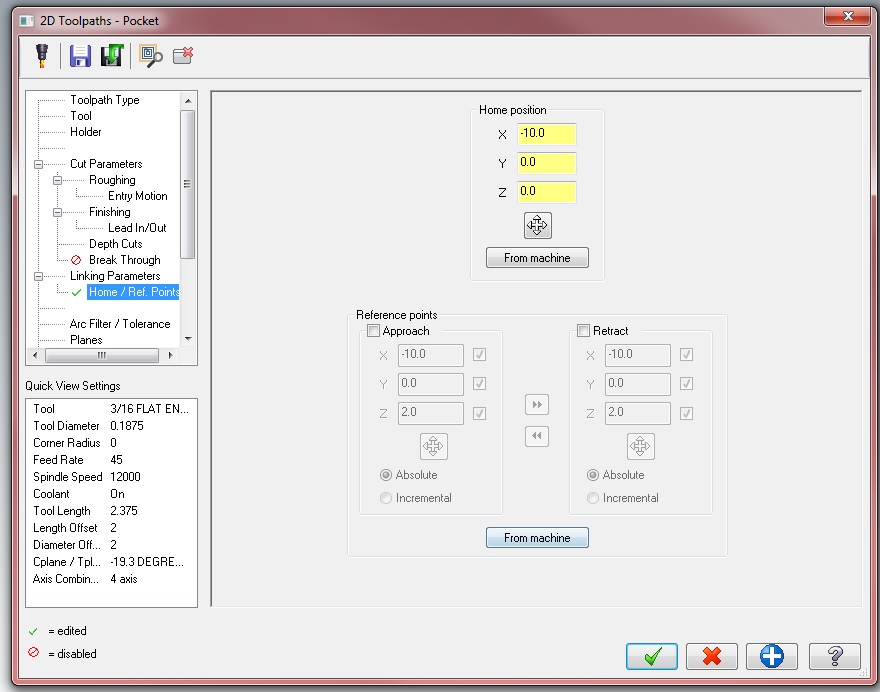
How do you command a safe tool change command in Mastercam 2019 on a Haas mill? I've tried setting my home position to X-10.0" as in this screen shot. The code doesn't post out though. Do I need to change something in the post? I've watched the Haas video on alias the M6 code (Haas Tip of the Day 4/16/2016 on YouTube). I didn't want to do that, because it would effect all programs. And I would like to be able to do in in Mastercam. I guess I could always do a manual input, if that's the ONLY WAY.
-
I'm using SolidWorks 2018, and Mastercam 2019. I'm happy to here it's not just me........
-
I just finished sending them a tech support email!!
-
I'm using both of 3D connexion's Space pilot Pro, and their Cadmouse. Yesterday I downloaded the latest drivers , because at times when I had multiple sessions of MC, and Solidworks open, the center "joystick" control would stop working on all but one session of MC. It would always work in Solidworks. Now it has a different issue. The center scroll wheel on the mouse, when pressed will not rotate in Solidworks, but.... if I click on the screen with MC running, and rotate, then switch to the screen with Solidworks it will work tell I let go of it. Then it won't work tell I click on the MC screen again........... Anyone have ideas on what's going on, or experiencing this?
-
So.....I downloaded the PDF tutorial, and started looking at it.........This has 166 pages, and the tutorial takes 6 HOURS to complete! And you should have a familiarity with XML (I don't), I guess this will have to wait........... I do appreciate all the responses! Thanks forum members!!


-
Thanks, I will look at that. At first I couldn't find it, (It's under the 2018 tutorials).
-
Thanks Chris for looking into this! In your post, are you saying you believe it is possible to do this? If so, I would need some instructions. This is me, when working with the Active Reports Designer........
-
I started customizing my set-up sheets, and have been trying to have it pull the program number from the machine group properties tool settings (see image). Is this possible? If so, can anyone point me in the right direction on this? I'm modifying the mill2 rpx setup sheet.