M_CODE1
-
Posts
149 -
Joined
-
Last visited
Content Type
Profiles
Forums
Downloads
Store
eMastercam Wiki
Blogs
Gallery
Events
Everything posted by M_CODE1
-
Thanks for some of the ideas. The cuter that we are using is solid carbide straight tooth.
-
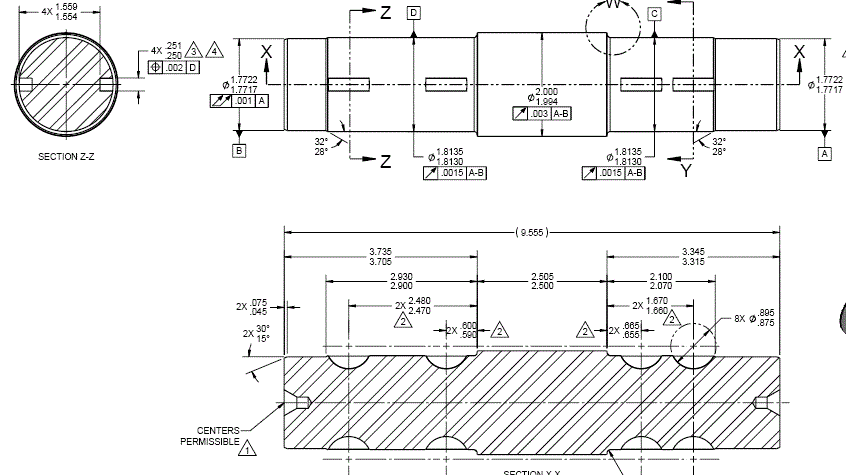
You guys have always been helpful in the past so I thought I'd come here for some advice on a part we are having issues with. We have a part that we are having trouble putting the woodruff key seats in. The part is 4140 and heat treated to 42-47Rc. We decided to heat treat the stock first then have 2 lathe operations, then a mill operation. We did not think we would be able to hold the keyseat tolerance and position if we did them soft and had a grind operation after heat treat. We are using a Fullerton .875" X .1875" Keyseat Cutter (#607 ). We made a fixture that locates the part on the 1.7722 diameter on both end and is clamped cross the top. The Fullerton book recommends 60-140 SFM for hardened steel for speed of 257-600, then a feed of around .004 IPR, so 1.0 - 2.4 IMP. We have has no luck in that range. The cutters have broke at different times, some at the start of cut and others at the bottom. I tried to program it and roll the cutter into the part to have a thick to thin chip, but that did not seem to help either. Any advice on a different too to use? Or any other way to better cut this part? Does anyone have an experience cutting key seats in 4140 at 42-47Rc? A few of the things we have tried -Part was in V block vice jaws, made fixture to make it more rigid. -Made sure tool was as short as possible -Tried rolling cutter in -With and without coolant (part was cool after a couple cuts, but then cutter broke) -Tried to peel mill .005" step over with a 3/4" keyseat tool to rough out (S7500, F30), Broke cutter after 3 keyseats. Thanks Mike

-
Sweet and my Hotel is only .2 miles away that night. While we’re in Chicago for IMTS 2012, we will be hosting our first-ever official “Mastercam Meet up.” This is a great opportunity for us to chat with our customers and for you to grab the ears of some key staffers. We would love to hear about what you do and what you think about the software. We have no agenda and no real plans, but if you want to come and just hang out with the Mastercam crew, we would love to spend some time with you off the trade show floor. We’ll be at the Sweetwater Tavern and Grill on Thursday, September 13th from 7-9 PM. We’ll all be wearing our Mastercam shirts and the name badges. Please join us for a drink or two and share some great conversation. Who knows…you might even score some Mastercam swag! http://events.r20.constantcontact.com/register/event?oeidk=a07e6ckdx4de8853cb4&llr=kftf58bab
-
Below is a time study I did to give you comparison. The main things the software factors in is type of material, type of contour, material thickness, and what you Jet PSI is when coming up with the time. Flow uses a % that controls your speed and edge quality. They are most likely running in the 10-20% range, when you see a real nice smooth edge in thicker material like this. 12" X 12" Square Cutting 3.5" Thick A36, This is 49" of travel with the Lead In/ Lead Out 10%, 255 minutes, 255lbs Garnet .2 IPM 20%, 132 minutes , 160lbs Garnet .37 IPM 40% 72 minutes , 85lbs Garnet .68 IMP 60% 53 minutes, 64lbs Garnet .92 IPM 80% 43 minutes (most likely will not cut all the way thru material in spots), 51lbs Garnet 1.14 IPM Garnet is around $.25 a pound for reference. They do have a different kind of Garnet that is better for cutting thicker stuff this this. We just got some for trial but have never used it yet. At 80% you would probably get the parts to cut thru, but the cost is 50% more for it. We do mostly thinner stuff that does not justify the cost. Anything to do out there when I go there got training on the laser? Thanks
-
I know your only guessing, but with our 86K pump it would be be closer 1.5IPM for a decent cut that thick. Its not a exact IPM feed rate. In the corners it has to slow down before it gets there and it does not speed up right away. It slows down for the stream lag. At 3.5" thick it does not move to fast. I could also run it thru our softare to get a closer cycle time. On another note, our new Trumpf 1030 laser with auto pallet changer just show up last week and is getting set up. Waterjets are nice but this laser will be able to pump out the under 5/8 steel parts a heck of a lot faster.
-
We recently purchased an EDM at an auction and need some pointers on it. It is a Mitsubishi model DWC90SB. Most of us here do not have any experience with EDM's and the book did not seem to helpful. The part we are cutting is .50" 4140 and has about 4.1" of cutting length. The first part we cut took about 3 hours. That would come out to about .022 IPM. We do not have a tight surface finish to hold, just a profile tolerance of .0015 in certain sections of the cut. Below is the program that we used to cut the profile. What exactly controls the feed during the program? The E101? What kind of IPM can you run of .50 steel? Does anyone have any charts that might help me? Thanks for any help that you might be able to give. % L1000 (06/07/12) (NO STOCK ON TOOTH) G90 G92 X2.135 Y.0625 M20 (WIRE INSERT) M78 (RAPID FLUID FILL) M80 (DIELECTRIC FLUID ON) M82 (WIRE FEED ON) M84 (MACHINING ON POWER ON) E101 M90 (STARTS ADAPTIVE CONTROL) G41 H1=.006 G1 X2.085 H1 Y-.035 X2.4576 X3.024 Y-.36201 G2 X3.0315 Y-.375 I-.0075 J-.01299 X3.0165 Y-.39 I-.015 J0. G1 X2.5412 G3 X2.54286 Y-.3748 I-.0687 J.0152 X2.4725 Y-.30444 I-.07036 J0. X2.40214 Y-.3748 I0. J-.07036 X2.40998 Y-.40708 I.07036 J0. G1 X2.41 Y-.40732 Y-.525 G2 X2.395 Y-.54 I-.015 J0. G1 X2.12378 G2 X2.10884 Y-.52631 I0. J.015 G1 X2.0979 Y-.40161 G3 X2.1032 Y-.3748 I-.0651 J.02681 X2.0328 Y-.3044 I-.0704 J0. X1.9624 Y-.3748 I0. J-.0704 X1.96588 Y-.39668 I.0704 J0. X1.76799 Y-.44886 I.29412 J-1.51672 X1.73445 Y-.4754 I.02001 J-.05974 G2 X1.27469 Y-.73931 I-.47445 J.2941 G3 X1.23909 Y-.75145 I.00161 J-.06299 X.94342 Y-1.03881 I.91941 J-1.24175 G40 G1 X.98281 Y-1.06974 M91 (ADAPTIVE FEED OFF) M21 (WIRE CUT) M58 (DIELECRIC FLUID TO LOWER LEVEL) M02 (PROGRAM END) %
-
Dont quote me, but this should be fairly close. 4k for SW Core + 1.2K for maintenance per year 5.5k for SW Pro + 1.5K for maintenance per year Dont know price of next highest package, I think its called Premium, but you should't need it anyways. Should be able to work a 10-20% off base price, Where are you located? I'm sure someone on here can reccomend a reseller. I know the support I get from mine is great. We have one seat of Pro and one of the Core. About the only thing I use in the Pro that Core does not offer is the Toolbox. What version to most other use? Is there anything that Pro offeres that you could't live without?
-
IMO 800 RPM is slow for a 10" Chuck. Should not have anything to worry about at that speed. Our new 18" chuck is rated for 2000 RPM. Our 10" on our 10" Kitagawa is rated up to 3200 RPM. Get the make and model and look it up. That would be your best bet.
-
The machine is a Tsugami SS-32 swiss lathe. My part is in the sub spindle and I am going to put a 1/4 ball endmill in the live tool pockets. So I will be using the Y axis, but I will have my c axis turned on for proper orientation. Its just like a vertical mill programing in the Top view, except the X value's need to be in diameter. What is your email?
-
Not sure where to change to the xabs_dia? I changed the two in bold and it did change the x's to double. But now the Z is outputing as a Y, and its not outputting a Z? Example below? pfxout #Force X axis output xabs_dia = xabs * 2 if absinc$ = zero, *xabs, !xinc else, *xinc, !xabs pxout #X output xabs_dia = xabs * 2 if absinc$ = zero, xabs, !xinc else, xinc, !xabs (I added this line) fmt X 2 xabs #X position output fmt X 2 xabs_dia #X position output (THIS IS ORIGINAL THAT I STARTED TO CHANGE THE X's by Hand) T252 M6 G0 G90 G54 X0. Y-.1901 S3500 M3 G43 H252 Z.25 Z.0876 G1 Z-.0124 F5. X.0512 Y-.1892 Z-.0136 F40. X.1016 Y-.1866 Z-.0172 X.1506 Y-.1822 Z-.0231 X.1976 Y-.1762 Z-.0312 X.2422 Y-.1689 Z-.0411 X.2842 Y-.1602 Z-.0529 X.3236 Y-.1504 Z-.0661 X.3604 Y-.1395 Z-.0808 X.4264 Y-.115 Z-.1139 X.482 Y-.0874 Z-.1513 X.5106 Y-.0695 Z-.1755 X.5358 Y-.0508 Z-.2009 X.576 Y-.0112 Z-.2548 X.6026 Y.0307 Z-.3118 X.6152 Y.0739 Z-.3707(I STOPPED CHANGING X's BY HAND) X.3071 Y.1176 Z-.4304 X.3033 Y.1448 Z-.4675 X.2969 Y.1715 Z-.5041 X.2879 Y.1976 Z-.5398 X.2765 Y.2228 Z-.5744 X.2627 Y.2469 Z-.6075 (THIS IS THE NEW OUTPUT) N120 T252 M6 N130 G0 G90 G54 X0. Y.25 S3500 M3 N140 G43 H252 Z0. N150 Y.1 N160 G1 Y-.0124 F5. N170 X.0512 Y-.0136 F40. N180 X.1015 Y-.0172 N190 X.1505 Y-.0231 N200 X.1975 Y-.0312 N210 X.2421 Y-.0411 N220 X.2842 Y-.0529 N230 X.3237 Y-.0661 N240 X.3604 Y-.0808 N250 X.4262 Y-.1139 N260 X.4819 Y-.1513 N270 X.5106 Y-.1755 N280 X.5359 Y-.2009 N290 X.5761 Y-.2548 N300 X.6026 Y-.3118 N310 X.6152 Y-.3707 N320 X.6142 Y-.4304 N330 X.6066 Y-.4675 N340 X.5937 Y-.5041 N350 X.5758 Y-.5398 N360 X.553 Y-.5744 N370 X.5254 Y-.6075
-
Jimmy I modified the post in 3 spots. But now I get an error when I try to post the program. Any ideas what might be wrong? fmt X 2 xabs_dia #X position output (changed "xabs" to "xabs_dia") pfxout #Force X axis output xabs_dia = xabs * 2 (ADDED THIS LINE) if absinc$ = zero, *xabs, !xinc else, *xinc, !xabs pxout #X output xabs_dia = xabs * 2 (ADDED THIS LINE) if absinc$ = zero, xabs, !xinc else, xinc, !xabs
-
I'll looking to do some surface milling on our swiss lathes to help debur a part. For that machine my X number needs to be in diameter. So I basically need to double all my X's. Anyone know of an easy way to do this. I don't want to have to change them all by hand. The post I am going to modify is the Generic Fanuc 3x. Thanks
-
Looking to make a meat screw out of a solid piece of cast iron stock (65-45-12). This part is usually a casting, but new tooling will not be ready in time to meet customers demands. This will be machined on a Haas VF4, with a rotary table. The end with the hex will be in the 3 jaw chuck then a tailstock on the other end. I am starting to program it with a Rotary 4 axis toolpath for the rough and finish. Is this best toolpath to use, or is there something better? I plan on using a 5/8 ball SGS Z-Carb Endmill to rough and finish. Any other tool that you might think would work great? Any other suggestions would be appreciated. For Roughing .015, stock to leave .01 Filter Tolerance .005 Cut Tolerance Rotary Cut Type Climb Milling, 1.0, Axis dampening length 15, lead/lag angle .2, max step .1 Tool Vector length (what does this actually do) For Finishing 0, stock to leave .006 Filter Tolerance .003 Cut Tolerance Rotary Cut Type Climb Milling, 1.0, Axis dampening length 15, lead/lag angle .025, max step .1 Tool Vector length (what does this actually do)
-
Send me an email on Monday. I think we might have some available. How many are you looking for? Where are you located? Thanks Mike
-
FYI I asked about the #3001=1 line, and below is what he told me. Since I don’t know how you were going to write the machining code, I wanted to put in a safety so the program couldn’t run all three marks in a row. #3001=1 () generates an alarm and stops the machine, whatever text you put in between the parentheses will be the message displayed on the control panel. A good use for this is tool life management as shown here - http://www.todaysmachiningworld.com/shop-doc-custom-macro-programming/ Or let’s say you start work at 7:00 AM and like to have fresh coffee waiting when you get in, you could put a macro at the end of the program that checks the time and generates an alarm like this: IF[#3012 LT 064500] GOTO 9999 IF[#3012 GT 065500] GOTO 9999 IF [#3012 GT 064500] GOTO5000; N5000 #3000=1 (I’M ON MY WAY IN MAKE A POT OF COFFEE THX – MIKE) N9999; M30; If nothing else it will baffle the xxxx out of the operator and if he’s running the machine between 6:45 and 6:55 AM you just might get coffee.
-
I cant take full cridit for the macro below but I was in the process of developing something similar when this was sent to me from our Rem Sales guy. Anybody know Dan Murphy, he know his stuff. As usually the idea was driven by bad parts being sent to the customer. Assuming N1000 = 1st shift mark program (7AM to 5 PM) N2000 = 2nd shift mark (5 PM to 9 PM) N3000 = 3rd shift mark (9 PM to 7 AM) N500 (TIME STAMP); IF[#3012 LT 070001] GOTO 3000; IF[#3012 LT 170001] GOTO 1000; IF[#3012 LT 210001] GOTO 2000; IF[#3012 LE 240000] GOTO 3000; #3000=1 (TIME STAMP MACRO ERROR); ; N1000 (1ST SHFT MARK) (MACHINING HERE) GOTO4000; N2000 (2ND SHFT MARK) (MACHINING HERE) GOTO4000 N3000 (3RD SHFT MARK) (MACHINING HERE) N4000; (REST OF PROGRAM GOES HERE)
-
I want to be able to mark a part with an end mill plunging in .005" during 3 time period in a day. Each section of time, the mark will be in a different spot. This will tell us what shift made the part. The picture show what I am talking about. The mark will be on the left from 7am-5pm, then in the middle for the 5pm-9pm time, then on the right for the 9pm-7am time. I am not sure how to go about writing a macro for each time frame. This is on a Tsugami SS-32 with a Fanuc 18i control. Anyone have any ideas? I first thought about using a "IF[#510EQ1]GOTO490" type statement for each mark and have the operator change the macro to (1, 2 or 3) for there shift, but I think they might forget at times, or use the wrong number on purpose N40(MILL SLOTS MILL SLOT) T3333(1/8 Z CARB_BACK ) G98M105(SPINDLE STOP) M123S5000 M50(C-AXIS ON) M8 M276 G0X-.590Y-.05Z.05 C45. G17 G1Z0F10.0(F8.0) Y.05Z-.04 Y-.05Z-.08 Y.05 G41X-.605F14.0(F12.0) Y-.05 G3X-.590Y-.0575R.0075 G3X-.575Y-.05R.0075 G1Y.05 G3X-.590Y.0575R.0075 G3X-.605Y.05R.0075 G1Y-.05 G40G1X-.590 (JUMP TO PROPER TIME FRAME) (GO HERE BETWEEN 7am - 5pm) Y.05 Z-.085 Z-.08 GOTO6000 (GO HERE BETWEEN 5pm - 9pm) Y0 Z-.085 Z-.08 GOTO6000 (GO HERE BETWEEN 9pm - 7am) Y0 Z-.085 Z-.08 N6000(JUMP BACK HERE TO FINISH SLOTS) G0Z.05
-
With the help of my reseller we figured out why it was using the edge of the the tool. The Lead/Lad angle was set to 15. I set it to 0, then it followed the CAM at the center of the tool.
-
I got this using a Flow 5 axis toolpath. Now getting the radius in the corner since the tool is cutting with the leading corner of the tool. Any Suggestions?
-
Yes we have multi/axis. And yes, unrolled it checked
-
Trying to machine the profile in the attached picture. Our machine is a 3 axis VMC, with a rotary table. When I use the contour tool path, using the axis substitution, the corner of the tool cuts into the part. Is there a way to cut this with my current machine in Mastercam? I'm thinking that I need to move in the Y axis while following the cam section, but dont know how to do that. Any Advice?
-
quote: Also, I think running in single block will scrap the part. Don't know about overrides. Again, be careful. All controls are diferent, but our Tsugmai Swiss Lathes will stop after the [G0 X.7368 (retract)] when in single block. I guess to check just raise you X offset up about a half inch or so and try it.
-
We do somthing like this except the threads are straight first, then it tapers The first operation below works on an Okuma lathe. On our Fanuc controlled swiss lathes our PartMaker software will post it out long hand for each pass simalar to what CNCCHUCK has. This is cutting a M16 thread with a taper at the end, NAT6 ( TOOL - 6 OFFSET - 6 ) ( LFINISH GD THREADER ) G97 S850 M08 G00 X0.7915 Z0.15 T060606 G88 NAT40 H0.1037 D0.005 U0.001 B60 M23 M22 M73 M32 NAT40 G81 G00 X.5855 G34 X.5855 Z-.4921 F.0787 X.5915 Z-.4921-.3346 X.7915 G80 M09 G00 X37 Z7 T0600 M01 This is used on the Fanuc control. Its cutting a M12 thread with taper in the back N4(FRONT THREAD1ST) G97S450M13 T1313(QUADTHREADER ) G99G0Z-0.1 X0.5783 X0.4651 G32Z0.1379F0.0689 X.4725Z0.3543 X0.5868 G0X0.5783Z-0.1 X0.4535 G32Z0.1379 X.4609Z0.3543 X0.5868 G0X0.5783Z-0.1 X0.4435 G32Z0.138 X.451Z0.3543 X0.5868 G0X0.5783Z-0.1 X0.4353 G32Z0.138 X.4427Z0.3543 X0.5868 G0X0.5783Z-0.1 X0.4287 G32Z0.1381 X.4361Z0.3543 X0.5868 G0X0.5783Z-0.1 X0.4229 G32Z0.1381 X.4304Z0.3543 X0.5868 G0X0.5783Z-0.1 X0.4173 G32Z0.1381 X.4247Z0.3543 X0.5868 G0X0.5783Z-0.1 X0.4118 G32Z0.1381 X.4192Z0.3543 X0.5868 G0X0.5783Z-0.1 X0.4063 G32Z0.1382 X.4137Z0.3543 X0.5868 G0X0.5783Z-0.1 X0.4009 G32Z0.1382 X.4084Z0.3543 X0.5868 G0X0.5783Z-0.1 X0.3957 G32Z0.1382 X.4031Z0.3543 X0.5868 G0X0.5783Z-0.1 X0.3957 G32Z0.1382 X.4031Z0.3543 X0.5868 G0X2.28T0 M1 Hope this helps
-
quote: Just because there is a cracked version of Mcam doesn't mean that it's OK to use it. The same goes for keeping the Beta guidelines in check. I like how you compare something that is illegal to something that is easily searched for on the internet.
-
LOL. I was told not to share the link/PDF, I downloaded. And I did't, because I respect the guy that asked me not to. But I went to google and was able to search for the very same link, and it showed up on the first page. The entire world is allowed to view it, but we can't share it with fellow Mastercam users?