FTI2007
-
Posts
355 -
Joined
-
Last visited
Content Type
Profiles
Forums
Downloads
Store
eMastercam Wiki
Blogs
Gallery
Events
Everything posted by FTI2007
-
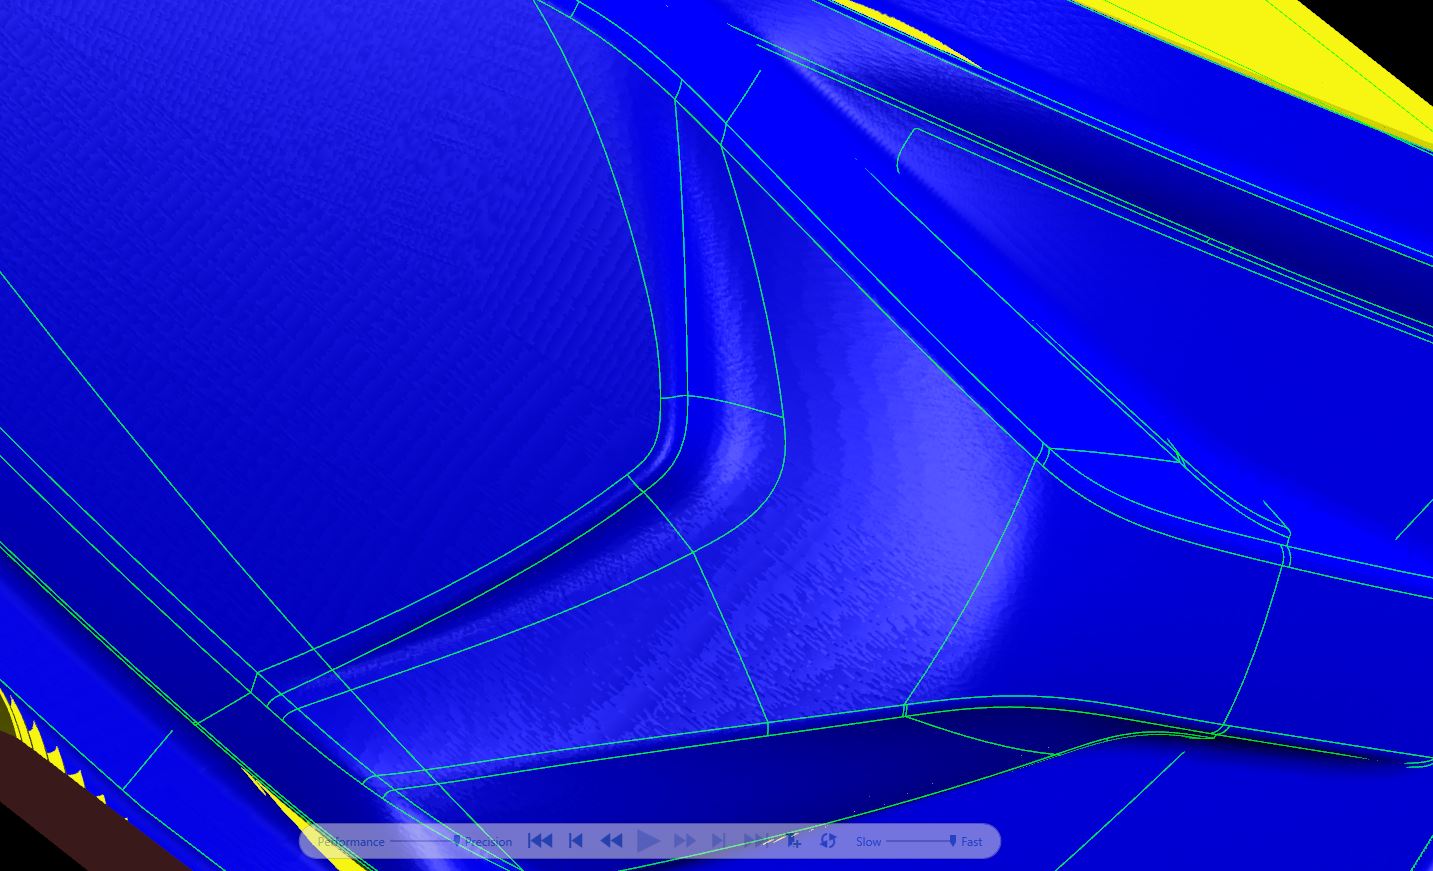
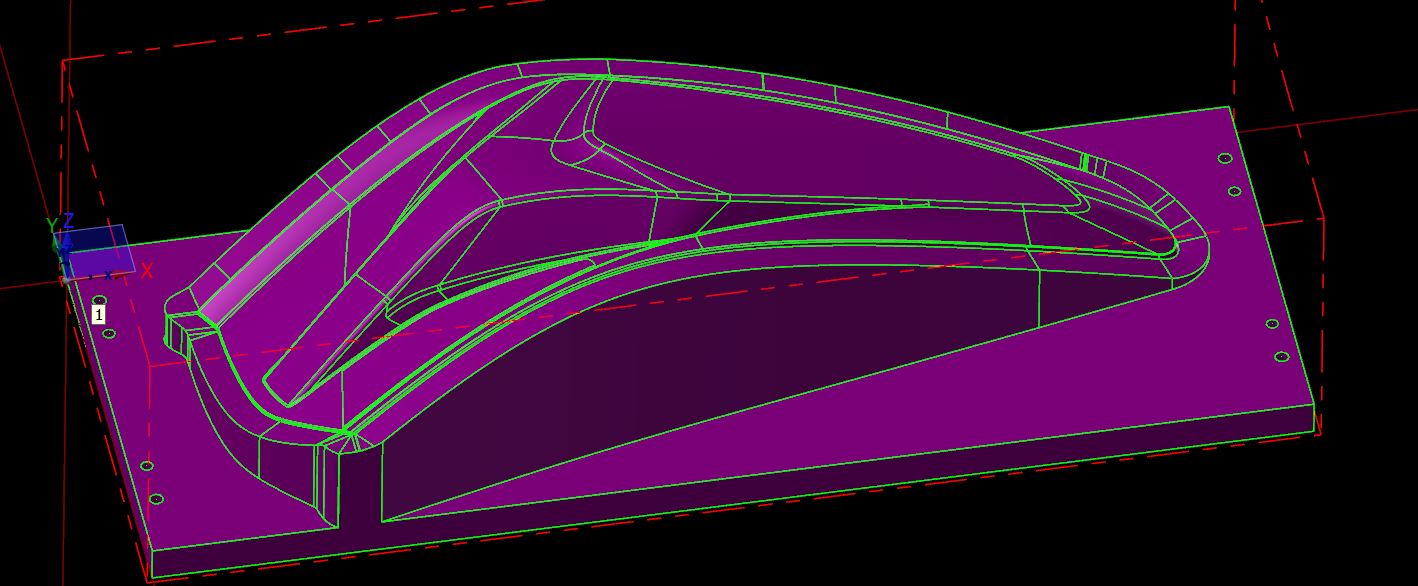
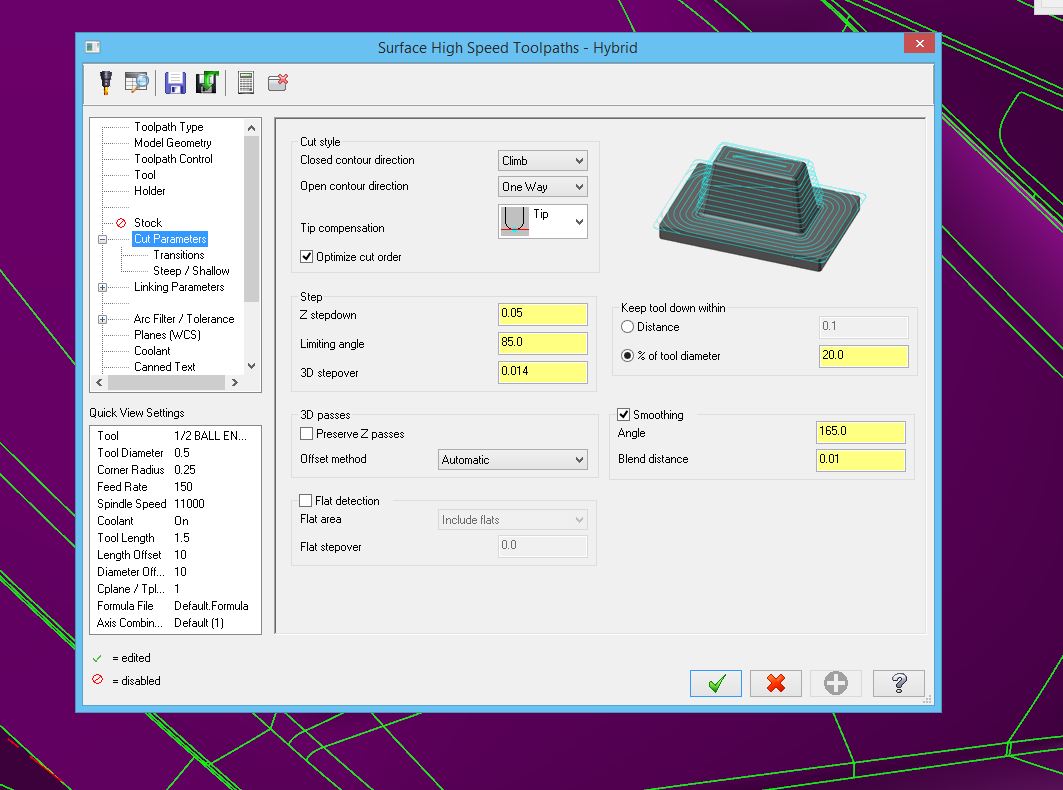
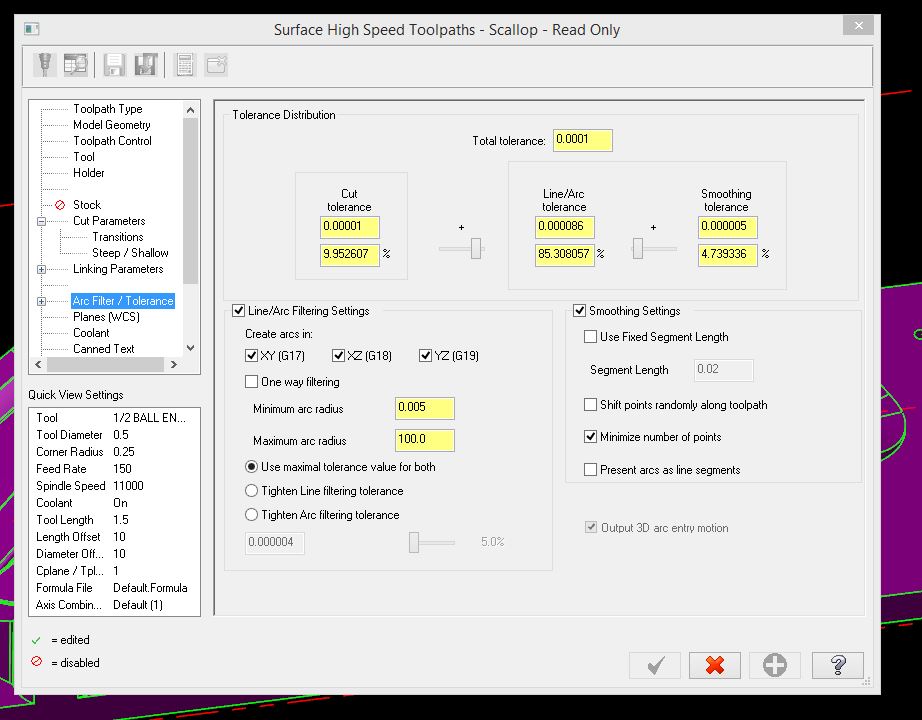
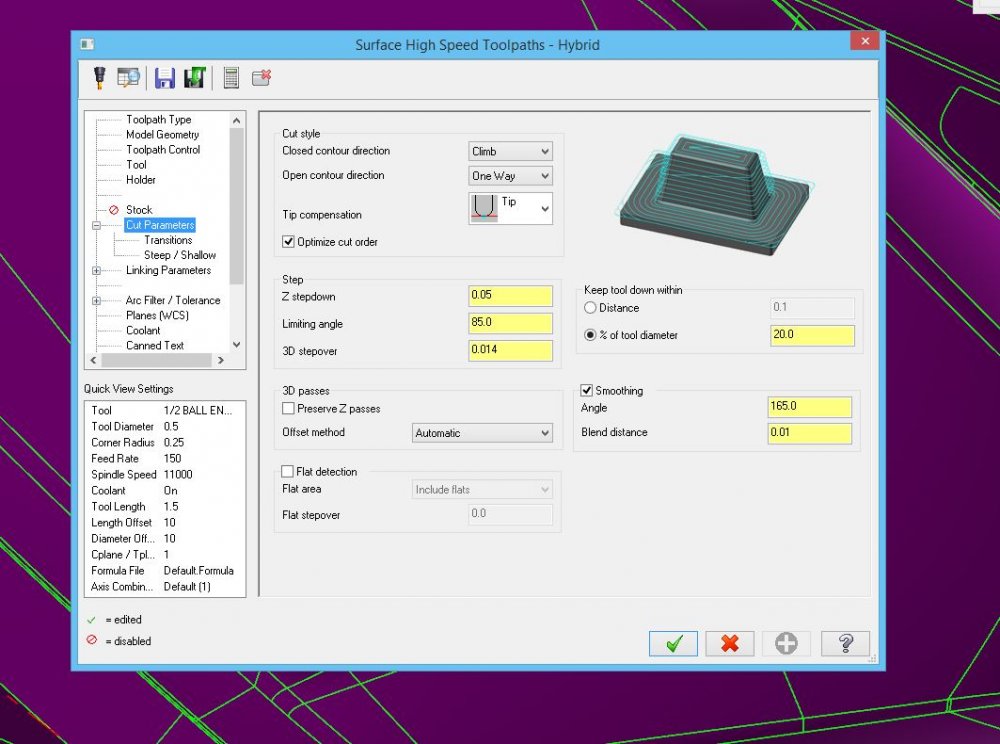
How Can I Improve my surface Finish. I am Using surface finish hi speed hybrid to finish this. The finished part looks exactly like it does in verify so I am assuming its not the tool or the machine. I am using a 1/2" ball endmill . Can anything be done? Or what would be a better toolpath to finish the 3d part of this? Is it a filter setting? I have been having this problem on multiple parts. Thanks in advance. I am tryin to cut down on or elimate any buffin/polishing down the line. THanks in advance


-
I have always wanted to pursue using them but I think I tried once back when they first were introduced and didn't understand it. Is there any good Tutorial videos on how they work and how to use them. I think if more people would use them if they had proper instruction.
-
right click on machine group,then -groups- new toolpath group or machine group
-
I noticed that option to. I just tried it and it will work for some of the weldments we do. A good quick way to do it. thanks
-
Now I got it. Thanks.
-
yes we have the finished models. they are created in house. If there is no need to convert to a STL how do you choose the stock model for stock in verify?
-
I have the models. and I see now that a stock model does need tool paths to be created. But if I want to add thickness to pads or fill in holes for an acurate verify I do not see how a stock model will work for that. Please tell me if I am wrong. Modifying a solid model is the only way That I see to do that. Then of course you could either save the solid model as a STL or make a stock model and export as a STL.
-
ok, thanks guys for the help
-
Is your initial stock model based off of your modified solid model?
-
I understand that part of stock models. But I dont see how i could use a stock model on a weldment for verify. the stock model is generated from the toolpaths. So on a weldment that is basically just a frame with some pads how would a stock model be used to generate the stock that I need to verify my toolpaths properly. The other method you told me about with modifying the solid does exactly what I need but I just want to make sure there is not another way to do it.
-
I did try moving my modified model z-.75 and then it worked. This is a coworkers file that I am helping him with so maybe he moved it for some reason. Ill try again with a fresh file and see what happens.
-
I use stock models for rest machining but I dont understand how you would use it for verify. please explain. Thanks
-
ok I a saved it in the top /top view but still get the same result with the surfaces .750 higher than the wireframe
-
OK. , Couple questions. First... should I be saving the modified solid as a STL for my stock in verify or just a standard mcx file? I brought the frame in as a solid and raised the pads and got rid of the holes. I have tried both saving it as an STL and just a normal mcx file but when I reference the file for my verify the wireframe is in the correct location but the surfaces are .750 high. What would cause that?
-
Apparently Daniel accidentally flagged me as a spammer so my last couple comments disappeared . Yes Ron the majority of what we do is drawn in house in solidworks. So am I right in thinking I would import a separate file as a solid and modify it by removing holes and raising the pads up and then saving it and reference that file for my stock in verify under the verify options page?
-
What is the best method to setup stock for verify for weldments or castings? Obviously the standard stock box method doesn't work for this type of work. For basic parts I just make a couple tool paths to remove the extra material and only use them for verify and ghost them later. Thanks
-
Surface finish leftover is usually my go to because I it works for me most of the time. I have mixed results with pencil for some reason.
-
Or offset your geometry 9 times and chain each line so you have 10 chains in one operation without multipasses . Then set depth cut order by contour.
-
Im glad its not just me. I thought I was losing it trying to get it to accept it after hitting enter. I never noticed that when it did work must have been when I moved my mouse out of the area.
-
2017 X+ Setup and window 10 compatability issue ?
FTI2007 replied to HEAVY METAL's topic in Industrial Forum
I have it installed on windows 8 and 10 and it works fine on both. Try to uninstall and have mastercam closed when you reinstall it. -
copying from x9 worked. I am not sure what you mean by importing step files.
-
Where do I find the mill_big inch tool library? Mine only displays mill_inch
-
I have tried rh clicking everywhere and do not get the context menu option. What I am I missing or doing wrong? can you be more specific about where to click in the tool bars? I found it.
-
I just found the Transition guide online. Any tips beyond what that covers?
-
I am getting ready to install it soon. whats the best way to merge all of my current settings etc into 2017? Migration wizard? and to update my post? I have 3 PCs to do and want it to be as simple as I can. Thanks.