scooke4073
-
Posts
112 -
Joined
-
Last visited
Content Type
Profiles
Forums
Downloads
Store
eMastercam Wiki
Blogs
Gallery
Events
Everything posted by scooke4073
-
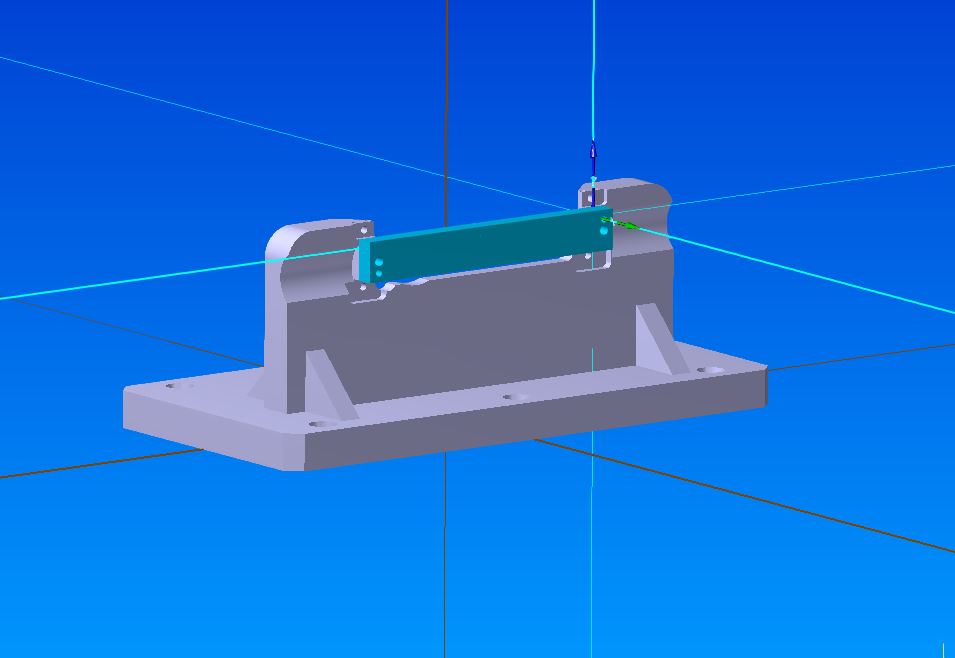
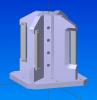
Alright in a nutshell.... Machine: Mazak Variaxis (trunnion 5 axis) I already programmed the part complete. The fixture and part were positioned on the global coordinate system as shown below with a WCS created relative to the part Datums. You can see both coordinate systems. I now have redesigned the fixture to machine 4 parts. The orientation of my parts have changed completely (see picture 2). I merged this new fixture into my old file and translated it into position. Now I need to be able to move the old WCS (and all the associated planes) and geometry to match the new orientation. Do I make sense? I understand what everyone is saying, for the most part. The reason I am doing it this way is so that when I run machine sim everything is positioned correctly. I want everything to match....what I see in Mastercam is exactly what I see on the machine.

-
WCS Origin as well as angular rotation Yes I use incremental in my operations as much as possible. I didn't use a base point to establish my WCS. I wish I had....I could have checked Associative and if I translated my part the WCS would have moved with it....right?
-
I don't want to create a new WCS....rather I want to move it to a new location.
-
I'm trying to move my WCS to align with a new part orientation. I know your can alter a WCS origin but this only does linear translations. What if I need to rotate my WCS? The part program is pretty extensive with lots of planes created at unusual angles so creating a new WCS would be a nightmare. I would have to go through each toolpath and reestablish all my planes (and create new ones). Also I created the original WCS by solid face so there is no way to make it associative (I'll never do that again!). I've attached a stripped down file. OP10.MCX-7
-
Not necessarily....you're merely confirming your earlier suspicion that the machine was garbage.
-
Yes. Total file size is somewhere around 600mb. Solids are only about 16 mb. About a dozen stockmodels and 20 optirest toolpaths make up the bulk of the balance.
-
How about deleting just one toolpath? I'm at 1 hour and counting.......
-
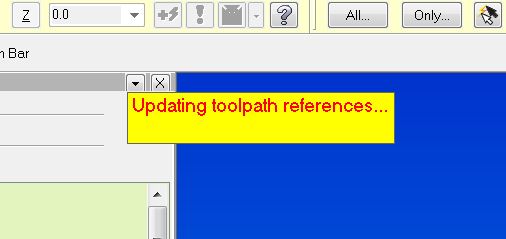
Anyone seen this before? Basically I have a pretty massive file and I'm trying to delete a couple toolpaths and also a few toolpath groups. This pops up and after waiting for about 30 minutes I get fed up and kill it via ctrl-alt-delete. The only thing I can think of is the fact that I am using a bunch of stock models in conjunction with optirest and the toolpaths are all interconnected in some funky way. Even if I completely kill all association between the optirest toolpath I'm about to delete and the stock model (by either deleting the stock model or not using it as the previous operation) it still freezes up. Can't attach file due to sensitive nature. p.s.- don't mind the color of my dialog box. I set it up that way so it sticks out like a sore thumb.
-
Should be able to pick that up for a six pack of bud light. If your feeling really generous you could offer a nice local craft beer.
-
Baud Rate is too high
-

Crazy Drills - Anyone using them???
scooke4073 replied to Newbeeee™'s topic in Machining, Tools, Cutting & Probing
Crazy. I used them in 17-4PH 20x diameter. .093 diameter 1.8 deep @ 6100rpm and .003ipr (18 ipm). You have to use the pilot drill first and follow the correct sequence of events (pilot drill 2xD, start spindle @ 500rpm, feed into hole, increase RPM, drill with no peck,......etc...) I was extremely impressed with tool life and performance. I had to hold true position of .003 and this drill did it without any problem. They are a bit pricey but well worth the cost. -
Mazak will bend over backwards to let a customer see our machines in action. I have cut several customer's parts when they are just going around kicking tires. We are willing to invest time and money into a project if it ensures the customer is getting exactly the machine he needs for the job.
-
Keep in mind part geometry/tool size as well. You might have to reduce your radius to a point that will allow you to remove the material from tight corners...I've gone as low as 5% to get into tight areas.
-
I would start off by using a containment boundary to focus the toolpath on one area. Obviously you also need to make sure your tool is sized appropriately....can't fit a square peg in a round hole. .
-
http://download.cnet.com/HyperCam-64-bit/3000-13633_4-75213019.html?tag=mncol;3 Hypercam works pretty well.
-
Thanks Aaron. I'll give it another try. I think it might also have to do with my overall file size (about 80 mb). To get the project moving I ended up just defining the multimaster shank as part of the tool holder. Basically I just wanted the ability for Optirest to prevent the shank from rubbing during deep pocketing......there's a hundred ways to skin a cat!
-
Force "H" and "D" to equal "T", at the machine (Fanuc 31i)
scooke4073 replied to Niezingerly's topic in Industrial Forum
or you could skip the step of writing from one variable to another......H#4120 or D#4120 -
Thanks Robert and Peter. That was what I was looking for. I probably would have tried that approach next....
-
Variaxis I-700 Control Option
scooke4073 replied to Zoffen's topic in Machining, Tools, Cutting & Probing
G54.4 P0 should be the very last thing you execute....After G49 so you cancel tool length. . . . . X-1.06554 Y4.95562 Z1.72157 C-98.26 A-20.5013 G0 Z1.73597 G5 P0 G49 M44 M47 G64 G54.4 P0 M30 -
I'm using Optirest
-
I'm running SP2
-
I've moved on to another project....I'll give my blood pressure enough time to normalize before I take another stab at this. Thanks to all who responded.
-
I have rebooted....could try again just for good measure. I've tried defining it both ways. It seems to accept the tool (I can see a preview of it) and when I take the next step to select a holder, it crashes.
-
Try this file.... The first one I posted was my attempt at a scaled version. I create a custom tool and the split second that I try to select a holder, it crashes.....every time. Start with a new file, create a quick line and contour it. Then create the custom tool, try to select a holder...and BAM! I'm about to lose my mind. T08 MULTIMASTER WITH .5 BULL.MCX-7
-
Is there a way to prevent the shank of a tool from colliding with material? I'm trying to use an Iscar Multimaster with a tapered shank. I need to be able to keep the shank away from the walls when doing deep pockets. I guess I could try making a custom tool and adding a little bit of a cushion to it but I have not been having good luck with custom tools (see my other post). I tried to create a new tool using the new "wizard" and I defined the shank as "non-cutting geometry".....it rubbed the walls pretty heavy during verify and never indicated a collision (with shank checked in collision settings). Any ideas?