Pitka_Guru
-
Posts
144 -
Joined
-
Last visited
Content Type
Profiles
Forums
Downloads
Store
eMastercam Wiki
Blogs
Gallery
Events
Everything posted by Pitka_Guru
-
THanks Josh, a hack doesnt have the ability to write that in a post, like me I've had my reseller send this query to cnc a week and a half ago and nothing yet. It's hard enough trying to get my reseller to return an email or phone call let alone make simple post changes. I'm going to forward this to head office and see if they can help me out because I can't afford to wait for this guy anymore. Thanks again!
-
Ahh nice, I will have to try that out. Thanks
-
Sorry guys, I'm the original poster and I logged in using my email address which is clearly attached to a different user account. Retracting to Z clearance and rotating A and C axis is awesome i'm sure thats great for your tools, holder and spindle lol. This is exactly what i want to avoid and you'd be a great help if you can post a section of the code because our reseller had to send this request to the USA head office. Thanks for the help and I look forward to seeing what you'very done to fix this problem. Cheers!
-
I've ordered an RWP-202 baseplate and RWP-02, 3/4" dovetail. The 202 mounts to the platter with a boss that locates it. Then there are 6 screws that fasten it. So it's in the center of the platter but with play in the coungerbores I'M thinking it won't be perfect? Ive never heard of WSEC? What is that? Thanks!
-
ok cool. I guess I'll mill a dovetail into a 6" long block so that 2 faces are parallel to the dovetail feature and indicate those faces o nice I mount it on the raptor. Thank for the help
-
I have a silly question about setting up a doevtail fixture on a trunnion. Do I need to indicate this when I set it up on the platter? I dont see anything to make sure it is parallel to the x axis but maybe its not necessary?
-
I've taken the MastercamU courses and they were well laid out. It might be a benefit to you, for the $250 it costs to purchase a course and get some idea's from how they've structured it. Some stuff is good, others not so much but it's a great starting point to teach people.
-
Need Lollipop cutters....
Pitka_Guru replied to Pitka_Guru's topic in Machining, Tools, Cutting & Probing
Thanks crazy^millman! -
I'm looking for some lollipop cutters, preferrably tapered. Other than Harvey tool, where can I find these things? Google searches come up pretty bare for me. Thanks
-
To find the operation defaults do the following. 1: In the toolpath Manager expand the properties tab. Then click on tool settings. On that page under toolpath configuration select assign tool numbers sequentially. If you find this method applies only for the current mastercam session then you need to use this method. 2: Goto toolpath manager and click files. Then click the exclamation point in the operation defaults box. This will bring you to a new window. Scroll up to the top of that window and follow the steps in #1 as I posted above. That should make it permanent. hope this makes sense to you There is probably an easier way but I don' t know of it.
-
Using contour with tabs is an interesting idea, I've always seen the tabs function but never had any reason to look at it, other than curiosity. That will come in handy, as it will save me from drawing the tabs in once I'm comfortable with the process. Thanks for that Jay! And to Ron's point, I modeled them in so I could get a good view of what the thing would look like. Having never done anything like this before, It's easier for me to wrap my head around it if I draw it. I usually make some sketches on paper before I create the cad. I need the visuals as well. So thanks to everyone who posted, pm'd or emailed me offering guidance. And thanks to the forum in general, this place is an invaluable resource with many knowledgeable people willing to share their experiences.
-
Ok, thanks Benk, I just thought there was some way to see it in event viewer without having to add it all up. Ran this on my home pc, 5m 53s X8 Win 7 home premium i7 3770 Gigabyte mobo z77 chipset 8gb ram AMD HD radeon 7800 graphics
-
Where do you find the processing time in the event viewer?
-
Are you guys just using a stop watch or using the event viewer to get your times?
-
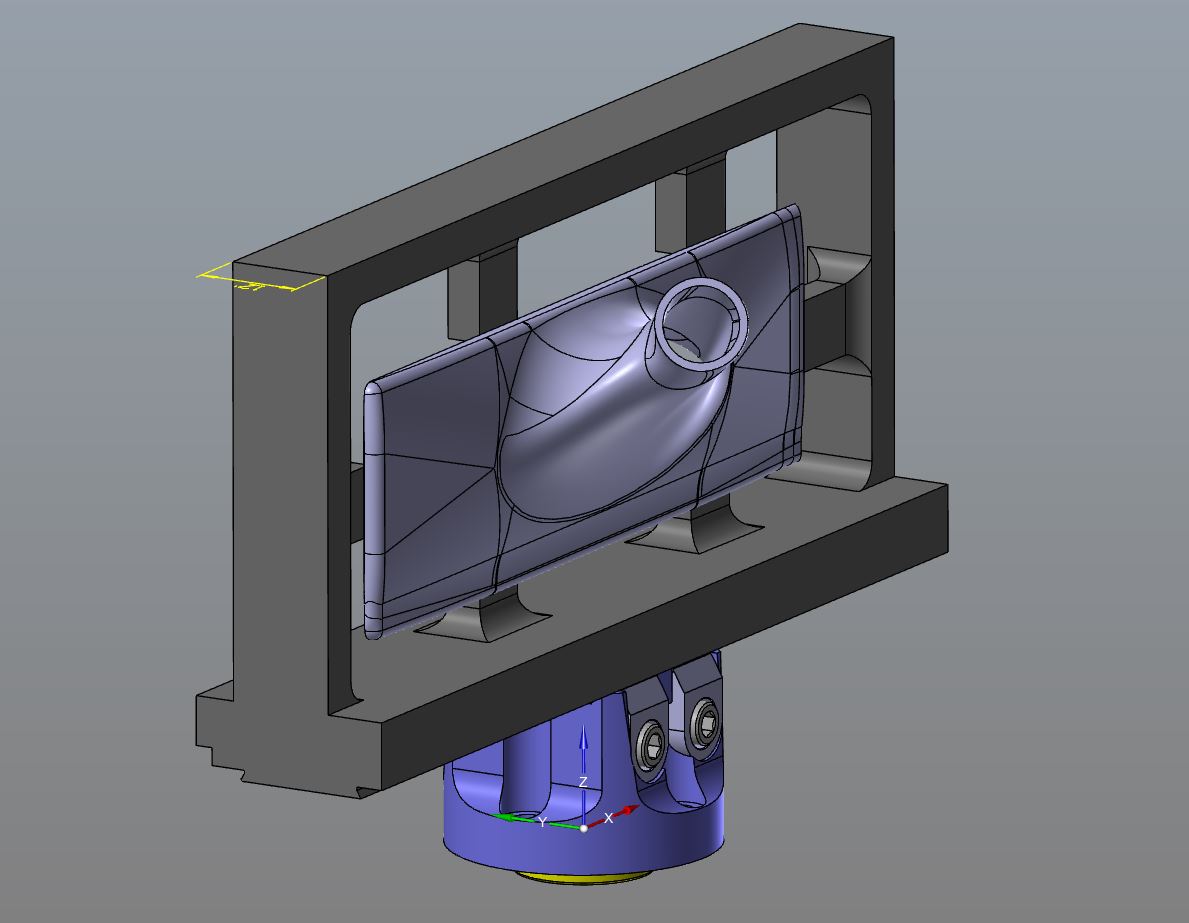
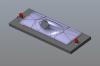
Thanks Jay! I've modeled what I think will work. Do my tabs look too big for the size of the part? And the frame thickness is 1.2", is that ok? Part is aluminum....I'll use 2 Raptors not 1. Thanks in advance!
-
Thanks Ron!
-
Ahh, ok, I don't think that functionality works from the right click menu, only the QM toolbar. I believe the icons you add to the right click menu are strictly individual switches. hth
-
I use right mouse for common stuff as well. I'm just not understanding the menu you're talking about? Do you mean right click menu?
-
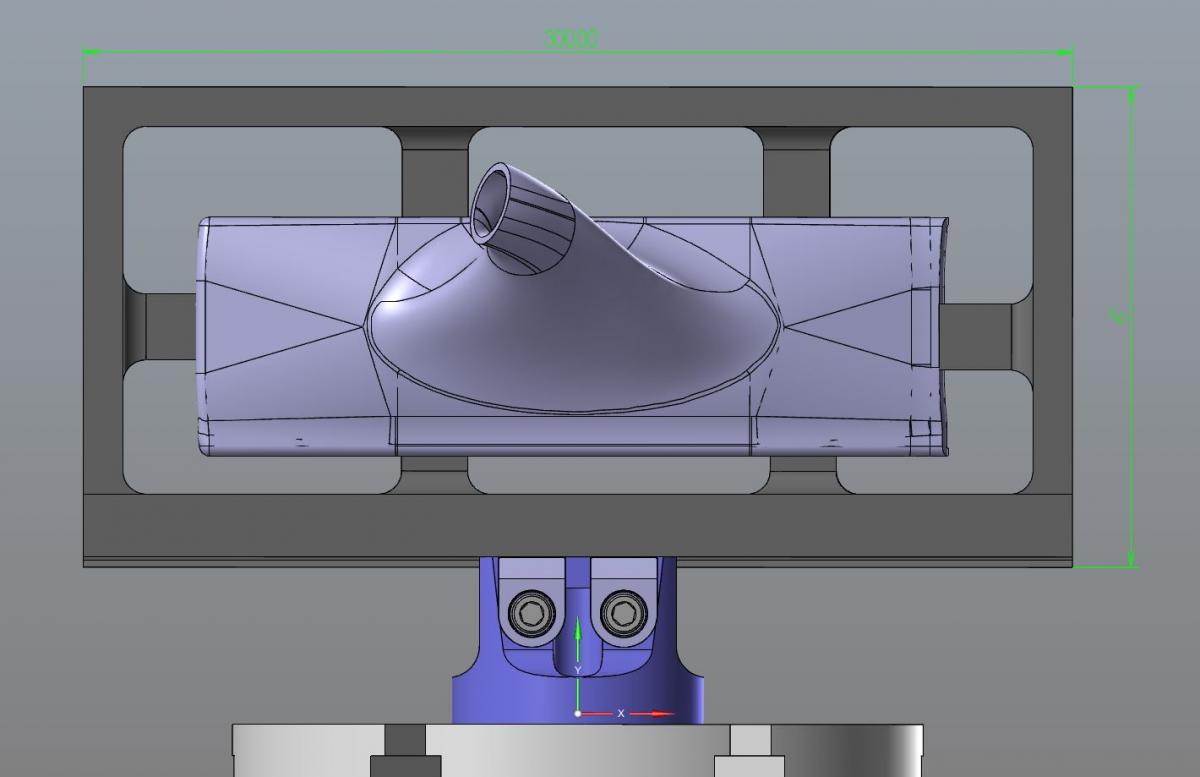
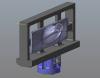
I quickly drew this up just to see if I'm going in the correct direction. Ron or Jay, how thick should my window frame be? Ron, is this what you meant when you said bottom? Thanks! Oh and how many tabs would be good? 6? As I've never done this before I'm not sure how thick to make them to keep the part nice and solid. Cheers And the frame is just for visual reference.

-
Damn, lots of good stuff here. Thanks for all of the replies, it is very helpful in wrapping my head around this. Being able to do this part in one shot sounds like the way to go. Ron, thanks for the reminder on those parts. I'm not sure what you mean by bottom, so I'm going to orient the part in cad and attach a pic. This way you and Jay can tell me if I'm on the right path. I'll post it shortly. Thanks again everyone!
-
Thanks Raider! I'd really like to avoid fixtures so if you can take a closer look you might be able to point me in the right direction I thought of doing the opposite side first but then I get lost on how to hold it down?....And yeah, its fun just not for my first one LOL! Thank you!
-
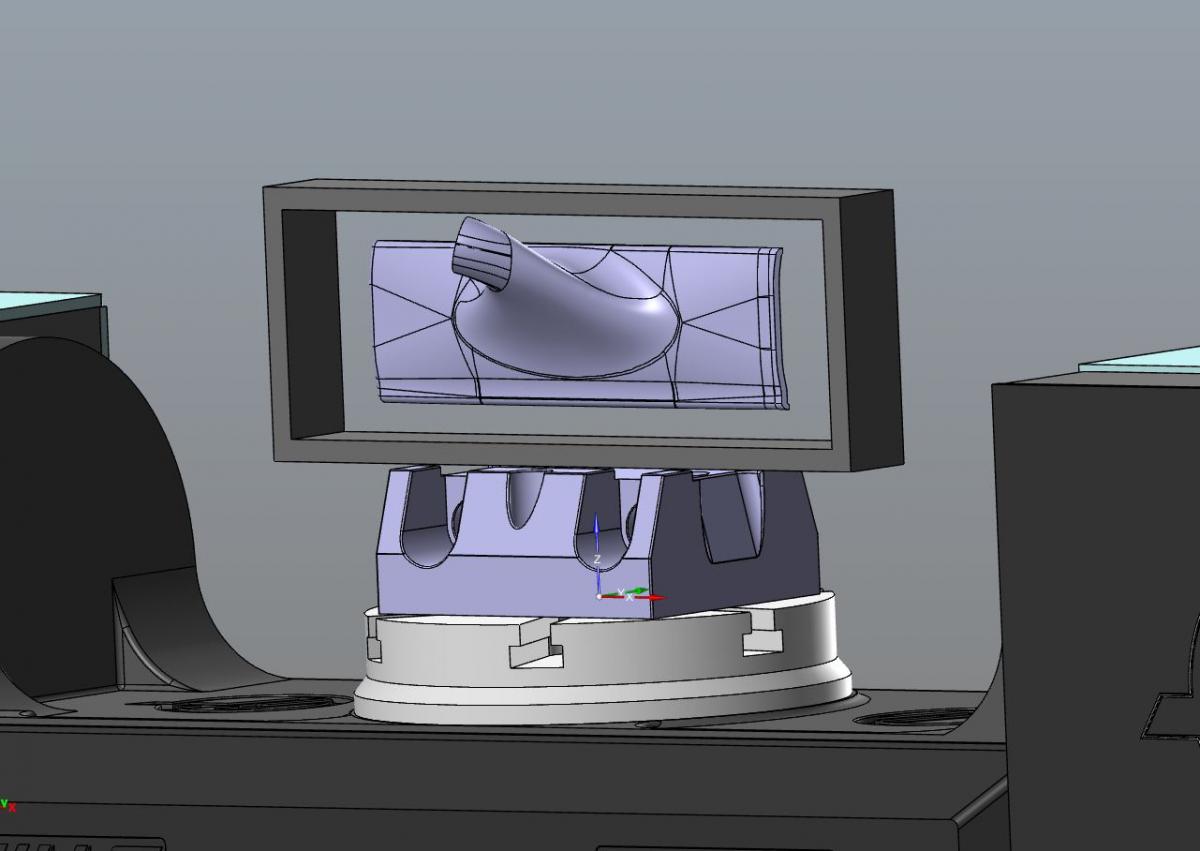
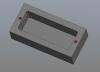
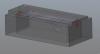
LOL of course, can't start with the easy ones but I'll learn more I've got another idea but not sure if it's good as there is a little fixturing involved. I could leave part oriented as is and mount it to a raptor dovetail. Mill 5 sides of the top and the bore as deep as I can go. I'll machine 2 bosses on each end of the part on the longest edge. These will be for locating and I can use them for holding down on the 2nd setup. Then I can machine a simple square block with a pocket and two locating holes for the above bosses. Fill the block with urethane or bondo, tape up the part and locate it with the bosses. Then finish machining the bottom and the inside of the bore. I'll post a few pics to see if this is a good idea or not lol. Thanks! Edit: I could do the fixture on a raptor as well and here are the pics of my other option. Thanks again!
-
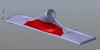
I'm gonna get some rice tape, sounds like it's handy to have around...Jim, we have x8 mill level 3, solids and 5axis so I can use the port toolpath. When I think about putting the pocket around the part I can see where I will not be able to machine the undercut on the outside of the inlet because the pocket wall will be in the way. I'm thinking I might need to orient the part in such a way to get access to the face in question see the pic I've attached. I'm just thinking out loud here Thanks!
-
Thanks Guys, I'm going to draw up this clamping method and see where I get. I'm sure I'll have heaps more questions shortly. Thanks again for your help fella's!
-
WOW! Bondo, wax tape and urethane, I never would have thought of this on my own. Thanks for the help, at least I have some starting point for this. Cheers!