BFleeger
-
Posts
17 -
Joined
-
Last visited
Content Type
Profiles
Forums
Downloads
Store
eMastercam Wiki
Blogs
Gallery
Events
Everything posted by BFleeger
-
Tool comment logic not working?
BFleeger replied to JVizzi's topic in Post Processor Development Forum
Looks like when you commented out the default line, you placed a comment in the middle of the command line. Try changing that to sopen_prn, no_spc$, *t$, sdelimiter, pstrtool, sdelimiter, *tlngno$, [if comp_type > 0 & comp_type < 4, sdelimiter, *tloffno$], no_spc$, sclose_prn, e$ #[if xy_stock <> 0 | z_stock <> 0, sdelimiter, *xy_stock, sdelimiter, *z_stock], #no_spc$, sclose_prn, e$ -
You could try adding the fixes one at a time and see when it starts to give problems. Also - when you do see these problems and restart your computer, be sure you do a HARD restart, don't just select reboot from the Windows start menu. Select Shut Down so that you have to actually turn the computer off and on again with the power button. In the past I have went as far as unplugging the computer and leaving it unplugged for a half hour to drain all power from the motherboard so that I was sure I was getting a good restart. With the problems you are seeing with the window disappearing and mousing over bringing the buttons back and all -- I would guess some type of memory issue - now to track if it is caused by memory being full, a M$ update causing memory to be managed badly, a bad stick of memory, ...... -Brian
-
Maximum Material Condition
-
I don't see this (running Beta 2). When I right click and select "Load Workspace", the only option I get is "MasterCAM" I do not have all the other workspace options. -Brian
-
I magnets ARE cool !!!! -- we are saying that around here right now. I trim fiberglass parts on a 5 axis CNC and the vacuum was a pain to hold the parts in the fixture. I did some looking and got some "Rare Earth" Magnets (2" x 1" x 1/2" ). That little magnet has more holding power on my parts than the vacuum ever did. Just be careful not to have your skin between 2 of them when they try to jump to each other..... (guess who has found out -- more than once
-
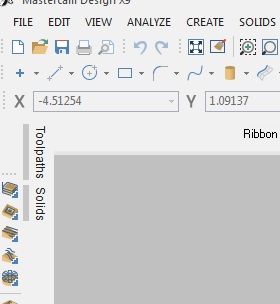
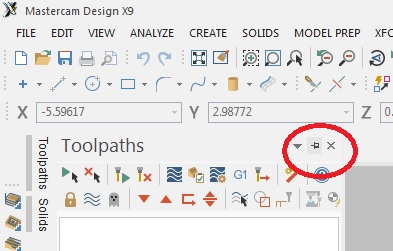
Have your Managers become minimized off the screen? Look at the edge of your screen to see if Toolpaths and/or Solids is shown: If it is there, hold your mouse over the words and the window should slide out. Then if you click on the "Pushpin" in the top right of the Manager window, it will "stick" it onto your screen again. If it is not there, the View / Toggle Toolpath Manager turns the window on and off for me (I am in X9 Update 3). -Brian
-
Thanks gcode -- I wasn't seeing it on my right click menu, needed to go into tool manager to get it.
-
I tried a search and couldn't find this. I created a program using the default tool list that is in Mastercam X9. Since then I have created a custom tool list for our company that is standardized and contains only the tools we have/use. I am now changing our files/programs over to use this custom tool list to make things uniform. But, how do I remove the old tool from the list in the toolpath properties? I know I could leave it there and things would post fine because it is not referenced, but I don't want it there. I see potential to get messed up in the future and the wrong tool then be posted out (they have different tool numbers). It seems to me that if the tool is not being referenced by any tool paths I should be able to remove it from the list, but I can not find how. Any help would be appreciated. -Brian
-
There was a recent thread on this. http://www.emastercam.com/board/topic/86720-tangent-to-tangent/
-
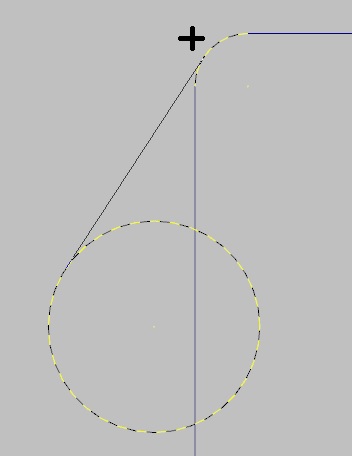
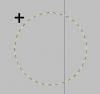
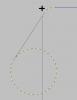
Select Create Line Endpoints Be sure the Tangent button is depressed on the toolbar Hold mouse close to first radius until it highlights (not on the actual radius line, just close) and click Move cursor to second radius until it highlights - showing tangent line between the 2 radii, then click Note: after you click near the first radius, you can drag the mouse around the circumference of the arc and see the line slide along it as it stays tangent. -Brian
-
Douglas. I think Leigh is on the right track. My thoughts on this. In the link you provide, He has programmed an absolute position for the start of each number. I think if you switch and work in all incremental it can be done. 1. Think of each digit as a box with the left and right edges of the box being the edges of the digit (no leading or trailing space on the number). The bottom of the box is the bottom line you will be writing the number on. 2. Start the code for each digit with the tool at the lower left of the box 3. End the code for each digit with the tool at the lower right of the box Now in the program, 1. Start your Serial in an absolute location at the lower left of the first digit. 2. Cut the first digit in incremental mode from that location. The tool will finish in the lower right corner. 3. Leave your machine in incremental mode in your main program and move your tool the correct distance to form the spacing you want 4. Cut the second digit etc.... for each digit in your serial. I hope this isn't too long or confusing. I have it in my head, just not sure I am getting it explained out correctly. -Brian
-
I see you got it working by splitting your night shift test IF[#105LT055959]GOTO4 IF[#105GT180000]GOTO4 I noticed on your original code, you have an "AND" where there should be an "OR" (Not sure if you can use OR in these macros, I am new to this) But you can not be LT 0600 and GT 1800 at the same time..... IF[[#3012LT060000]AND[#3012GT180000]]THENGOTO4 If you can combine this back together, might save the machine some processing steps.
-
mastercam .nc file to WinPC-NC usb: not working
BFleeger replied to rcdaniel91's topic in Educational Forum
Try making a simple program in both and compare the actual NC code files they spit out. See if there may be some command at the end of the WinPC-NC file that triggers the machine to execute that is missing in the MC output. -Brian -
The XForm/Offset Issue was corrected with the X9 Update 1 Patch.
-
I just played around with this a little. I have MCX9 full version on my desktop, and HLE on a laptop I take home to study. On the HLE version, it seems to give you only 2 significant digits of value, regardless of what is set for the number of decimal places (though it pads the correct number of decimal places that you have set). On the full version, it works correctly by looking at the number of decimal places you indicate in the settings. But, when you are setting the dimensions, and click on the "Number" button in the ribbon bar - it asks for the number of significant digits - but uses that as the number of decimal places. It seems what you are seeing may be a limitation on the HLE version (a very bad one if you ask me). But there is also another underlying issue with MasterCAM's confusion of the use(or nomenclature) of decimal places and significant digits. -Brian
-
Operations manager un-docked, strange maximize
BFleeger replied to r6z4o6's topic in Industrial Forum
Try to click on your MAIN MasterCAM window Maximize button (2 overlapped boxes in extreme top right of your screen) to maximize it. In other programs I have used, if the main screen is sized for your whole screen, but not actually maximized, you lose some of the edges/controls of sub-windows within the main window. If you maximize the main window, you can then resize/control the sub-window. -Brian -
IF [MY IDEA DOSENT WORK] THEN GOTO THE FORUM
BFleeger replied to oneyankfan1's topic in Industrial Forum
I might be missing a minor detail here, but couldn't you cut down the if-logic needed by using vc125=[vc121+vc122]/2 ?