CJep
-
Posts
1,593 -
Joined
-
Last visited
Content Type
Profiles
Forums
Downloads
Store
eMastercam Wiki
Blogs
Gallery
Events
Everything posted by CJep
-
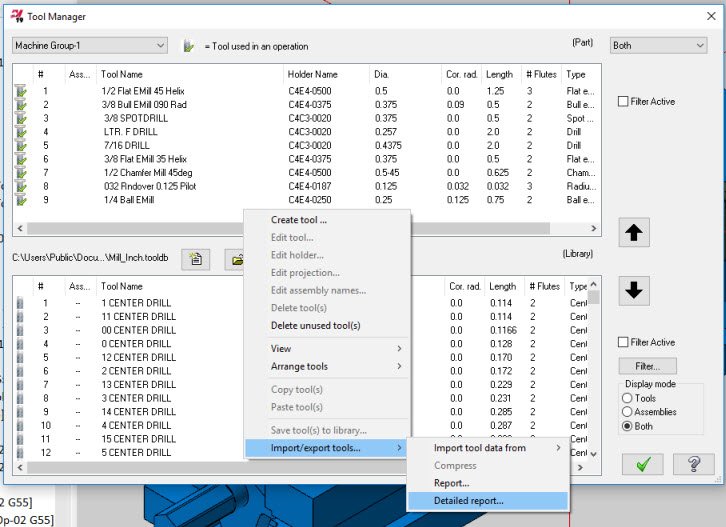
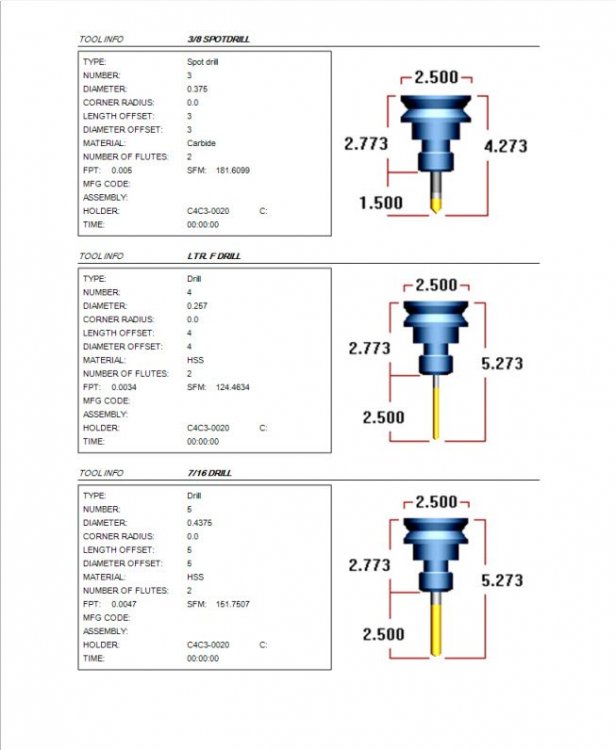
In the internal tool manager you can run a detailed report that will show the tool holders right click in the manager, select import/export then select detailed report from the fly out menu
-
running as the Admin jacked up the ability to drag n drop Mcam part files to graphics background on my install
-
If you are working from the settings you have currently in the linking parameters the depth is actually telling the Z axis to move in a positive direction. The TOS is set -0.800 below your Z zero, your depth is set to send the tool to -0.050 below Z zero. To get this to drill another 050 deeper at the -0.800 you would need to either set it to -0.850 absolute or if the geom in Mcam is already located at the -0.800 leave the depth in the tpath set to -0.050 and switch to incremental.
-
how to start a pocket by plunging on a specific point
CJep replied to awjareme's topic in Industrial Forum
In Mcam 2019 you can set the entry to plunge only then select an entry point.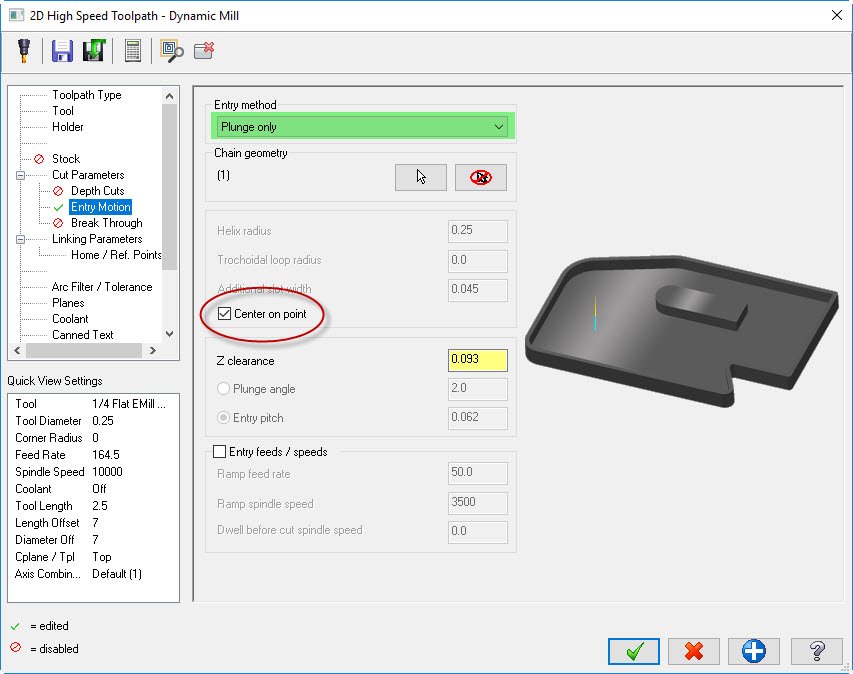
-
You might find that in the shared folder,.... then again it may be in the my folder.
-
Ifen you go to the system config and open the toolpath manager page what do you have the NC file parameters set to?
-
Not that I have noticed been running it in 5 axis since McamX9
-
set the option to number, throw an odd number in there and you'll get a curve running through the middle of the surface
-
@Mark VIII might want to give @Pete Rimkus from CNC Software Inc. a holler and share the file with QC
-
Yes remove the second dwell call in the additional positions.
-
About toolpaths,.. Yes, careful with the other Sir Daniel would not approve.
-
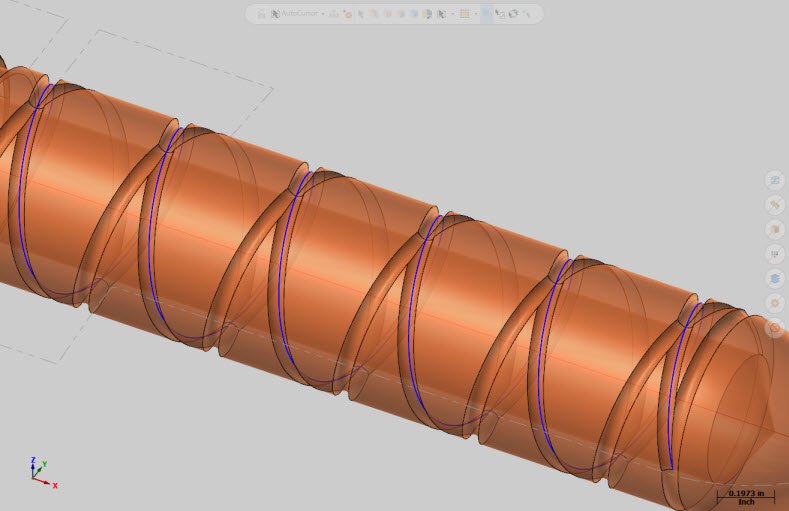
I used curve flowline to create a helix in the bottom of the groove then selected that as the chain, the red arc represents the dia at the bottom of the grove. MachineGroove_CJep.mcam
-
pdrill_2_cmn #Canned Drill Cycle, additional points pdrlcommonb punclamp pcan1, pbld, n$, sgplane, prdrlout, dwell$, feed, strctxt, e$ << you're calling the dwell again here in the additional positions as Leon mentioned pclamp pcom_movea
-
Yeah, that is way more detail than what's absolutely required. What happens if you save it as a parasolid or step file instead of the direct import?
-
can you copy the post block you're modifying are you forcing the dwell with an "asterisk"
-
just here for the show,.. you mentioned you imported a vise, where did you get the solid model? have they modeled all the threads of the cap bolts? have they modeled all the threaded holes? I have found when they over detail solid models Mcam gets kicked in the nutts First thing I do when importing fixtures/vices that will be used is blowup the history, then I start simplifying by removing features that are not required like all the threaded holes. Here is an example of a four inch Kurt vice, the original file has 30 or so parts I combined solids that didn't have any effect on the setup other than space envelope. The vice assembly has 4 parts, the body the movable body and the jaws, removing the jaws allows me to model soft jaws. Kurt 4IN Vise .mcam
-
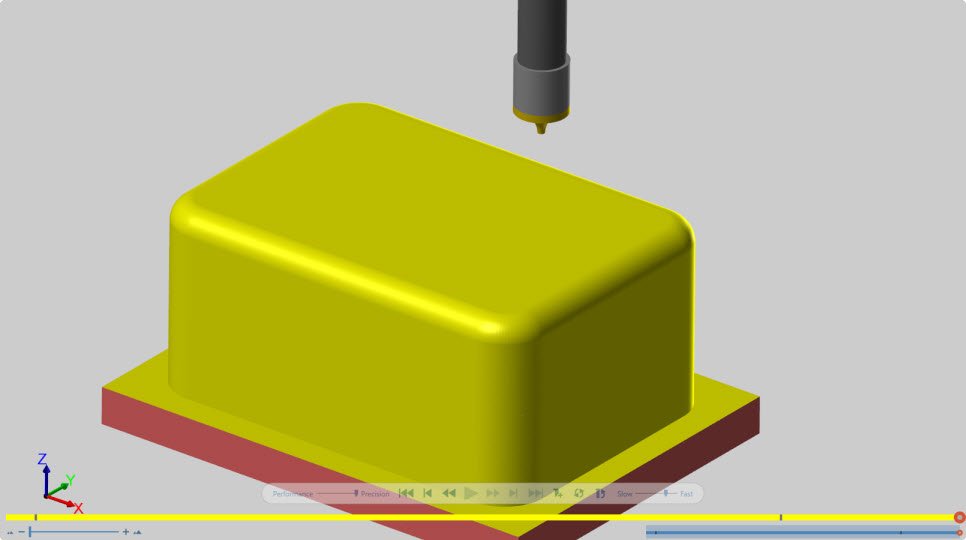
You need to check the simulation engine in Verify, the default setting is to use the 3 axis engine. Go to the file tab select options and switch the engine to 5 axis, this will titghen up the tolerances and the round over tool will cut a radius instead of a chamfer.

-
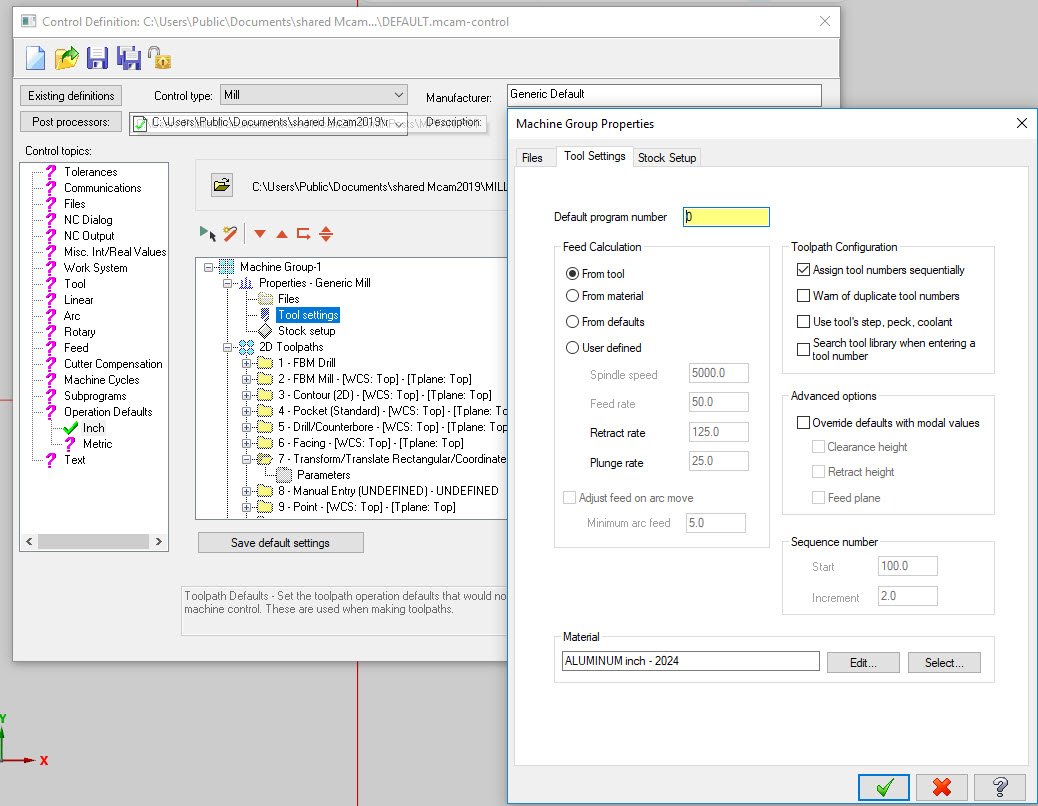
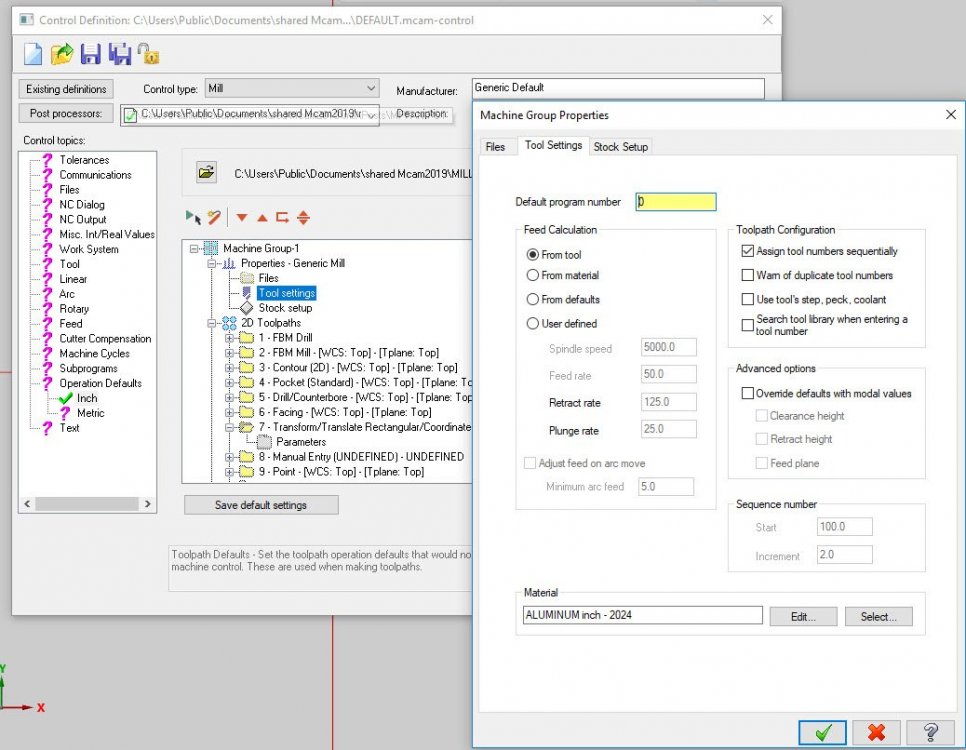
Yes, you can set operations defaults local to the control def file by selecting the control def without going through the machine def.
-
You mentioned you're working with surfaces, what was the native file? Did you start with a solid model? Was the model sent to you as a step or parasolid X_T, X_B?
-
Your reseller should be contacting InHouse if they got the post for you, however you could just go directly to InHouse
-
I have seen this issue, however as stated it has been very difficult to nail down. I haven't noticed it yet with the 2nd update.
-
Fishing or just making conversation? The decision to do what eva with the UI is somebody else's to make The decision to fight with the software and allow it to $hit on my day repeatedly is mine, I choose work with it instead of against it. I found ways of working with it that make sense to me there are quite a number of methods I used in V6-V9 that I wouldn't use in Mcam 2019. One that I can think of is how I work with and create custom planes.
-
Matt, I just use the software and found it easier to adapt and overcome, rather than fight it find a way to work with it. my 2mil Bolivars

-
Haven't had to register mine.