


djstedman
-
Posts
577 -
Joined
-
Last visited
Content Type
Profiles
Forums
Downloads
Store
eMastercam Wiki
Blogs
Gallery
Events
Everything posted by djstedman
-
Its still there, in your start menu .. go to mastercam then utilities then advanced configuration - then under post support make sure that Post Debugger is set to Enabled Then when you go to post you just need to hit the debug button to go into debugging mode ..
-
2D Contour Ramp w/ Control Comp...no cycle time in Backplot?
djstedman replied to jfranya's topic in Industrial Forum
I don't know why it happens, but I can confirm that any toolpath that uses control comp will not give a cycle time, this has been like this for a long time. I believe that it is due to the 'supposed' inability for Mastercam to know the exact path the tool will take based on when comp turns off and on, personally I think this makes little sense, since they determine the path for use in backplot and verify .. but maybe there is another reason. It is certainly something I wish they would fix.. despite the legions of people who use wear and nothing else, there are still those of us out there that for one reason or another use control comp and it would be nice to see CNC Software take it more seriously and fully support it by fixing issues like these.. -
Looking for some professional post writer
djstedman replied to PcRobotic's topic in Post Processor Development Forum
In addition to what everyone else has already said.. just figured I would mention that with only 125Kb of memory using 2D highspeed paths is going to be very difficult without some serious filtering which is more on the programming end of things than the post.. depending on the size and configuration of the parts you will be lucky to get one or two operations in highspeed 2d without running out of storage.. look into DNC or learn to start using the equipment you have in the oldschool manner it needs to be used to produce the results you need. -
One way I can think of without messing with the post would be to force toolchange on each toolpath. Since it outputs the work offset on each tool change, this would give you the work offset for each operation.. If that's not good enough I think you would have to look at your null toolchange block (ptlchg0) of the post and how to make it spit out the work offset on null toolchange.. I am sure it wouldn't be super hard to modify .. but then again.. just forcing toolchanges would be easier..
-
Since the file is a database file .. though you cannot use Mastercam chook calls to work with the database you should be able to write your own code using a SQLite database driver to read data from the database. There is a data browser on their web page that should allow you to see the SQL structure of the relational database.. assuming you know SQL you could then create queries to pull whatever data you wanted ..
-
Step one.. post on the forum in a color that doesn't make my eyes bleed from looking at it.. Not sure I would have the time or be able to help or not but I am sure I wont be trying to read anything in that bright blue mess that's posted..
-
Didn't notice the tabs was on, I assume it was that way in the original toolpath in order to keep the parts from moving around.. although it doesn't in fact make the toolpath any different so far as lead in/out and comp from what I could see..
-
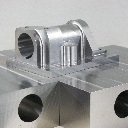
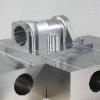
NESTED CYMBAL STAND.MCX-5 Took a moment to look at the file and modified it using control comp - basically just added an arc in .. dropped the line length down to 52% and added an arc sweep of 90 degrees at 52%.. Should work fine with no gouges..
-
From my recollection this has always been bugged in some cases with Helix bore.. I know its why I have always used contour with ramp instead..
-
He said he wants to use control comp.. I understand people probably just want to help, but why do people insist on showing how to do it with wear.. a lot of machines WILL NOT run with wear comp without serious tweaks.. and some shops don't use wear.. The shop I am has mostly Mazak's that had legacy programs using control comp going back years when I started .. there was no option but to learn to use control comp.. and answers like the ones above just drove me crazy.. I feel like its essentially like someone asking how to make an apple pie.. and everyone saying.. well you don't really want apple pie.. here is a recipe for chocolate cake.. Use the method I described above to actually use control comp..
-
To use cutter comp in control.. set your line lead in to perpendicular and make sure the percentage for bot line and arc lead in and out is a minimum of 50% of the cutter diameter. This should eliminate gouging.. the reason is that when the control turns on comp it needs to move the cutter half the diameter of the cutter to get into position, setting your lead in out as I suggest above will create a path that allows it to do that without gouging..
-
Alternatives to Pibull clamps
djstedman replied to dstryr's topic in Machining, Tools, Cutting & Probing
I remember when I was about 20 an older guy once told me something that stuck with me, the biggest mistake most people make in business is not accounting for the cost of their own time. I think specv is right, between machine time, material and your own time and lost production time, these self made clamps are going to cost you more than purchasing them in the long run. -
Not having really worked on Robodrills I couldn't say for sure, I was just going off of experience I had on one of our Mazak's. We mounted an indicator on the table and never moving the column in Y and only running the spindle at 18K saw growth of .0017 in Y after 2.5 hours of runtime, the tech's at the time attributed the movement to the heat created by the spindle, and with a infrared thermometer we were able to measure the casting surrounding the spindle bearings at about 150 degrees F. I just thought it worth mentioning that its a possibility that the spindle itself could be contributing to some of the movement.
-
If this were me (and often times it is.. since I deal with this a lot) I would put some money into a renishaw touch probe, then probe for location.. this way your probe 'follows' your part around as the machine drifts around in x y and z.. not sure if probes are able to be put in robo drills but I really cant see why they shouldn't be able to be. Not only will this solve movement in Y causing error, if you also probe in Z you can eliminate issues from runout of the part as well. Also If your stuck going the warm up route, I personally wouldn't lower the rpm's on the spindle way down, since a lot of the thermal growth you are seeing is coming from the heat generated from the spindle running at rpm.. lowering the spindle rpm too much could have a significant impact on the amount of movement you see.
-
Are you choosing the stock plane in the Stock Definition page of the stock model toolpath? You should be able to choose that and have it alter the position of your initial stock (before the toolpaths are applied to it) You should be able to make a stock model after all your toolpaths from your previous operation, then use that toolpath as the stock for your next stock model, on the new stock model you would choose the stock plane to be whichever plane you wanted the stock to be located in relation too. So for instance all your toolpaths for op 1 are in the top plane, then for op2 you will be working from the front plane, you make a stock model using your initial stock and all the op 1 toolpaths and name it op1, then for the op2 stock you choose the stock model op1 you just made for your initial stock shape and choose the stock plane as 'front' for it, you should end up with a stock model in 'front' orientation that is the result of what you 'cut' in op1.
-
Mastercam file path not in the title bar any more
djstedman replied to oneyankfan1's topic in Industrial Forum
FYI - you mentioned you thought it was the public beta version you were using, if that is really what you are using then you will 'have' to re-install the official release version soon in order to continue using X9 because the beta version is time limited and will expire somewhat soon (I cannot recall the exact date) -
Ok first let me preface this by saying that I think im generally a pretty calm guy.. but seriously, your going to complain about it cause you have to hit 2 buttons to delete it now after your comparison? I mean .. yeah it may not be exactly the same as what your used to, but can't we agree that there are bigger things to worry about for the Mastercam developers than maintaining a 'redundant' function that never worked nearly as nice as the new one? (and yeah I do believe a function that does basically the exact same thing as the new function is redundant) In order to maintain that function requires developer time and resources that could be much better spent on more pressing issues.. or wait.. you could use two mouse clicks to delete after your comparison.. hardly a matter worthy of debate IMO.
-
X8 / X9 Save files with solid feature suppressed
djstedman replied to rsbeadle's topic in Industrial Forum
It is because that utility was made for X9 so it will be linked to the X9 nethook.dll or if its a true chook it will be compiled using the code that powers x9 chooks.. either way the X9 version wont run on X8.. At the top of that download page is a dropdown for Mastercam version.. set it to X8 and you can download the X8 version of the same chook -
I am not sure at this point.. been messing with my drivers trying to fix the issue I have with backplot - that is really the one that's a lot more upsetting .. anyhow after messing with some of the settings for my video card it seems like the translucency toggle is working.. or at least I can't seem to get it to do what it was doing before. The backplot issue I am having is far more frustrating anyhow, since without being able to tell if the tool is in back or in front of the piece its cutting makes every backplot a lot less useful for determining what is actually going on.
-
I take it this is the humorous way of telling me its doing the same thing for you then? I was kind of hoping this was a graphics card issue. If it were I could possibly fix it with a different card, but if it is a Mastercam issue that everyone is having then guess I will take a deep breath and carry on .. unless of course someone does indeed know a fix for it..
-
X8 / X9 Save files with solid feature suppressed
djstedman replied to rsbeadle's topic in Industrial Forum
They have a chook/nethook you can download on the Mastercam site which will allow you to save a file with the solid model suppressed.. Save Solid As Is Runs in X9 and performs a "Save As" function that overrides the Solids saving restrictions introduced in X8. It allows users to save parts that contain Solids that are dirty, or have suppressed, or rolled back operations. To install... Download the .ZIP file to a temporary folder. Extract the *.zip file to your C:\Program Files\mcamx9\chooks directory. Launch the C-Hook by Pressing Alt-C and selecting it in the File / Open dialog. -
Settings - > Configuration -> Shading -> Translucent is already unchecked. That was the first thing I checked. When opening Mastercam the model is still translucent until I click the translucency toggle. The second setting worked though.. so there is that.. although now that it worked I just realized the problem is worse than I originally thought.. it appears that the tool is always displayed 'in front' of any geometry even if the geometry should occlude the tool. This actually explains the weirdness I was seeing when it was semi-transparent as well. I wonder if others are experiencing the same thing or if this is a graphics issue? In order to replicate this you can go to backplot something on a solid with the solid model visible and once it starts where it should be cutting pause backplot and rotate the view so the model should obscure the view of the tool.. for me at least, the tool displays 'in front' of the model when it should in fact be obscured by the model since it is actually 'behind' the model
-
I was just wondering if anyone knows if there is a setting in X9 to have translucency off by default? It seems like its on by default in X9 and I haven't been able to find any place to change that behavior, I know I can shut it off using the translucency toggle, but I pretty much never want my models to be translucent and the few times I do it would be a heck of a lot easier to turn it on than to always be turning it off. Another question regarding translucency .. does anyone know how to make the tool in the classic backplot display as a solid? Maybe I'm losing my mind but it seems to me it was always shaded solid in the past and now its translucent no matter what .. now I often can't tell if its Intersecting the model or not because of how its displayed translucent.. Anyhow.. really hoping someone knows a simple way around these two issues..
-
So far as retracts go, I often program these kind of paths using a 'force tool change' so that between paths the machine moves to toolchange position. The post I use is setup to always go home in Z first then XY, so by forcing a tool change I know the tool will always be out of the way prior to making any weird rotational moves. So far as machine simulation goes, I wouldn't say you could take for granted that it will always be correct either. For this one particular issue it most likely will be correct, but you have to keep in mind that it doesn't matter if you are using verify or machine simulation, what you are seeing is what is coming from Mastercam BEFORE it goes through the post processor. So depending on how your post interprets the NCI file your G-code can do something else entirely. A better method for verifying code is to use a verification software that displays actual g-code that is run through a simulation of the specific machine you intend to run the g-code on, such as Vericut. And even that can have errors if the machine is not setup to perfectly mimic the machine itself. So far as I am concerned the only truly proven code is code that has actually run on the machine, because of this first run programs are still always stepped through carefully to prove them out before they can be run full speed.
-
I am just making an educated guess here since I can't see a file, but in my experience Mastercam's verify has been hopelessly broken regarding retracts on rotary programs for a very long time. In verify the verify engine processes the retract move as a move in Z+ relative to the tool axis normal to the surface of the part, rather than as a move in Z+ in the tool plane direction. I am sure the problem stems from the fact that the verify of rotary programs does not simulate actual machine kinematics (ie. tool/table movement in XYZ axis's only with rotary movement in A) but rather displays the rotary as stationary with the tool moving in XYZ and rotating around the part rather than the part itself rotating relative to the tool axis. Because of this behavior you get a retract along the tool axis normal to the part, on the machine however you get a retract in the Z+ direction that clears the part. Then when the rotary rotates to the next position the tool moves from its current location (somewhere retracted from the part but not necessarily above it) to the next location - often this positional move to the next location will go 'through' the part in verify due to verify being a poor representation of how the machine actual moves in the real world. This is why in simulation it works fine, because in simulation you are showing actual machine motion based on machine kinematics and in verify you are not.
