Günther Massimo - GMCCS
-
Posts
554 -
Joined
-
Last visited
-
Days Won
2
Content Type
Profiles
Forums
Downloads
Store
eMastercam Wiki
Blogs
Gallery
Events
Everything posted by Günther Massimo - GMCCS
-
AutoRegen - CHook
Günther Massimo - GMCCS replied to Günther Massimo - GMCCS's topic in Industrial Forum
To update this Chook, CNC needs to release the 2021 Chook-SDK. -
Mastercam 2019 not loading menu and tool bars
Günther Massimo - GMCCS replied to wojtek90's topic in Industrial Forum
try to rename mastercam.workspace to mastercam.workspace_old in ".../my mcam2019/config" then restart mastercam. -
X+ Mastercam 2020 beta 1
Günther Massimo - GMCCS replied to Günther Massimo - GMCCS's topic in Industrial Forum
To install X+ you need to download the correct version from my website. Then unzip the installer and then execute the installer. https://www.gmccs.de/downloads_x+.php Once X+ is installed, it makes sense to create an X+ ribbon bar with all the icons you need. The icons with the flash are new. They will be included with the next upload. So don’t miss them
-
X+ Mastercam 2020 beta 1
Günther Massimo - GMCCS replied to Günther Massimo - GMCCS's topic in Industrial Forum
You got mail. -
X+ for Mastercam
Günther Massimo - GMCCS replied to Günther Massimo - GMCCS's topic in Industrial Forum
You can tweak this with CSS. Open your CSS file with a text editor. Add the max-width style to the HEADINFOTEXT class. Play with the the percentage amount. .HEADINFOTEXT{ clear:right; background-color:white; float:right; padding-top:20px; max-width:40%; } or try this: This is more dynamic .HEADINFOTEXT{ clear:right; background-color:white; float:right; padding-top:20px; max-width:50%; } .HEADSCREENSHOT{ max-width:50%; } .HEADSCREENSHOT img{ max-width:100%; } -
AutoRegen - CHook
Günther Massimo - GMCCS replied to Günther Massimo - GMCCS's topic in Industrial Forum
autoregen 2020 -
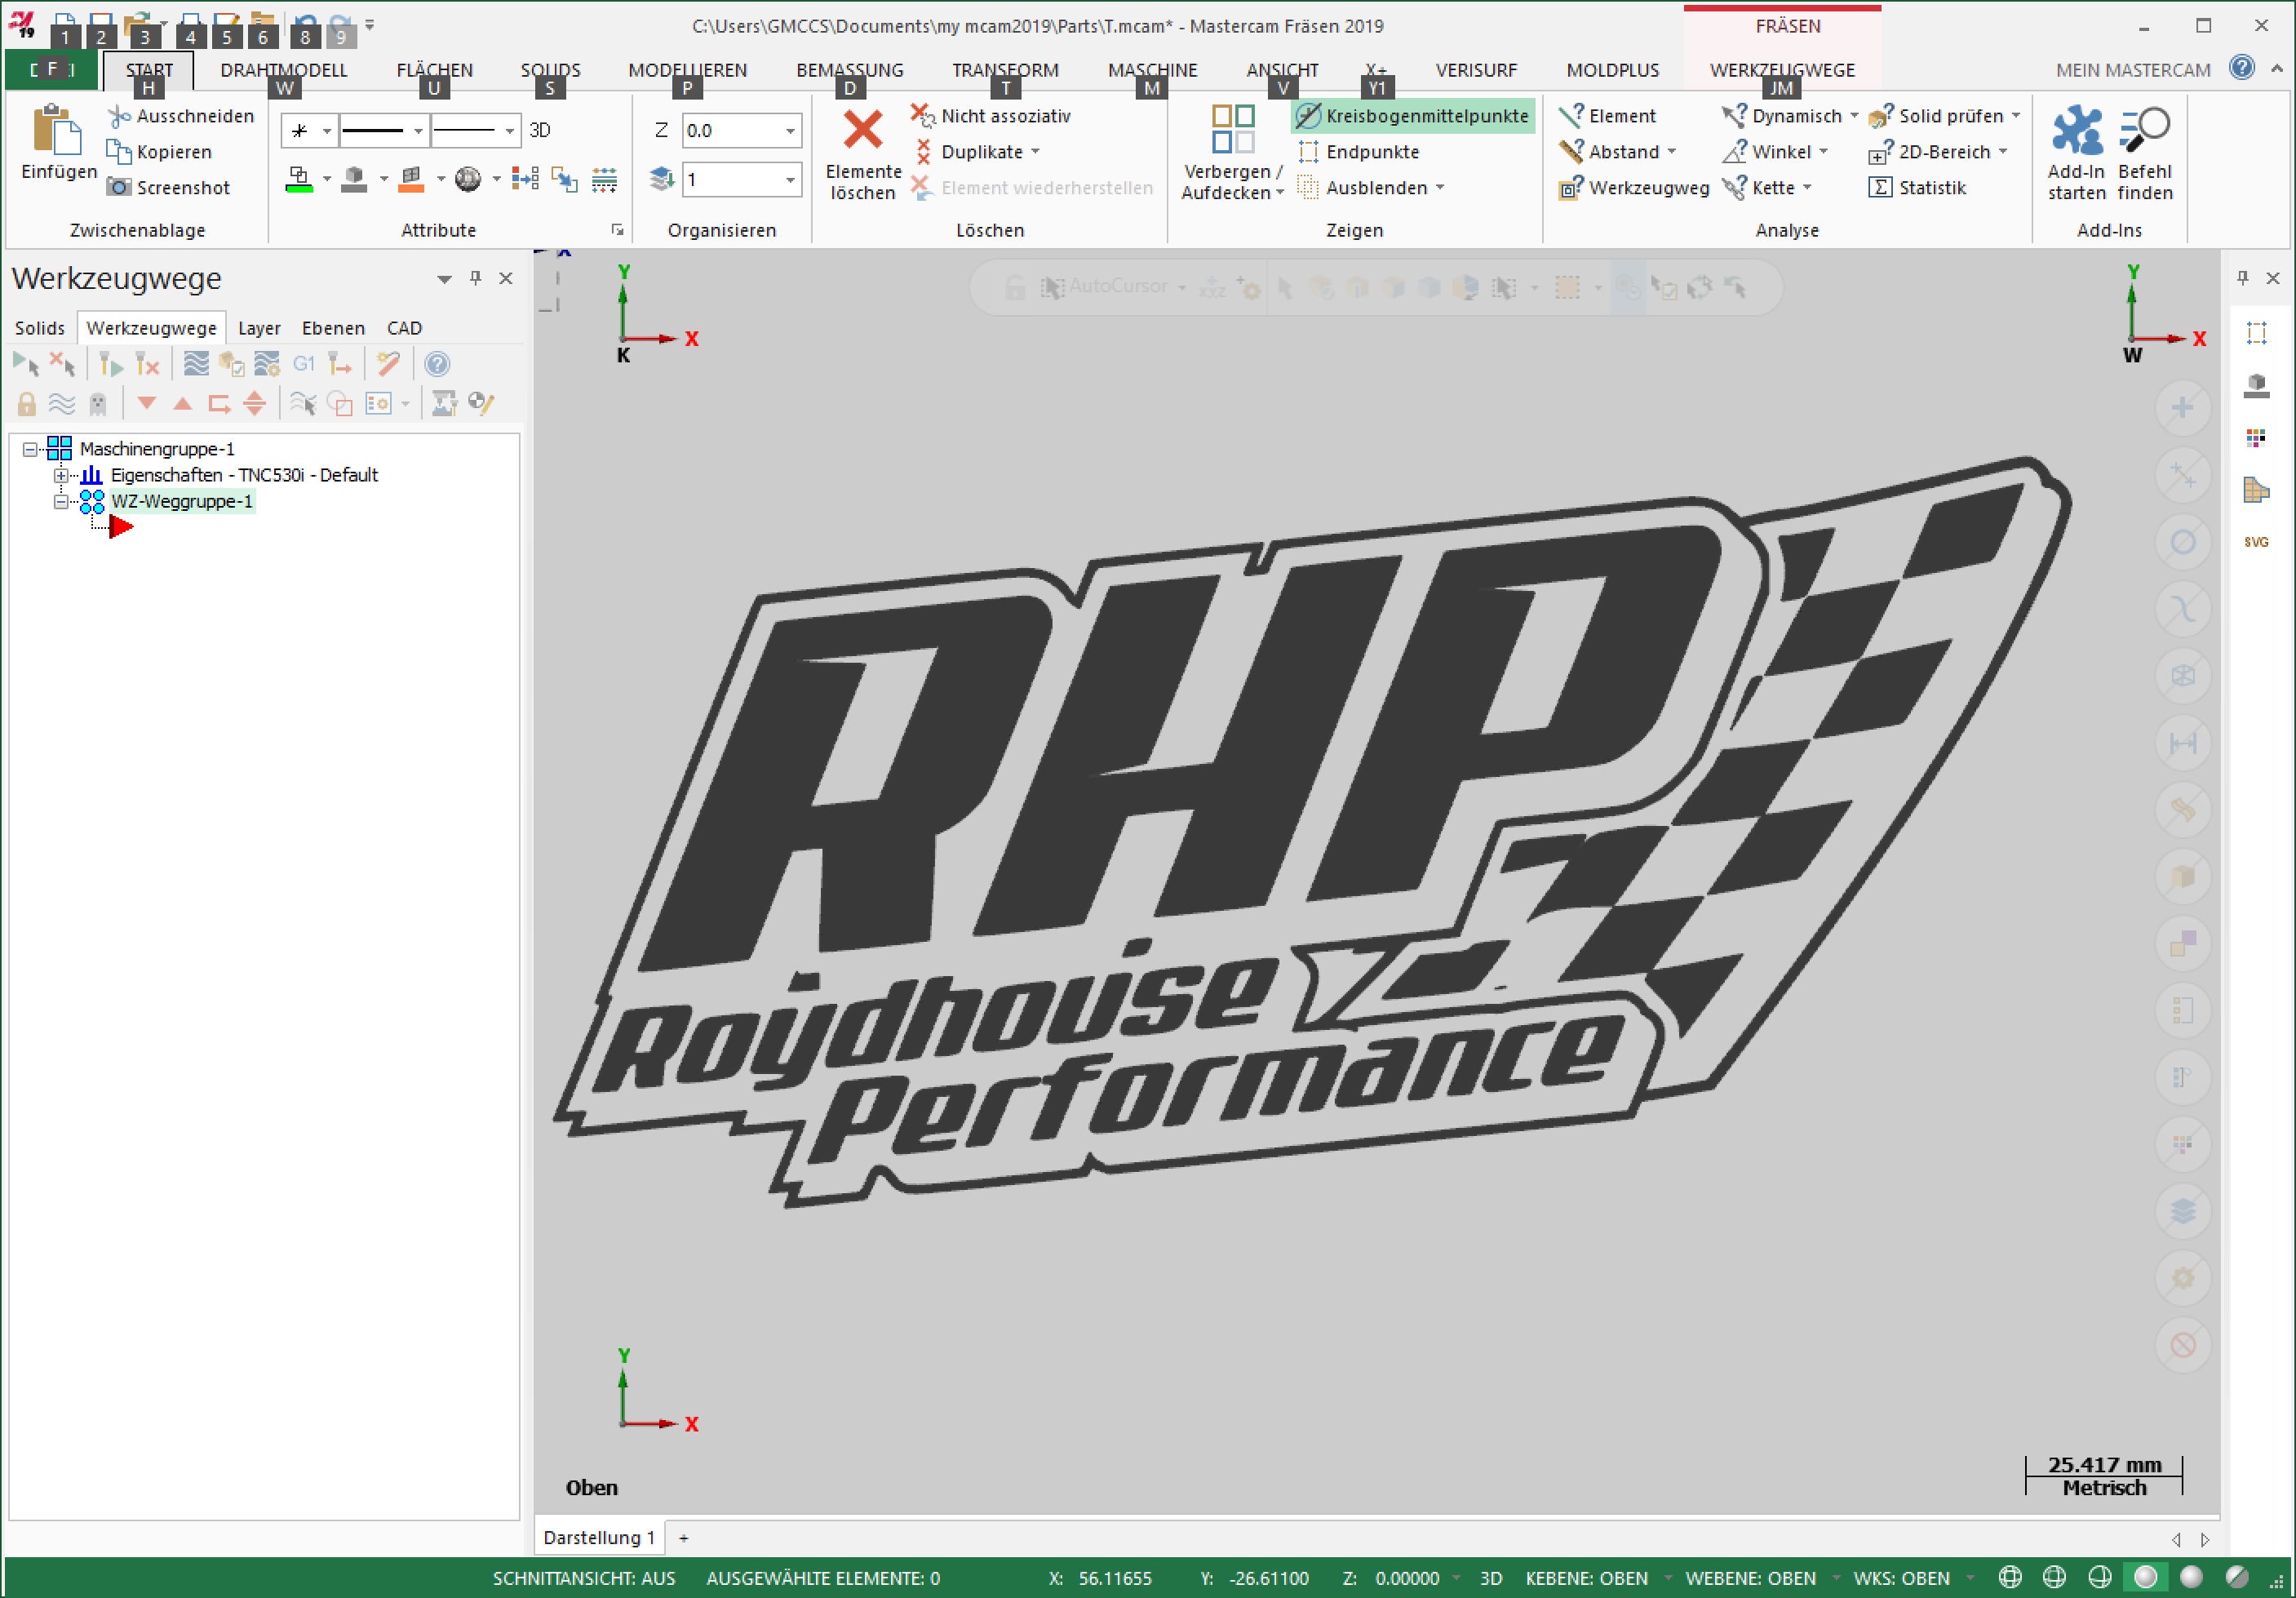
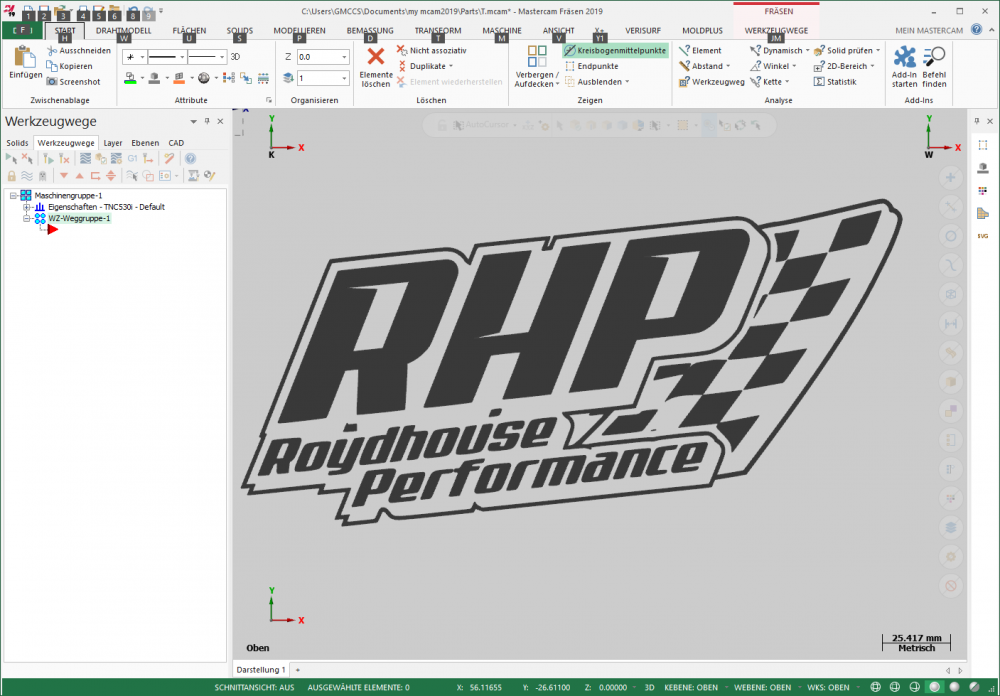
Inkscape -> SVG -> X+ SVG Import The SVG file is attached. test.svg
-
My configuration is all messed up now!
Günther Massimo - GMCCS replied to Roger's topic in Industrial Forum
Most Mastercam setting are located in this folder: C:\Users\%USER%\Documents\my mcam2019\CONFIG Keep a copy of this folder...or at least the two files mastercam.workspace and mcamX(m).config. However some settings are stored in the registry or in different locations.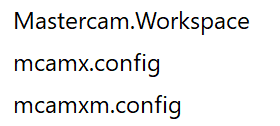
-
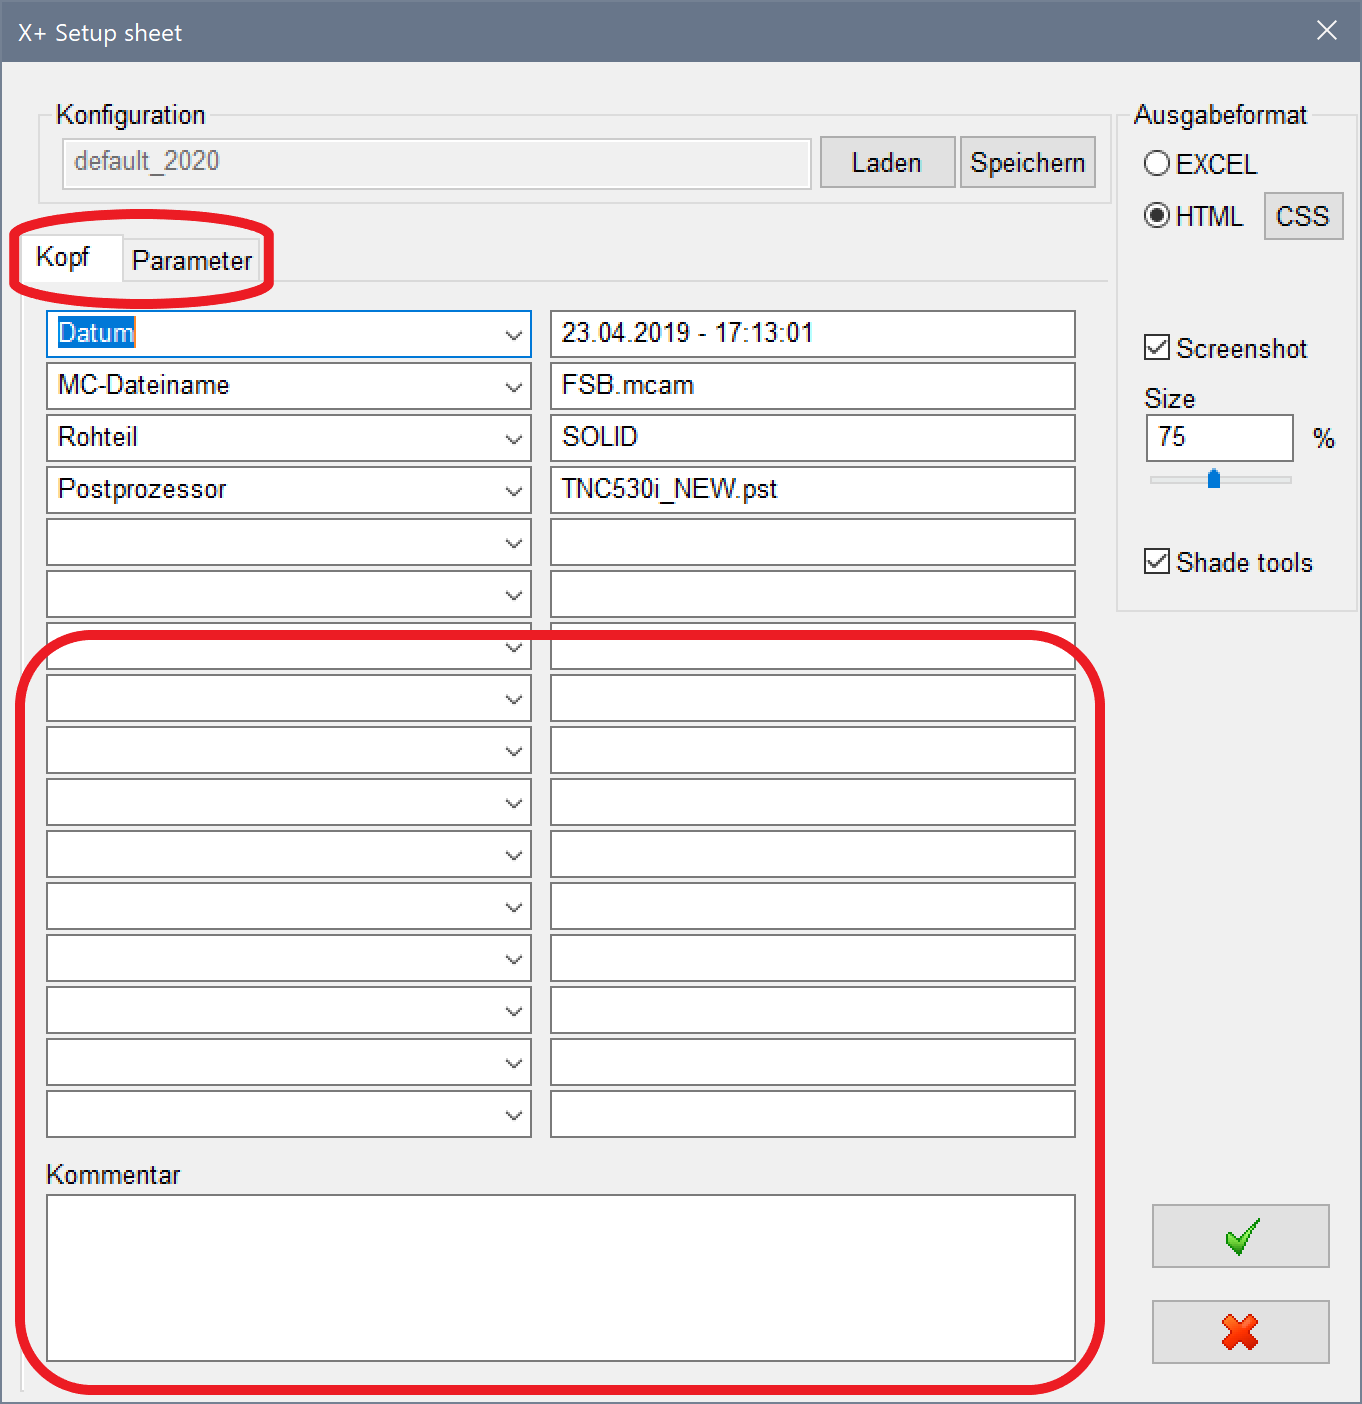
default.template -> saves your dialog settings (your setup) default.css -> this will be included in your html report and tells the explorer how to render the html document (color, font, borders etc) dafault.js -> this file will be included in your html report (if it exists) and gives the advanced users full control over the html document (no limits). So, if you create your own template let's say "MySetup.template" you should also have at least a "MySetup.css". A good start would be to just copy the "default.css" to "MySetup.css"
-
It should be white. Before the screenshot is taken the background color is switched to #15 (white by default). You should see this just for a short moment when you create a screenshot with X+ setup sheet, tool list or snapshot.
-
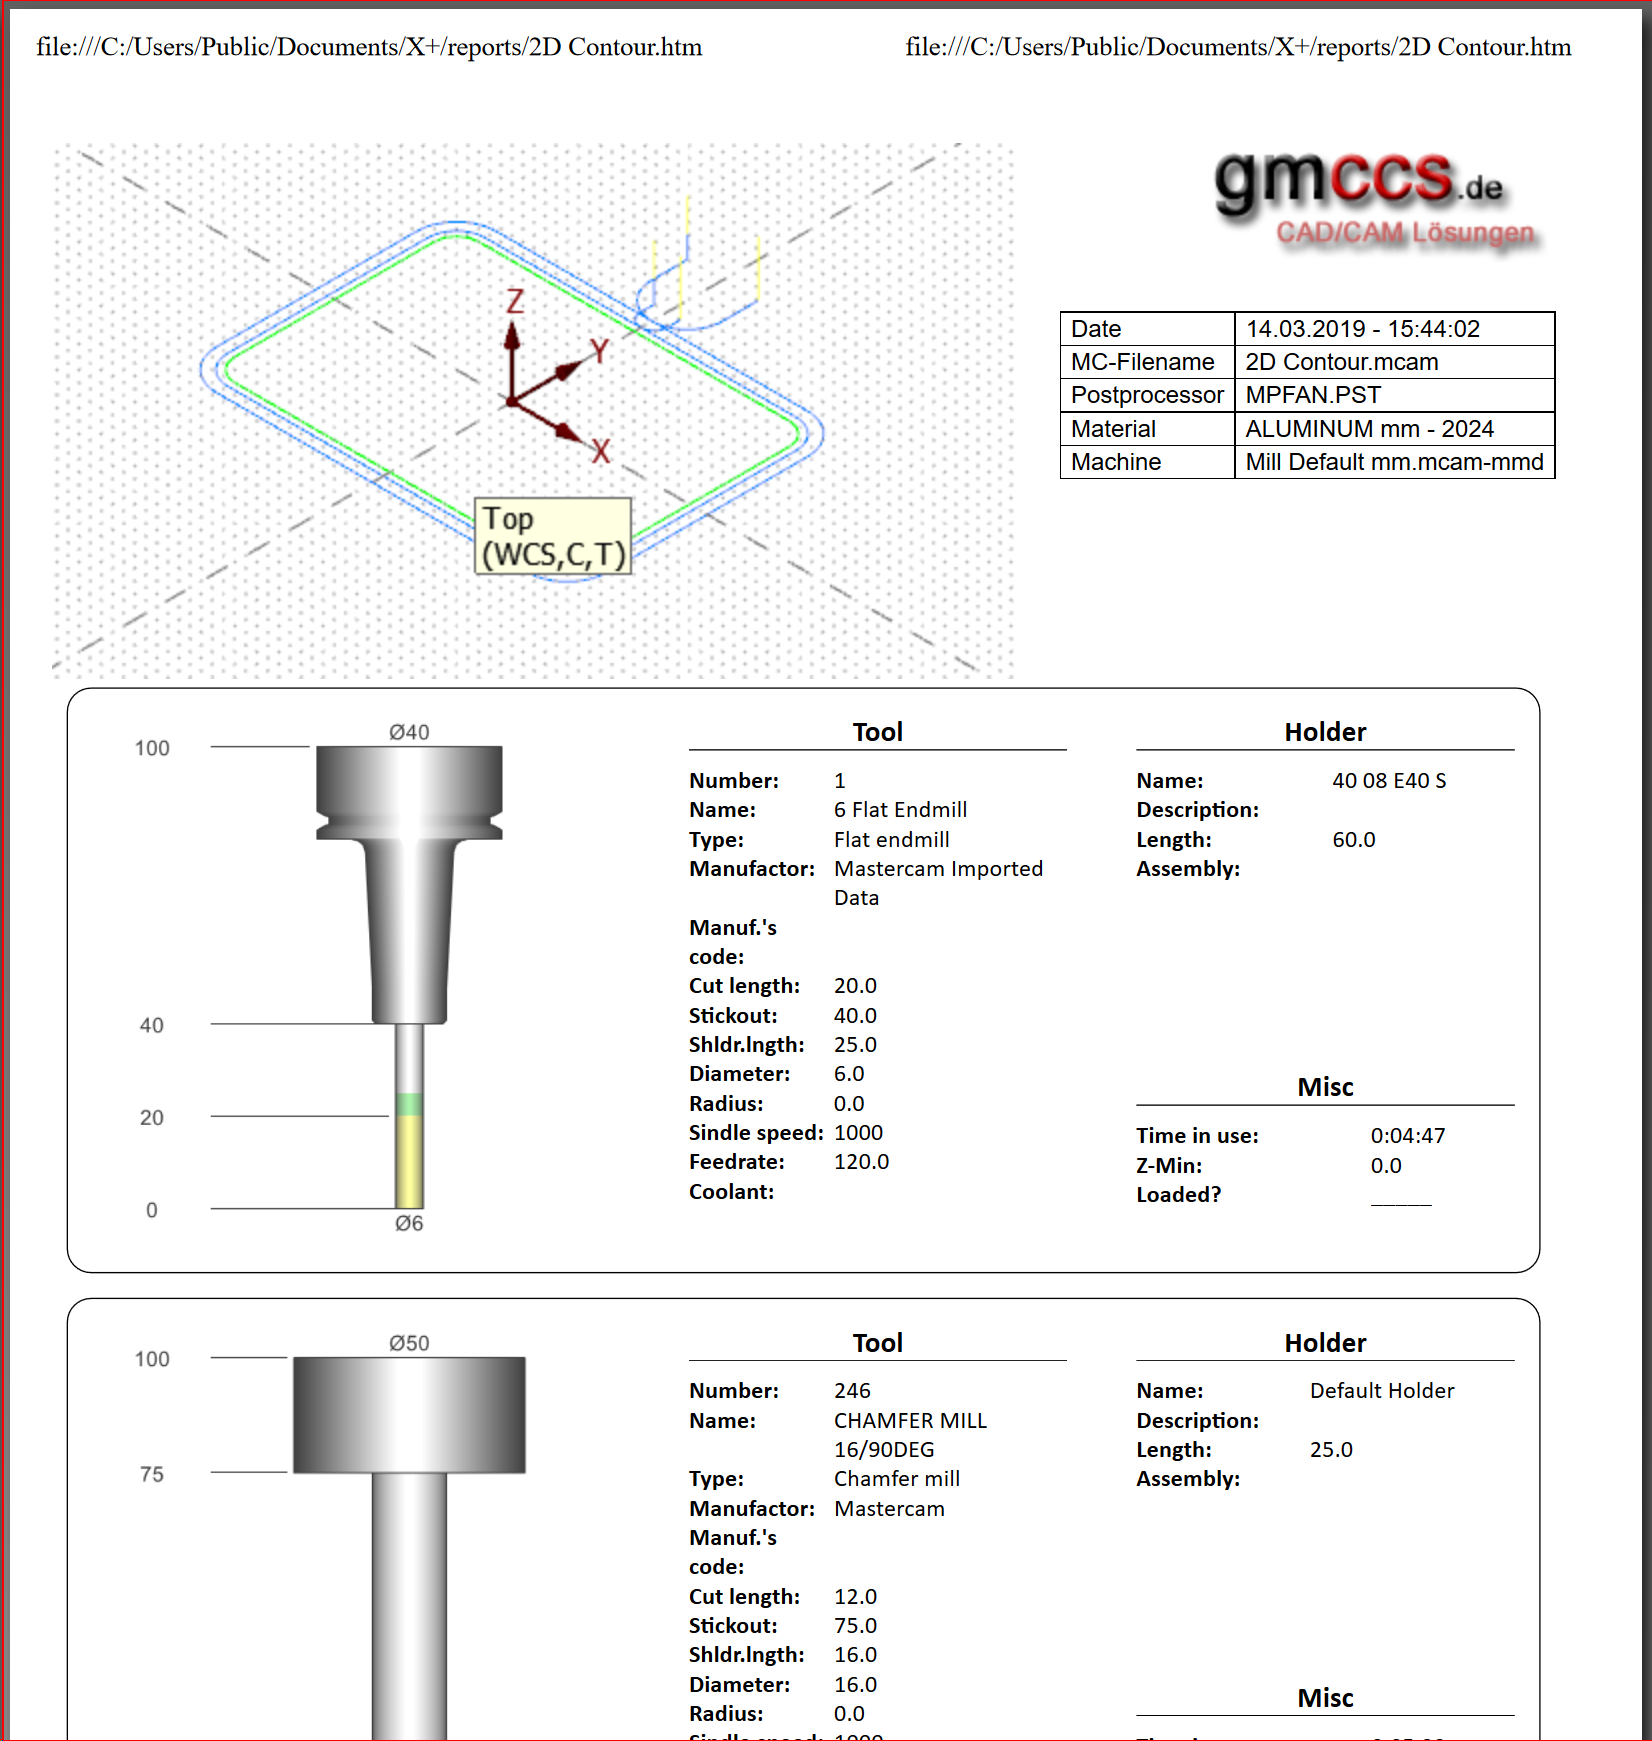
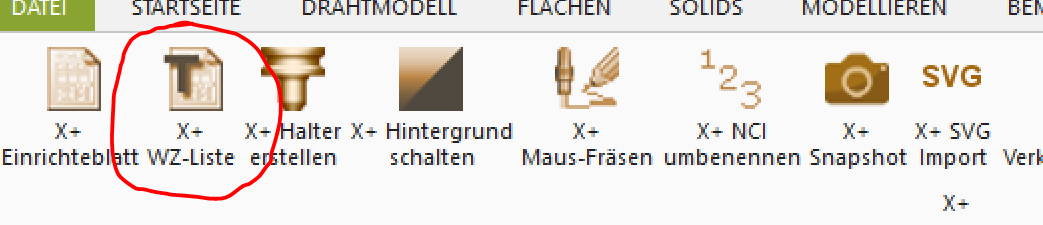
X+ Setup Sheet and Tool List - 3rd party Add-on
Günther Massimo - GMCCS replied to a topic in Industrial Forum
It depends on the CSS. Just an example: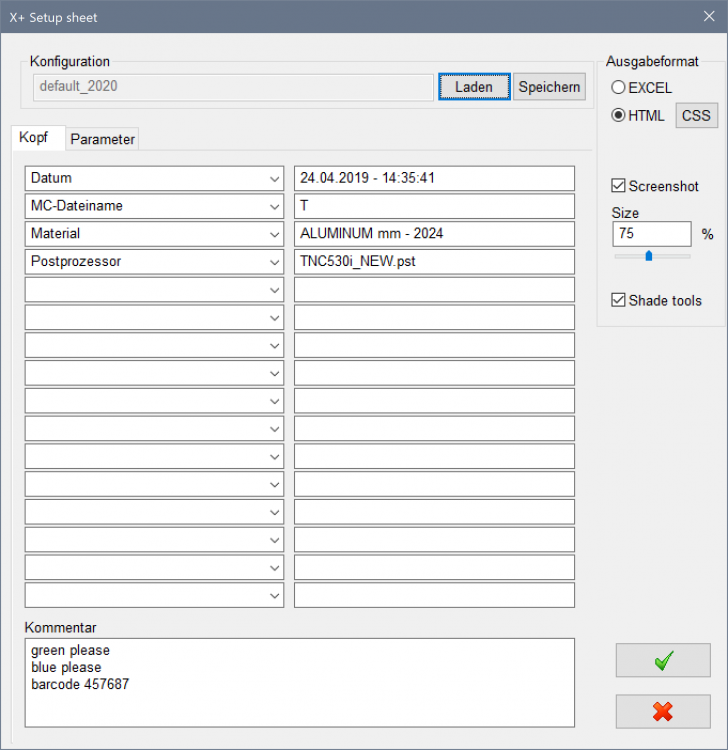
-
X+ Setup Sheet and Tool List - 3rd party Add-on
Günther Massimo - GMCCS replied to a topic in Industrial Forum
Yes, this will be the new dialog for 2020 (release). added 8 more edit boxes for the header. added 1 comment box (multi line). added 2 tabs (header/parameter)
-
X+ Setup Sheet and Tool List - 3rd party Add-on
Günther Massimo - GMCCS replied to a topic in Industrial Forum
Yes. -
X+ Setup Sheet and Tool List - 3rd party Add-on
Günther Massimo - GMCCS replied to a topic in Industrial Forum
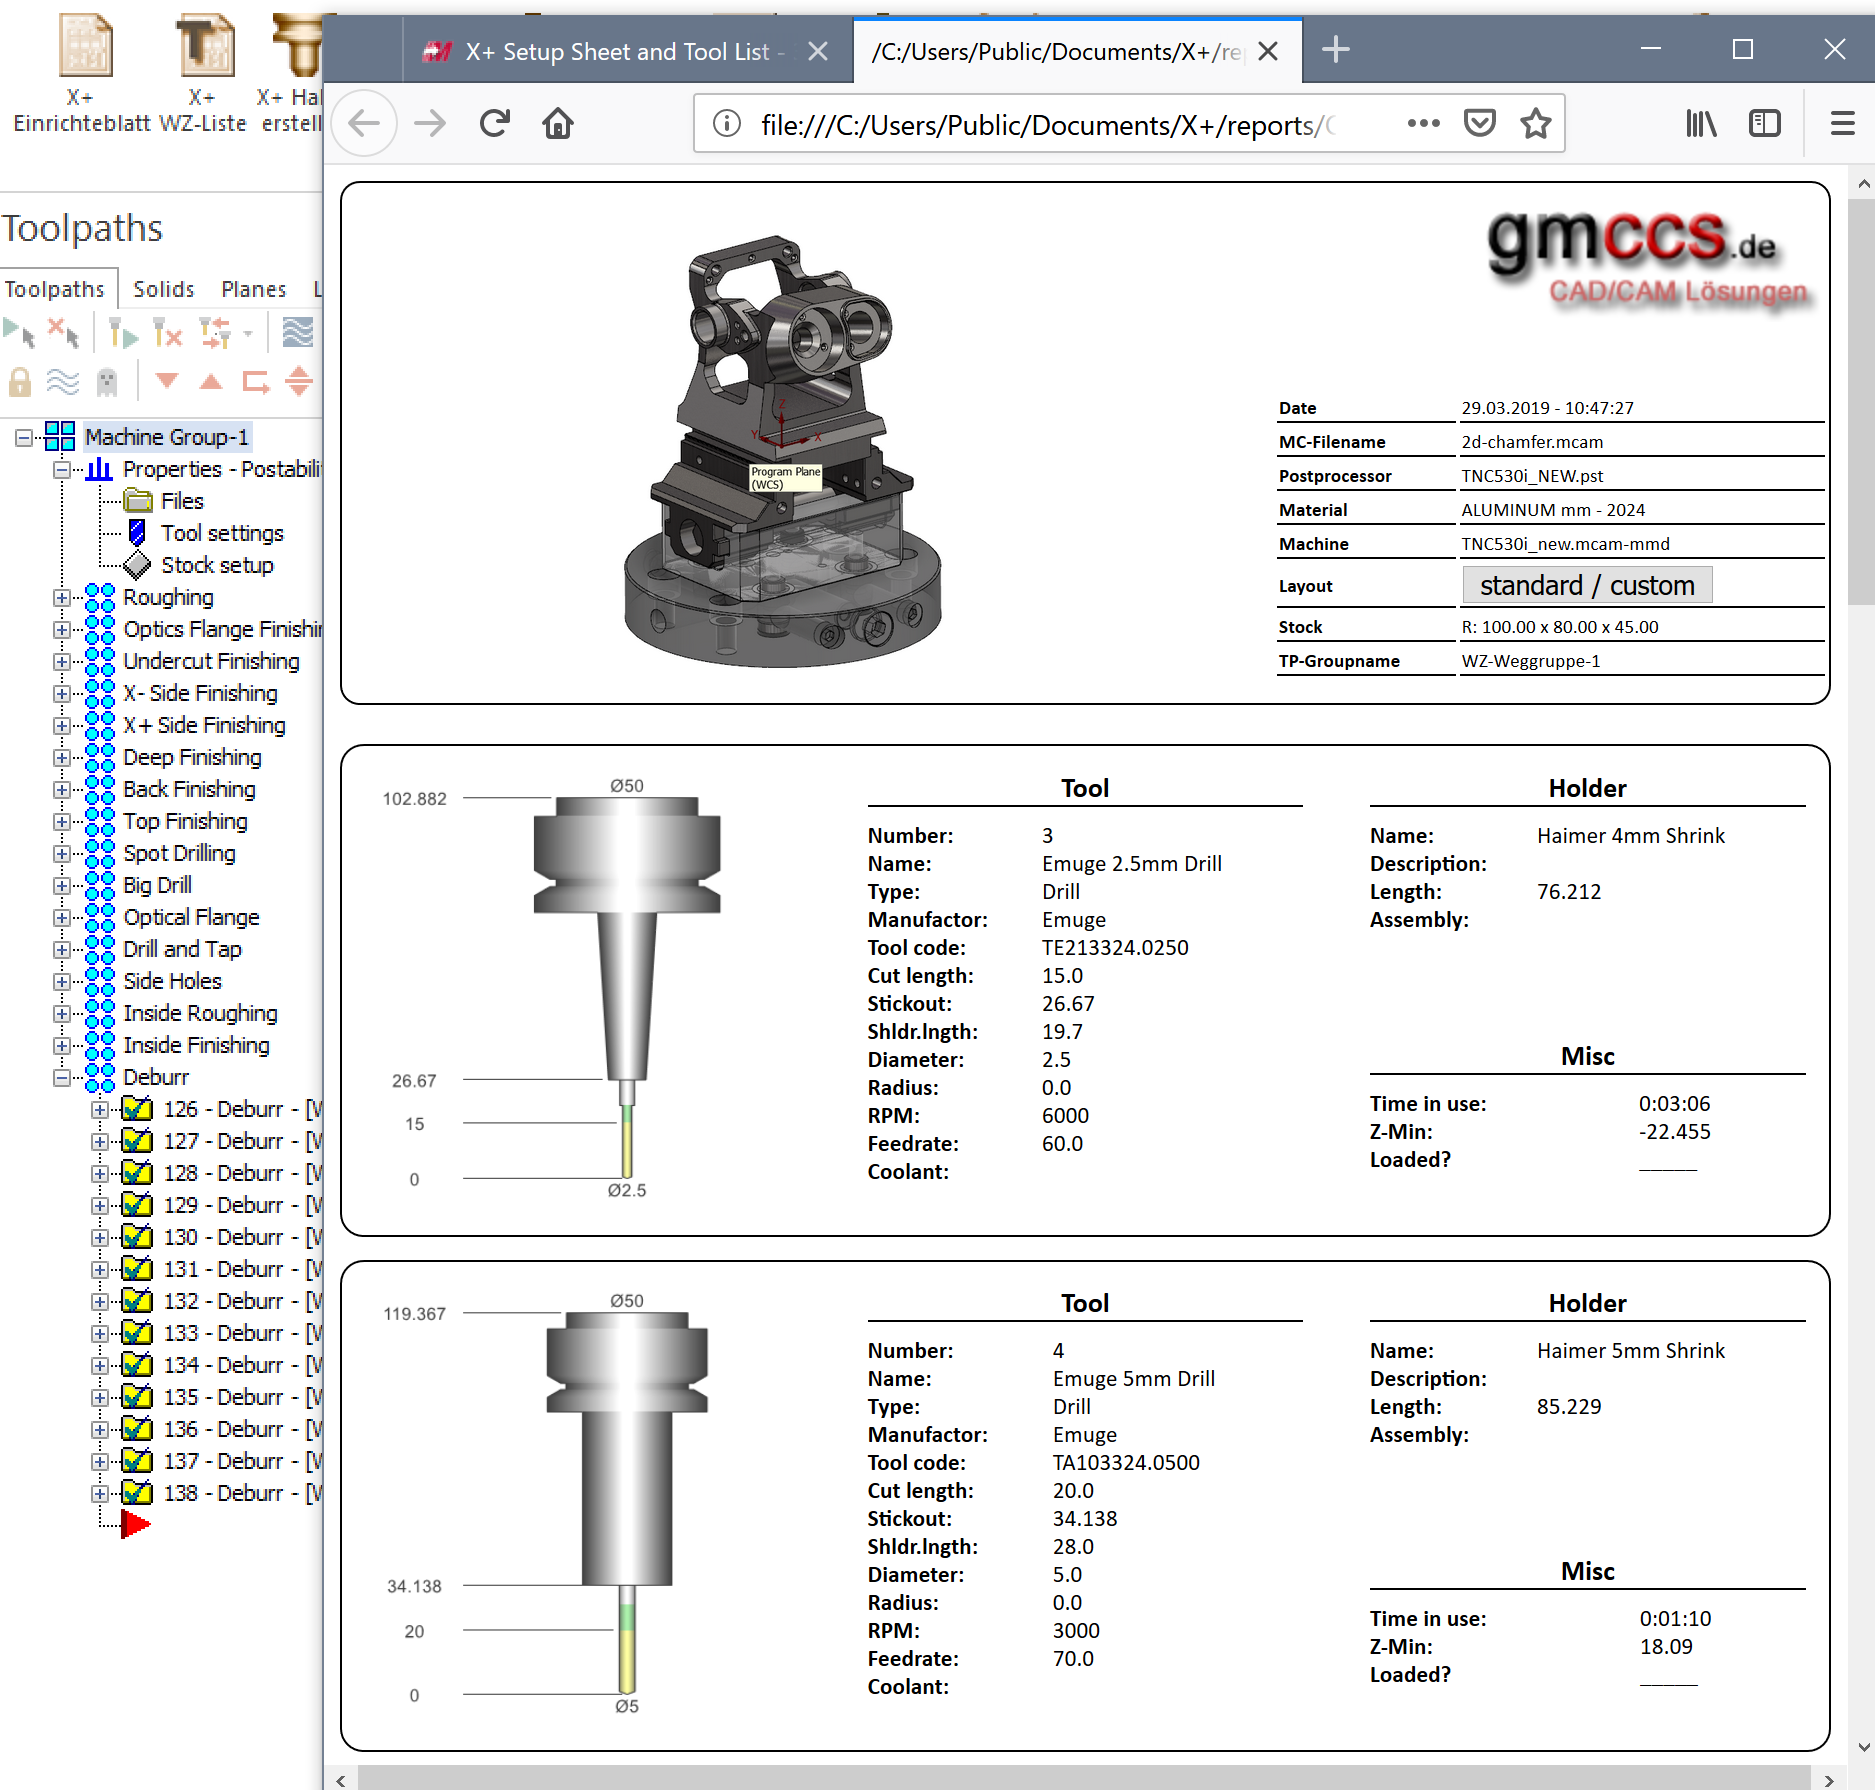
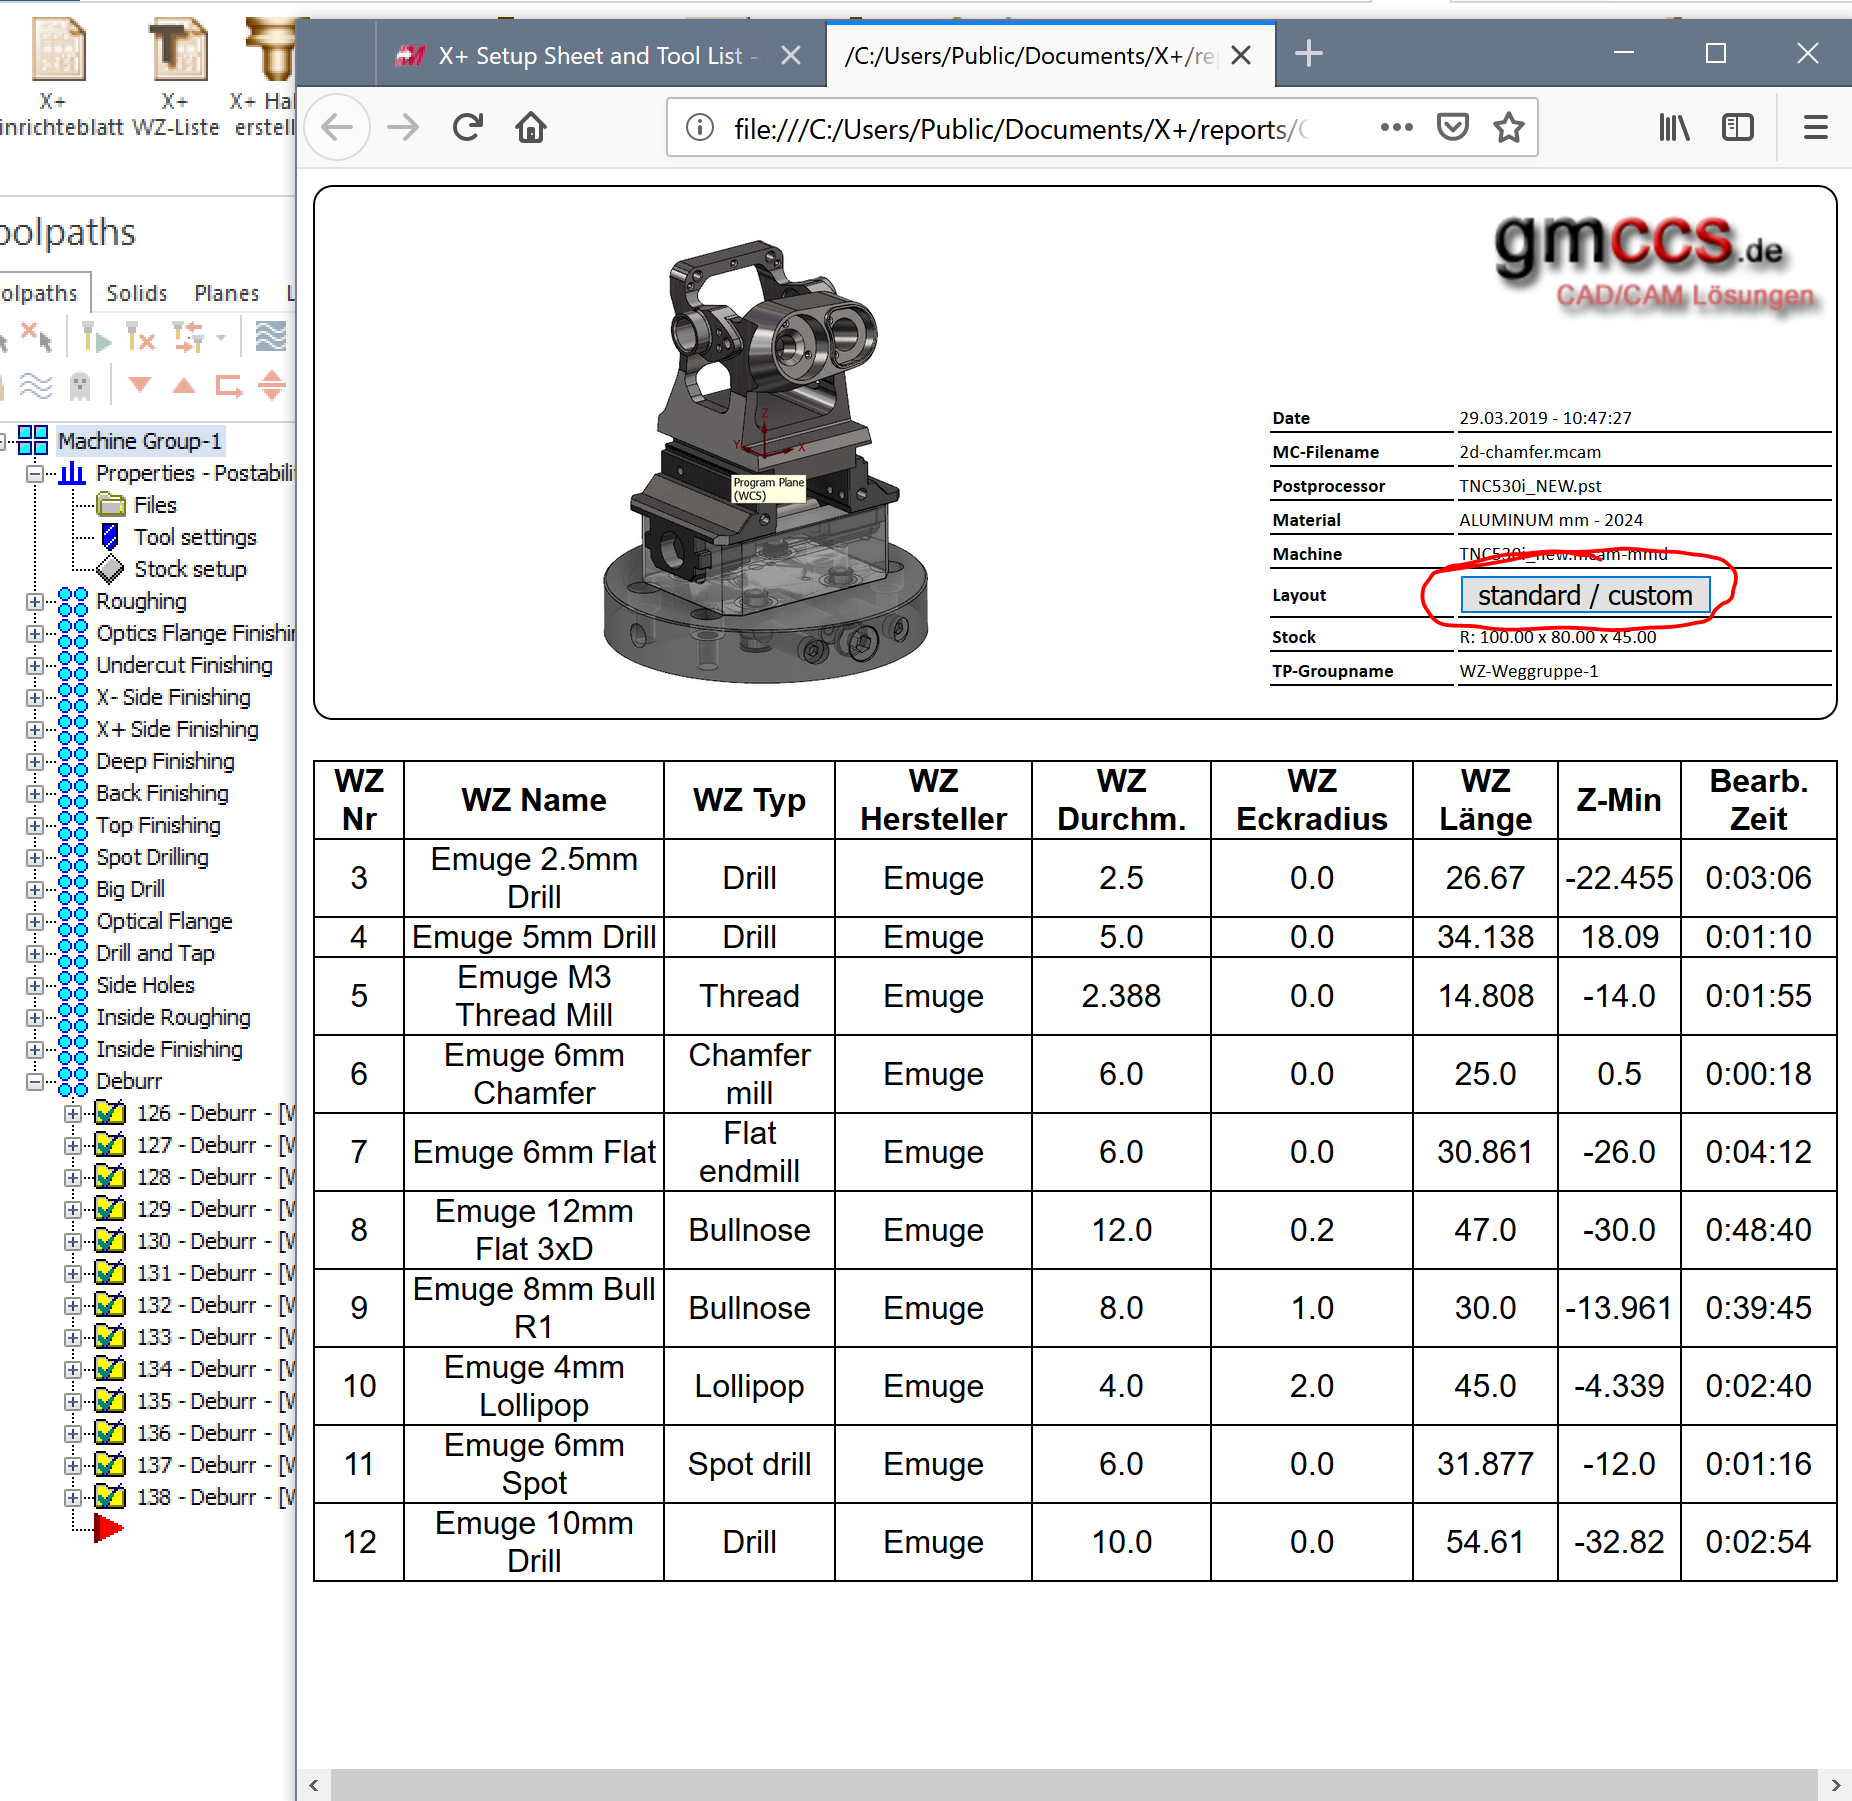
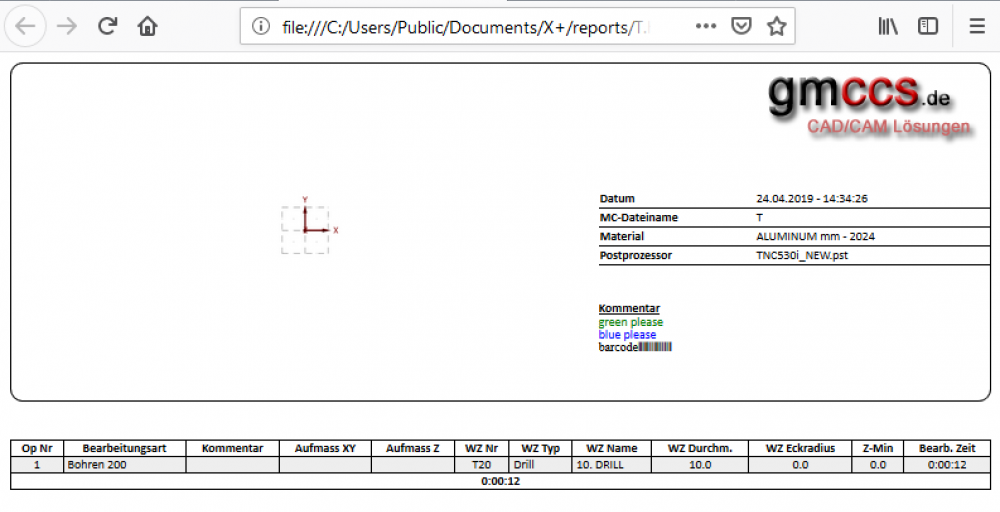
Most what you are asking for can be done with CSS. Every element on the setup sheet has it's class name. You need to assign format statements to these class names. It's fairly easy...just google CSS HTML. You can do a lot of things with CSS. To find out the class name of a certain element just right click in your browser and view the source code of your setup sheet. You can change colors, borders, font, replace text and lots of other things. For #3 there is no build in functionality. I like to create all notations on a separate layer and grab it with the screen shot. But you could also edit the screenshot with 3d paint as an alternative. If you saved your setup sheet template fore example like "MySetupsheet", make sure you have also a MySetupsheet.ccs and probably also a MySetupsheet.js file created. A good start is to just copy the dafault.css to MySetupsheet.css....then edit the file to feed your needs. You need to do this only once. More advanced users can use java script and have the full power over the generated HTML file. Here is an example of what you could do with X+. 138 operations, 2 seconds for the tool list With a button I can change the layout on the fly. This example will be included with 2020.

-
X+ Mastercam 2020 beta 1
Günther Massimo - GMCCS replied to Günther Massimo - GMCCS's topic in Industrial Forum
I've noticed that you're going to start charging for X+ with MasterCAM 2020. Yes, X+ has been a freebie for many years. It is grown over the years and it became a fairly big job to keep it up to date. Also Mastercam version updates are more frequently...once per year. Hereunder I decided to adopt this new course. Can you give us a brief description of how this will work? Subscribers will receive a license file (XML). This file has to be copied into the public X+ folder. Very simple. X+ will run without license on all dealer SIMs. To create a license file: The SIM number, SIM type (Hasp/Nethasp) and of course company's name and address has do be delivered. 30 days demo licenses are possible too. Will the license be purchased through my distributor? You can purchase straight from gmccs or through your reseller. A discount is granted to resellers. Your reseller may contact me. Will it be included in my nethasp license file or will I have to setup a second license server just for X+? Nothing like that. The license will be delivered as an XML file. No server needed. Will the software be licensed per copy or does the 400 euro/year cover all copies being run? On a NetHasp X+ will run on all seats. Will formal documentation now be included? In the future I'll probably deliver some documentation and maybe also some videos. Maybe I'm going to make some tutorials. It depends on the amount of subscribers. Will a method of support, aside from an unreliable forum, be created? Email and community. BTW I don't think that this forum is unreliable ;c) -
Create holder from geometry, save holder only
Günther Massimo - GMCCS replied to SlaveCam's topic in Industrial Forum
X+ Holder Chook...give it a try. -
X+ Setup Sheet and Tool List - 3rd party Add-on
Günther Massimo - GMCCS replied to a topic in Industrial Forum
I will add a new tool sheet example with the next release. It will demonstrate how to convert the standard layout into a new custom layout.
-
X+ Setup Sheet and Tool List - 3rd party Add-on
Günther Massimo - GMCCS replied to a topic in Industrial Forum
Yes, that was my idea...giving the advanced users full access to the HTML document. The include of the script file is the backdoor ...no limits -
For testing. http://gmccs.de/downloads/SetupX%2B_2020_beta_1.zip Have a nice day EDIT: not more available
-
Adding a Peck Field to the Toolpath Tap Menu
Günther Massimo - GMCCS replied to Born to machine's topic in Industrial Forum
Yes. This is a post issue. -
X+ for Mastercam
Günther Massimo - GMCCS replied to Günther Massimo - GMCCS's topic in Industrial Forum
You can use the tool sheet as well. It takes account for multiple tools....and you are also able to sort the tool list.
-
AutoRegen - CHook
Günther Massimo - GMCCS replied to Günther Massimo - GMCCS's topic in Industrial Forum
FT-File is now inkluded to the zip. Upack both files to the chook folder. Autoregen will than appear in options dialog box for menu bars. Watch the status bar when you activate/deactivate autoregen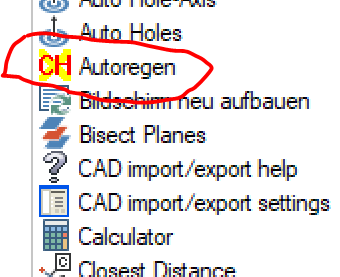
-
AutoRegen - CHook
Günther Massimo - GMCCS replied to Günther Massimo - GMCCS's topic in Industrial Forum
No Sir. Once launched, it will automatically regenrate any operation after editing the operation through the parameter dialog. Launch it again to stop the automatic regeneration. -
X+ for Mastercam
Günther Massimo - GMCCS replied to Günther Massimo - GMCCS's topic in Industrial Forum
It's a Windows 7 issue. I've uploaded a new installer. Hopefully the problem is solved. I can't test it, because I don't have Windows 7 installed. -
X+ for Mastercam
Günther Massimo - GMCCS replied to Günther Massimo - GMCCS's topic in Industrial Forum
Verify that the following registry keys are set. Key: HKEY_CURRENT_USER\Software\CNC Software, Inc.\Mastercam 2019 Value: Directory Key: HKEY_LOCAL_MACHINE\SOFTWARE\CNC Software, Inc.\Mastercam 2019 Value: Directory