Leaderboard


Popular Content
Showing content with the highest reputation on 03/21/2019 in Posts
-
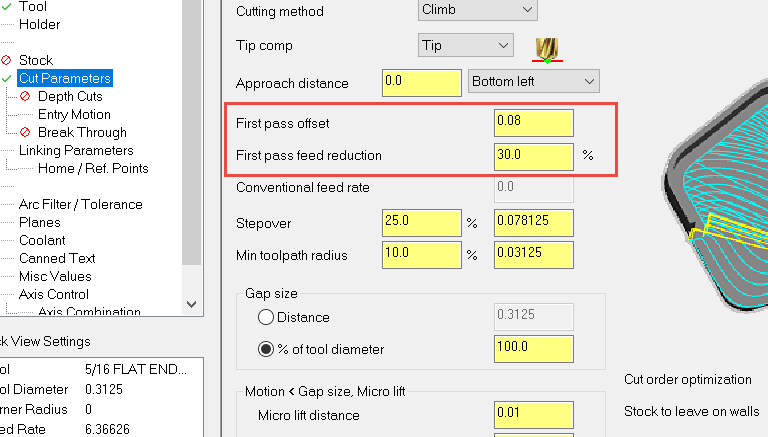
Because the raw stock can be heavy on one side and light on the other, and saw cut. The dynamic toolpath needs to go around the stock once to understand where the material is. Try giving it a first pass offset with feed reduction and you will achieve what you are looking for.
 4 points
 -
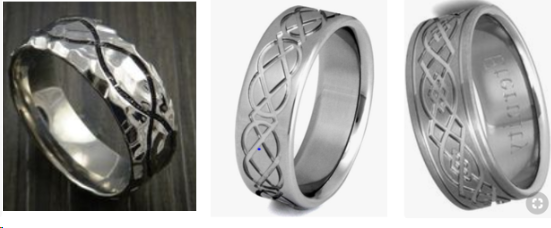
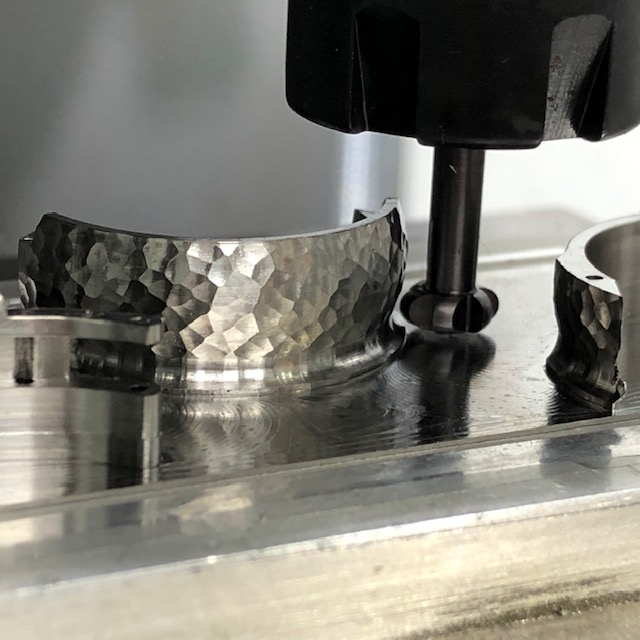
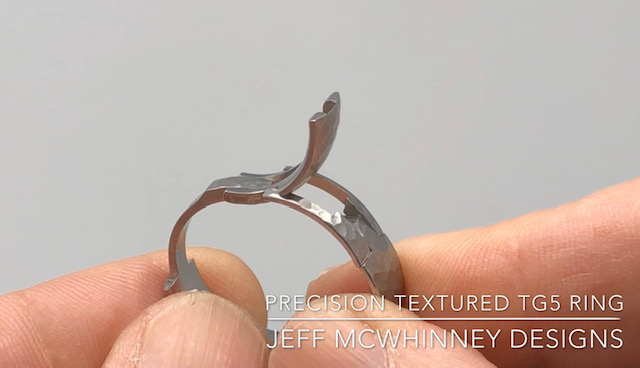
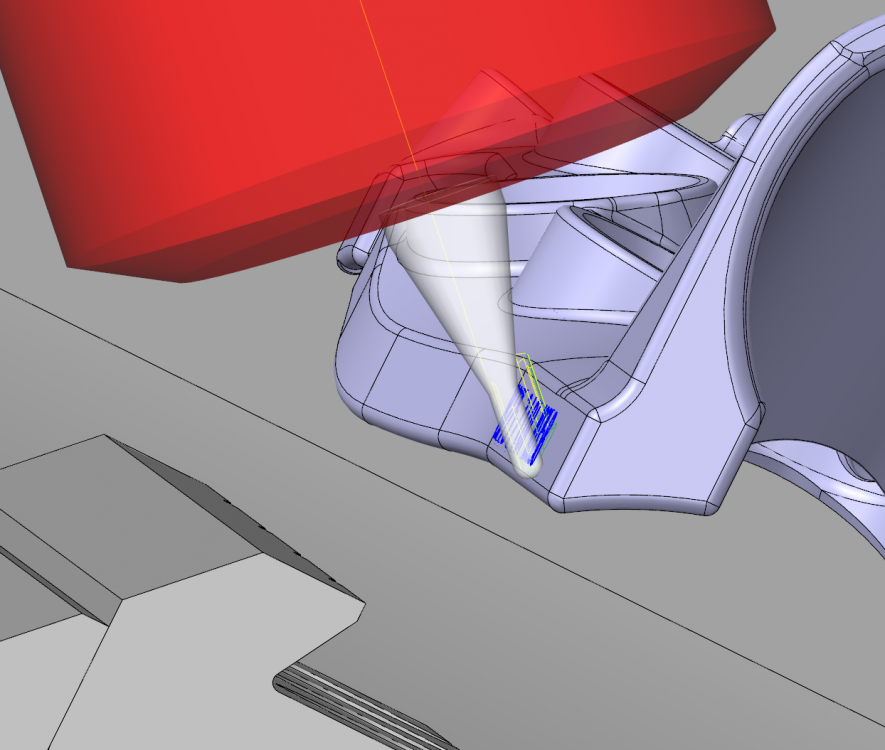
Hello All, My company machines hinged wedding rings (picture below). I make them on my Haas OM2A in two operations. Recently I've been adding a faux hammered texture using Surface Contour Toolpaths and a radius keycutter (picture below). A customer seeing this requested a Celtic pattern (examples below). I know I could approximate it cutting in and out of material using a Surface Contour toolpath, very small Lollipop cutter and VERY small step downs, but I'm wondering if there is a slick programming method that would allow me to stay in material and contour along the paths around the ring. In other words, approximate the motion of a 4th axis, using 3 axis and Lollipop cutter. Hope I'm being clear. Ideas anyone? Thanks in advance! Jeff
 2 points
 -
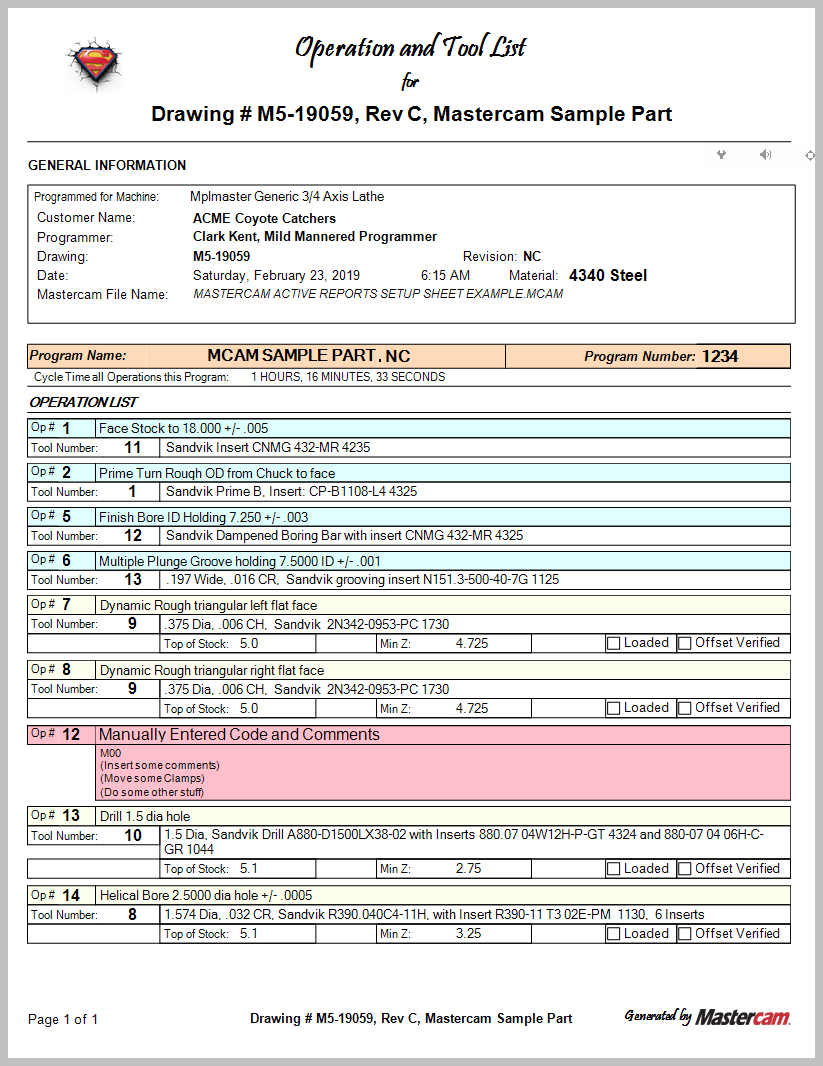
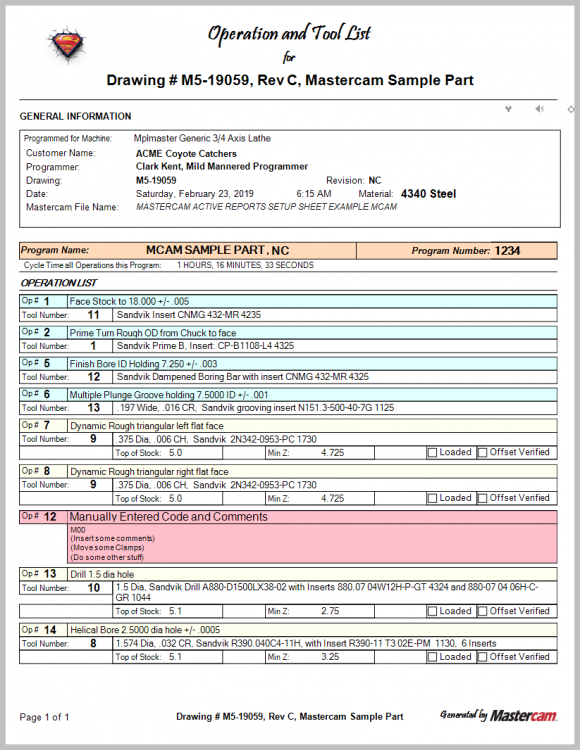
Greetings all, I have developed a setup sheet that is really more of an Operation check list. Developed for minimal paper waste. It works with all three of the main program types without changing report templates: Mill, Lathe, and Mill/Turn. The operations are color coded: Blue is turning, Yellow is Milling, and red is Manual Entry. If the tools are named in Mastercam the way that I recommend, all of the information will be there for the operator: Insert codes, etc. Included in the zip file that is attached is a sample turning program with milling, the Active report templates, a Word doc with instructions on how to install and where to enter information. For best results, pay close attention to the Word doc on what and where I enter the names and comments of the tools and operations. Disclaimer: Use at your own risk. Active_Reports_OP_Tool_List_short.zip
 1 point
 -
Edit: I think I know what you're asking now. I do something similar when engraving part numbers with a small ball endmill canted 45° from the surface. What I do is make a wireframe on the centerline of what I want to engrave, then offset it from the surface by the radius of the ball (or lollipop in your case) minus the engraving depth, then do a 3d contour with comp off (at centerline) and drop the tool down by it's radius. You'll need to include your lead-in and lead-out in your geometry to avoid gouging.
 1 point
 -
sounds familiar with similar results. There was one place where they used to remove the 4th axis that was mounted on one end of the table every time a specific job was run so they could make parts in spec! I hate it when the real world and the laws of physics get in the way of making good parts... using a single axis approach definitely has it's place and can make a big difference, and it can be done manually if you don't have G60.1 point
-
Always done that best thing to do is trim the cornered with a contour toolpath then run the dynamic toolpaths. I have some X7 files where I was breaking endmills 250% DOC with 10% ROC on 3/4 3 Flute endmills. Those corners were just enough to stress the endmills and break them. I did the process I just told you and problem was solved.1 point
-
In the Save As field, select Options and roll the version back to V28 You can make this setting permanent on the Converters page in System Config1 point
-
i once saw a strategy in adv. multiaxis machining that could do automatic 3+2 surfacemilling am i wrong ? , i cant find it now , anybode can help ? i have a part now that has a whole lot of machining , and undercuts , maybe it could help me ?0 points
-
Sorry I am not aware of an automagic button to do this.0 points