


All Activity
- Past hour
-
Can confirm.
-
I have to say, I'm completely lost as to what the process is here. Like, they're changing their WPC mid-cut? To accomplish what?
-
Changing the WPC is terrible practice, even if it works on this particular part. Any workpiece correction goes out the window and all other features/tools are affected if the operator "forgets" to adjust it back. Easier to just have the habit of defaulting to TLO for adjustments and pretending WPC is just going to scrap parts every time.
-
We ran the first part and it came out OK. The operator did use Z axis WO Common to adjust tool length. We are just roughing this part and have a ±.050 tolerance. To me this just seems wrong, but it seems to be working, probably because we're just running G54 not G54.2. The reason the guys do this is because the TLO can't be changed in the middle of a toolpath on this machine, If you change the TLO you have to start the tool path over. If you change the Z WO common it takes effect immediately. This is significant when you have toolpaths that run for 1 to 3 hours between program stops.
- Today
-
 Nic13 joined the community
 -
 junn joined the community
 -
Yeah, if you have a 3 axis surfacing path interacting with that, adjusting the work offset would cause it to mismatch.
- Yesterday
-
 kader1974 joined the community
 -
 shortcaek joined the community
 -
 Matteo85 joined the community
 -
As it's the tool doing the cutting....and if you want it to cut either deeper or shallower....why would you adjust anything but the tool length (TLO or Wear) Temp adjusting global Z has it's place (basic 3ax paths!) but changing this obviously affects ALL tools....where you only want to adjust the one....
-
 James Park joined the community
 -
 banarendra joined the community
 -

Solid cut in two solids
Matthew Hajicek - Singularity replied to Danie Terrazas's topic in Industrial Forum
1. Copy the solid to another level. Cut away one half of one, and the other half of the other. 2. Create two blocks, one encompassing one half, the other encompassing the other half. Use boolean common once with each, keeping the original at least the first time. The confusion came because you didn't phrase it as a question. You said you wanted to show us, not that you wanted us to show you. -
 Sanjay-hapaliya joined the community
 - Last week
-
ok thanks
-
 IntoTheBreech joined the community
 -
 I just downloaded the GetToolData sample and I cannot get it to run. I launch from Mastercam and this is all I get.
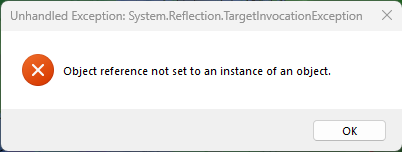
-

DMU 50 machine sim
thienvu79 replied to Luis Eduardo Aleman R.'s topic in Machining, Tools, Cutting & Probing
Hello. can you please send me your machine haas umc 750 that I can simulate. I am very appreciate . [email protected]. thank you so much. -
Many times builder sell a 5 Axis machine without all the options. then people go to use the machine with those options only to find out they are not present. Then adding them can be a pain. for now will have to program from the Pivot point since it is a Head-Head machine. Need to get a hold of the dealer and see what options were purchased. Then if they were figured out why they are not working correctly. Also just heard of Okuma's with Faunc controls where the Mcodes in the book don't match the one the machine has. Took a seasoned veteran with a cheat cheat for one customer to get their Okuma VP machine running. Once the secret hidden codes were discovered and all the parameters dialed in the machine is running great.
-
Make the tool into a solid and give it the relief it needs. All lathe tools in Mastercam can be easily converted into a wireframe through the lathe tool manger. Then from that wireframe make the solid. Now make a 3D tool from the solid and have the 2D shape still just a 3D model that matches what is on the machine.
-
 I'd say ditch*.stl also. Personally I use *.obj or *.3mf file types. *.obj files can get massive though. But do mess with the tolerances.
 -
"IMPROPER G-CODE" alarms nearly always indicate the option/function isn't present in the machine. Command the following in MDI; G68.2X0Y0Z0I0J0K0 G53.1 G4X5.0 G49G53Z0 G69 The ONLY way the #19700-#19705 parameters even matter is if you're using G43.x ("x" being different modes etc...), G68.x, or G54.4. If your code doesn't command those function, yiu could chance #19700-#19705 to all 0's and it won't make a bit of difference.
-
When I placed G68.2, it gave me the illegal G alarm. What I don't understand is that when the machine failed, it was out of nowhere. I'm starting to believe that some operator changed some configuration, but I checked my parameters and I didn't find anything strange.
-
In 2024, when performing solid cutting verification, the first operation among the selected operations specifies a stock model, which is stock... There is no need to specify it from the stock setup.
-
Download a model from a tool supplier and build a 3D tool
-
Hi All, I've just created a custom 2d lathe tool, but verify shows a collision on the backside. How do I adjust the relief/thickness of this tool for the simulation?
-
If the Machine has TCP then you are correct, without TCP which is probably the case on a Horizontal both options will work. I would use the TLO but shifting the common will also work
-
In MDI G43.4 and G68.2 don't show illegal G code do they?
-
pretty sure you can do this now the arrow lets you pick a stock model from the screen if it is visible it does however create a mesh out of it and would need to be reselected it changed
-
I have a problem in my OKK Vp400 machine which I try to adjust my center of rotation however I cannot move it, I use the parameters 19700 to adjust but by placing random numbers it reaches the same position, I checked the parameters however I still cannot make my machine work with 5 axis
-

Posting 2 different B0 machining operations, no rotation commands.
Tim Johnson replied to JB7280's topic in Industrial Forum
I have a pstopcomment segment that I use for part clamping/unclamping, inverting material, adding cap screws, ect and use variables to pick the particular code that I need. You just pick the mi7$ choice pstopcomment #pallet rotation macro "G91", "G30", "X0", "Y0", "Z0", e$ if machine = 300 | machine = 800, *sunlock, "(PALLET UNLOCK)", e$ "G91", "G28", "B0", e$ "M60", e$ if mi7$ = 1, "M00", "(ADD CAP SCREWS THEN REMOVE CLAMP)", e$ if mi7$ = 2, "M00", "(REMOVE WASTE MATERIAL)", e$ if mi7$ = 3, "M00", "(RESET PART TO POSITION 2)", e$ if mi7$ = 4, "M00", "(MOVE CLAMP TO BOTTOM POSITION)", e$ if mi7$ = 5, "M00", "(ADD CENTER CLAMPS TO PALLET A)", e$ if mi7$ = 6, "M00", "(UNCLAMP AND RECLAMP PARTS)", e$ if mi7$ = 7, "M00", "(ADD CLAMP)", e$ if mi7$ = 8, "M00", "(ADD CAP SCREWS)", e$ if mi7$ = 9, "M00", "(ADD CLAMPS)", e$ if mi7$ = 10, "M00", "(INVERT PARTS PER SETUP SHEET)", e$ if mi7$ = 11, "M00", "(ADD CLAMP THEN REMOVE CAP SCREWS)", e$ if mi7$ = 12, "M00", "(ADD OP1-2 CLAMPS THEN REMOVE OP1-1 CLAMPS)", e$ if mi7$ = 13, "M00", "(REMOVE ANTI-VIBRATION BLOCKS)", e$ if mi7$ = 14, "M00", "(REMOVE CENTER SCREWS THEN ADD CLAMP)", e$ if mi7$ = 15, "M00", "(ADJUST CASTED SLEEVE WITH 1.97 DIA SHAFT THEN REMOVE)", e$ if mi7$ = 16, "M00", "(ADD THEN REMOVE CLAMPS PER S/U SHEET)", e$ if mi7$ = 17, "M00", "(ADD CAP SCREWS THEN REMOVE Y STOP BLOCKS)", e$ if mi7$ = 18, "M00", "(CLEAN AND DEBURR PART BEFORE PROBING)", e$ if mi7$ = 19, "M00", "(REMOVE CLAMP)", e$ if mi7$ = 20, "M00", "(REMOVE CLAMPS)", e$ if mi7$ = 21, "M00", "(REMOVE ANTI-VIBRATION BLOCK)", e$ if mi7$ = 22, "M00", "(DEBURR HOLES AND EDGES BEFORE FINISH CUT)", e$ if mi7$ = 23, "M00", "(CLEAN OUT HOLES WITH DRILLS)", e$ if mi7$ = 24, "M00", "(ADD CAP SCREWS AND INSPECT Z LOCATION)", e$ if mi7$ = 25, "M00", "(ADD CAP SCREWS AND INSPECT FOR FULL CLEANUP)", e$ if mi7$ = 26, "M00", "(ADD CAP SCREWS THEN REMOVE ALL CLAMPS)", e$ if mi7$ = 27, "M00", "(ADD CLAMPS THEN REMOVE CAP SCREWS)", e$ if mi7$ = 28, "M00", "(ROTATE PART PER SETUP SHEET)", e$ if mi7$ = 29, "M00", "(ADD FLAT HEAD SCREWS AND REMOVE CLAMPS)", e$ if mi7$ = 30, "M00", "(ADD FLAT HEAD SCREWS)", e$ if mi7$ = 31, "M00", "(CHECK 28.084 DISTANCE AND 2.00 DIAMETER)", e$ "G91", "G30", "X0", "Y0", "Z0", e$ "G91", "G28", "B0", e$ "M60", e$ "G91", "G28", "B0", e$ if machine = 300 | machine = 800, *slock, "(PALLET LOCK)", e$ " ", e$ Note, this segment is the way that we modify our clamping and any use of this code is the user's responsibility to make sure no crashes occur. We've been using this segment for at least 20 years on 12 horizontal machines, (5 different makes). -
I see what you mean. I am pretty sure that is not (yet) possible in mastercam. It is definitely an arduous task and one of the reasons why I dislike rev changes I have done a decent amount of searching on this topic and have only found the workaround that we both seem to be using. If anyone would know for sure, it'll be @Aaron Eberhard
-
the work offset will either move the slot up or down or out position
.thumb.jpg.15afa8dbfcde0167893a4a297d335e0b.jpg)


