


cncappsjames
-
Posts
1,219 -
Joined
-
Last visited
-
Days Won
85
Content Type
Profiles
Forums
Downloads
Store
eMastercam Wiki
Blogs
Gallery
Events
Everything posted by cncappsjames
-
I use a Logitech MX Master mouse. My hands are too big for the majority of mice on the market. I use a 3D Connexion wireless SpaceNavigator. It has 2 buttons which is perfect because its about all my memory is good for not being a full-time programmer anymore. Plus they are only about $150 I assigned toggle shading to the right button and set rotation point to the left button.
-

Torque Wrenches for Production
cncappsjames replied to Jobnt's topic in Machining, Tools, Cutting & Probing
When I worked at Cummins BITD we used pneumatic tools that were set to specific torque values. That was in the early 90's. They work awesome. You'll just need to get the thing to tell you what it's torque is at so you can adjust if necessary. Something similar to this is what we had. https://www.ebay.com/itm/255230683471?var=0&mkevt=1&mkcid=1&mkrid=711-53200-19255-0&campid=5338590836&toolid=10044&customid=34dd0270de8b17929218618a86ac2c85 -
Memory Card Reader Fanuc 18I setup
cncappsjames replied to Oppiz's topic in Machining, Tools, Cutting & Probing
There is no "MT" @Leon82. There is an "M" and a "T". I've done this on 0i-MD, 0i-TD, 0i-MF,16i, 18i, 21i, 30i, 31i. I can't think of a reason why it won't work on anything with a PCMCIA slot. Note, this only works on PCMCIA, not USB. -
TRANSFORM -ROTATE+TRANSLATE
cncappsjames replied to Fine Machine's topic in Machining, Tools, Cutting & Probing
Since you can transform transformed operations I don't see why not. If the most efficient code is what you're after you will need to select the operations for transform in certain orders. But... as Ron said, it's all theoretical until you give us a sample to work with/from. -
Funny you should ask that... So I went to set "Power" settings on my laptop and I've been informed my settings "use more power" and therefore "results in higher carbon emissions".
-
Windows 11 fresh install - 03:54 Dell Precision 7750 Mobile Workstation Intel Core i9-10885H @2.4GHz 64GB RAM DDR4 @3200 MHz NVidia Quadro RTX 4000 Samsung 990 EVO Pro PCIe 4.0 NVMe M.2 SSD 3D Connexion SpaceNavigator Windows 11 Pro Mastercam 2023 Update 3
-
Inventor to Mastercam no solids capability
cncappsjames replied to ETC Don's topic in Machining, Tools, Cutting & Probing
Once you pay for solids it doesn't go away. Nothing is stopping him from driving old software... he just can't compare that to what's available today then complain about it. I mean I guess he caaaaaan, but he's really got no leg to stand on. We gave him a reliable way to drive tool path from an imported solid. There's extra steps but it's not capable of doing what he wants at WAY past it's sunset date. I misspoke about 2006... X6 came out in 2011 best I can tell. Also best I can tell that was 11 versions ago. 11 Versions old is eons in software age. 4 versions is ancient. 2 Versions behind is old. -
Inventor to Mastercam no solids capability
cncappsjames replied to ETC Don's topic in Machining, Tools, Cutting & Probing
It will always allow you to import a solid body, you just can't "do" anything with it except maybe convert it to surfaces. I cannot think of a situation where if you had the solids add-on at some point in time it disappeared. Unless it was a trial for a span of time and that trial expired. Exporting an IGES file from Inventor will allow you to put toolpath on something at least. Short of exporting from Inventor then importing that into Mastercam, updating is the only option I can think of. That's the biggest issue with using old software; it's not like a car. Replacement parts (apps) aren't being made to keep them running. Old hardware to support new Operating Systems is no longer available either. Once the hardware expires, the junk yard/eBay is your only option. If that is unappetizing, new car is your only other option. X6... that's like what 2006? -
At the top of the post are switches and settings. Read through each one until you find tap_feedtype. 0 = UPM and 1 = UPR.
-
Inventor to Mastercam no solids capability
cncappsjames replied to ETC Don's topic in Machining, Tools, Cutting & Probing
Is this still X6 you're talking about @ETC Don? -
Lately OLD tropics have been coming up. THe WebCrawler is diggin DEEP.
-
Siemens Macro Programming
cncappsjames replied to balnh's topic in Machining, Tools, Cutting & Probing
FANUC example SETVN500[HELLO] (giving variable 500 a name so it doesn't need to be called by number) #_HELLO=5. IF[#_HELLONE70]GOTO1234 (If HELLO is not equal to 70, GOTO line 1234 ALL the FANUC System variables have variable names and variable numbers. Those names and variable numbers are in the "FANUC Series 30i-MODEL B, Series 31i-MODEL B, Series 32i-MODEL B Common to Lathe System/Machining Center System" ... because we're talking about what features controls manufactured in THIS century have... while certain others dredge up 30 years ago I reference the 30i series control manual. It really is as simple as that. Regarding jog with probe and measure.... TOTALLY GUI driven... just like Heid. THis one shows the Matsuura Setna dImspect. Renishaw makes it for straight FANUC controls as well. Can't speak to the other unfortunately.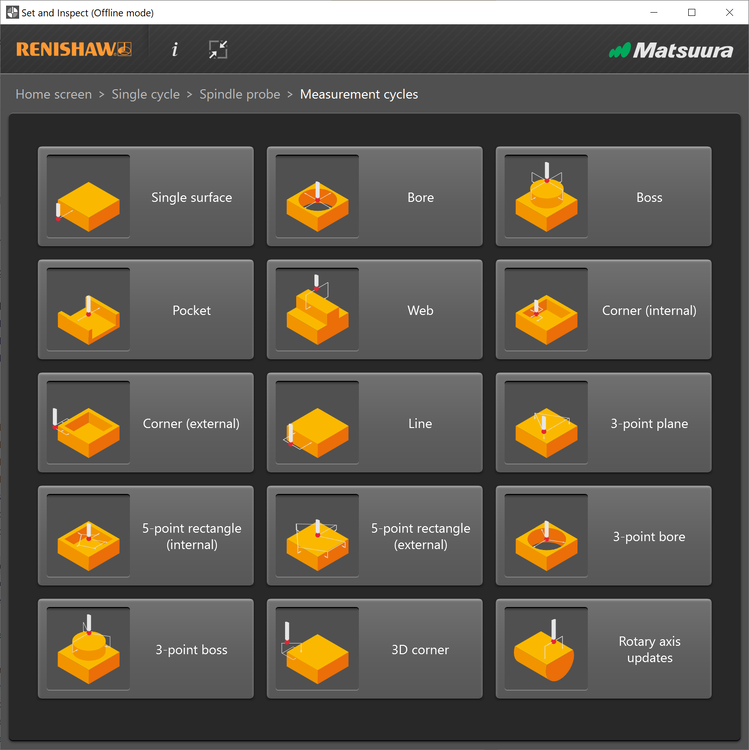
-
Helix at 60% of your tool diameter and you'll end up with a hole that is .600. It should give you less engagement. Pocket isn't a great path for that. Use circle mill and Helix whatever diameter you want. It's much better suited for hole Interpolation than pocket.
-
McMaster-Carr FTW. There's a ton of download able stuff there. It's my go to for hardware.
-
The only place I've seen a Parallel Port on a PC in the last 15 years-ish... in in Inspection attached to CMM computers. Speaking of getting hold of Pentium class... I was digging around the garage last weekend found my old Adaptec SCSI Wide Ultra II card and HDD. I was going to plug it in but there are no drivers past I think Windows 98 or Windows 2000 Pro. That's the danger of not updating... You REALLY accelerate that built in obsolescense train, and the ONLY way to avoid that head on collision is to update.
-
Your InspectionPlus software has to be set up to correctly In O9744... you have to assign the system variables for the A and C axed in the N3 section for #1 and #3 respectively . If those aren;t set correctly you'll chase stuff until the cows come home. This is how I typicall do things; N1T1M06(2MM X 98MM TIP RENISHAW OMP400 PROBE) G00G49G53Z0T3 G05.1Q0 N100(PROBE A AND B DATUM - PART 1) G49G53Z0.0S60 M132(UNCLAMP A/C) G00G90G54.1P11A-90.0C-90.0 G68.2X0.0Y0.0Z0.0I-90.0J-90.0K0.0 G53.1 X0.Y0. M59(SPINDLE PROBE ORIENT) G65P9832(SPINDLE PROBE ON) G43H#517Z10. G65P9810Z.250F120.(PROTECTED MOVE) G65P9810Z-.150F80.(PROTECTED MOVE) G65P9823D.703A35.B180.C-55.(3PT BOSS MEASURE CYCLE) #170=#140(STORE X AXIS ERROR) #171=#141(STORE Y AXIS ERROR) #177=#145(TRUE POS. ERROR) (Check for proper part clocking) (POS. AND MEAS. FOR POINT 1) G65P9810X-.05874Y-.33315F90. G65P9821X.16332Y-.37231 G65P9834(CAPTURE POINT 1 POS.) (POS. AND MEAS. FOR POINT 2) G65P9810X.06222Y.3530F90. G65P9821X.28431Y.31384 G65P9834A80.D.69674H1.5(DETERMINE CLOCKING/ANGULAR ERROR) #175=#144(STORE c WSEC ERROR FOR PART 1) G65P9810Z.25F120.(PROTECTED MOVE) G65P9810X.535Y0.F120.(PROTECTED MOVE) G65P9811Z0.H.02(CHECKING Z SURFACE CONDITION) G65P9811Z.01(Z VALUE SETS HOW MUCH TO TAKE OFF) #172=#142(STORE Z AXIS ERROR) G65P9810Z2.0F120. G49G53Z0.0 G65P9833 G69 G54.4P0 (RESET WSEC OFFSET BASED ON ERROR MEASUREMENT) G90G10L23P1X#170Y#171Z#172A0.C#175I#5024J#5025 G11 M01 Process is as follows; Tool Change, Activate Workoffset and get into correct Tilt and Rotation, activate TWP, position XY, activate TLO, turn on the probe, do the things and capture the data, turn off the probe, return Z home, write error to G54.4 table. Now, if I could not measure everything in one orientation then because of the way G54.4 functions, #5024 and #5025 will be 0 and I'll have to figure out where x, y, z, a, b, c go when everything is home. Hopefully it translates to Mazak, ok.
-
Memory Card Reader Fanuc 18I setup
cncappsjames replied to Oppiz's topic in Machining, Tools, Cutting & Probing
Set the machine into "MDI" Mode. Press the OFFSET/SETTING button. Change/Set the “I/O Channel” to “4” Set "Parameter Write Enable" to "1" Press the Cancel AND Reset buttons simultaneously. This will clear the alarm you get stating parameter write is enabled. Press the "SYSTEM" button. Press the numbers "138" on the key pad then "NO. SRCH" on the soft keys (below the CRT). You'll need to set bit 7 to a 1 (Bit order is as follows - 7 6 5 4 3 2 1 0 - so you'll want to change the furthermost bit to the left to a 1) Press "3404" on the key pad then "NO. SRCH" on the soft keys. Arrow over to bit 2 (3rd bit from the right) and change that to a "1" Press "6005" on the key pad then "NO. SRCH" on the soft keys. Set Bit 0 to a 1. Press "6030" on the key pad then "NO. SRCH" on the soft keys. Change it to "198". Press the OFFSET/SETTING button to get back to setting and set Parameter Write Enable to a "0". Press Reset. Now, this will allow you to run directly off your memory card. Your main program in your machine control will just need to look like the following; % O100(MAIN PROGRAM) M198P1234 M30 % Optionally, you can add a Q to the M198 Pxxxx line (M198P1234Q101) and it will jump to that line number within the Sub Program. Your program on the memory card MUST be named Oxxxx (the exes being a 4 digit number that MUST correspond to the actual Sub Program Number in the sub program. (ex. O1234) with NO file extension. Your program on the memory card must be as follows (making sure the M198 P call AND the O number AND the Sub Program Number match as I've shown) % O1234(YOUR PROGRAM NAME HERE) (YOUR PROGRAM AS NORMAL) N101 M99 % You MUST have a memory card in the slot when “M198” is called or you will get an alarm. NOTE: You’ll need to have the following on hand as well; • USB Reader/Writer for your PC so you can load programs to the Compact Flash Card. • PCMCIA to Compact Flash Card Adapter so you can load programs from the Card to the machine. • 1MB to 1GB (MAX) Compact Flash Card. The smaller the capacity, the more likely it will be compatible with your machine. -
You need to edit the O9744(REN*FCS*TO*WCS) From; N30 (FCS*TO*WCS*CALC) (ONLY SET WCS FOR TABLE TYPE ROTARY AXIS) (ALL TOOL TYPE ROTARY AXIS = 0) #1=0 #2=0 #3=0 TO; (Note = ysettings dependent on how your machine is set up A/B, A/C, B/C - Example below assumes A/C with A = Primary) Use the system variable for current MACHINE coordinate/position tilt then rotary for table/table configuration. N30 (FCS*TO*WCS*CALC) (ONLY SET WCS FOR TABLE TYPE ROTARY AXIS) (ALL TOOL TYPE ROTARY AXIS = 0) #1=#5024 #2=0 #3=#5025 I probe with G54.4 and G68.2 Active all the time for inspection. To write standard work offsets no G54.4, just G68.2 active. All day long. You need to set the following parameters; #3106.6 =0 #5400.5 = 1 #11200.3=1 AND your probing software suite needs to support it as well. HTH
-
In CAMplete, if I programmed my part in inch, I can convert it to metric with a few mouseclicks. @Greg Williams, DO NOT BET they have been working on it. Remember how long it took to get multi-core processing? That was close to 15 years. Maybe even 20. I requested it back in V6.1 days... when I was running a Dual Pentium Pro 200 MHz... w/ 8MB RAM and a 2 MB Matrox G200 (IIRC) Video card on Windows NT...
-
Inventor to Mastercam no solids capability
cncappsjames replied to ETC Don's topic in Machining, Tools, Cutting & Probing
IGES is your only other solution if you don't have the solids option in Mastercam AFAIK. That should at least give you something machinable. (wire frame and surfaces anyway). Update that X6 if for no other reason than file translation. THat by itself is worth it, no to mention all the new toolpaths. -
Bridge mill..... set it up in the parameters as a head/head type machine. Pplus set #19696.5 (WKP) as 1 for "workpiece coordinate system" instead of the normally 0 for a table/table. You may need to get some help from FANUC as there may be some other parameters involved in. I really lack recent parameter setup experience on head/head machines. Been a while. Too long.
-
@Pete Rimkus from CNC Software Inc. Toolpath data is NOT stored in the ge3. The ONLY way he's got any toolpath data is if he's got the NCI file. There [i]may[/i] be a link from the ge3 to NCI but that's a developer question IMHO. There was no integration of toolpath and Mastercam file until V7. HTH
-
Theoretically G68.2 should work as long as the parameters are set correctly for the type of machine.
-
Stockmodel limitations and slowdowns
cncappsjames replied to Bill Craven's topic in Industrial Forum
I use the method Ron Branch showed me. Make a stock model of the selected paths and let it generate. Tighterntolerances are better. Activate a new empty level and set as main level. In the ops manager right click on your stock model and create a mesh. It will save that mesh to your main level. Go into the stock model op for stock, select the new mesh. Deselect all the toolpaths associated to it. Regen. Create the next stock op, the previous mesh will be your current stock model, select toolpaths to machine that stock model. Let it generate. Rinse. Repeat as often as necessary. -
Any arguments required on G2201? What's in #921?


