Thad
-
Posts
8,914 -
Joined
-
Last visited
-
Days Won
17
Content Type
Profiles
Forums
Downloads
Store
eMastercam Wiki
Blogs
Gallery
Events
Everything posted by Thad
-
Old school 2D-remachining path all the way.
-
And unless you do aerospace, military, etc work, where they get anal about your tap chamfer size/angle, just spot the hole a little deeper in the first place so that you'll have a chamfer when the hole is done. No need to chamfer later, unless your spot drill isn't big enough. If you happen to use a 120 degree spot drill, you can use the web app that I made to calculate your spot depth. http://spot-calc.thadseaver.com
-
You mean like this?
-
Oops, sorry, I just remembered it was for a Mazak with a laser tool setter.
-
I did the same as oceancnc, with the help of this forum. It was probably 8-10 years ago though and I'm not sure if I still have it. I'll look through my stuff.
-
I've been using MC since 2002. I've submitted bugs to QC, typically with sample files and documentation on how to replicate the bug. I don't remember exactly how many bugs I've submitted but I'd bet my paycheck it's between 5-12. The QC guys were always professional and pleasant to deal with and always gave me a bug# to track it. In fact, all of my correspondence with ANYONE from CNC Software has always been pleasant. That being said, I don't recall a single one of those bugs ever being fixed.
-

New computer- Can't remember where some options are
Thad replied to Corey Hampshire's topic in Industrial Forum
I don't believe it's ever OK to just copy your old .config file. New features are added to the config file and copying an older version that doesn't have those features built into it is very likely a disaster waiting to happen. -
What changed?
-
It works fine in X9.
-
If the shoe fits...
-
I use it quite frequently. Almost every time I make a change to a detail. Since I'm a tooling guy, most of my changes come around after the detail has been heat treated and now needs to be hard cut (with all different tooling that I originally used). I move the original geometry to the "old" level and import the new geometry, then blow the dynamite. I don't need the old tools cluttering up my file.
-
Eh, seems like a lot of fluff to me. I didn't realize maximum and minimum depth could be so complicated.
-
Realistically speaking, could such a(n) (accurate) list even be created? It's unlikely. Generally speaking, V? can't run on Win?... but with addon ??? and registry hack ??? along with VM ??? running with a simulated ??? and hacked ??? it can. Who can say, really?
-
...and here I thought it sucked if I scrapped a part and had to go to the stock rack and saw cut another piece of D2.
-
Bob, I've got nothing constructive to add, but wanted to say hi and it's good to see you around these parts again. I was just thinking about you the other day.
-
...and 2 of them are selling his services.
-
***Removed false information Thanks for the dynamic option, Old Bear!
-
Great idea! Maybe I should start charging people for the help that I give here at the forum.
-
Cutter Comp Beginning on Arc Move - How to Avoid?
Thad replied to Bill H's topic in Industrial Forum
Good question. Kinda looks like something that's generated inside the bowels of MC before being turned into something that's actually usable by a CNC machine. -
It looks like you didn't get that far. Did you click "Settings" in the Performance section?
-
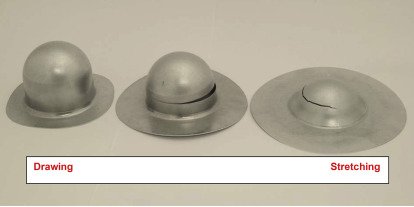
Deep drawing is a quite a sizable topic to be hashed out here in a discussion forum. As you've seen, forming that in one hit, you're very likely to get wrinkles and tears in the part. It's usually done in multiple dies, starting with a shallow draw and getting deeper with each die. See pic for example. As you can see, the outer edge of the blank gets deformed as it's drawn so the outer edge of the final part will need a trim die to finish cutting the shape and punch the holes in those tabs. There's so much more to this, but a book would have to written to convey it all. My recommendation is to send it out to a die shop who does this kind of work.
-
Mostly done in extensive upgrade in our use of Mastercam
Thad replied to sharles's topic in Industrial Forum
Holy sh!t! -
Mostly done in extensive upgrade in our use of Mastercam
Thad replied to sharles's topic in Industrial Forum
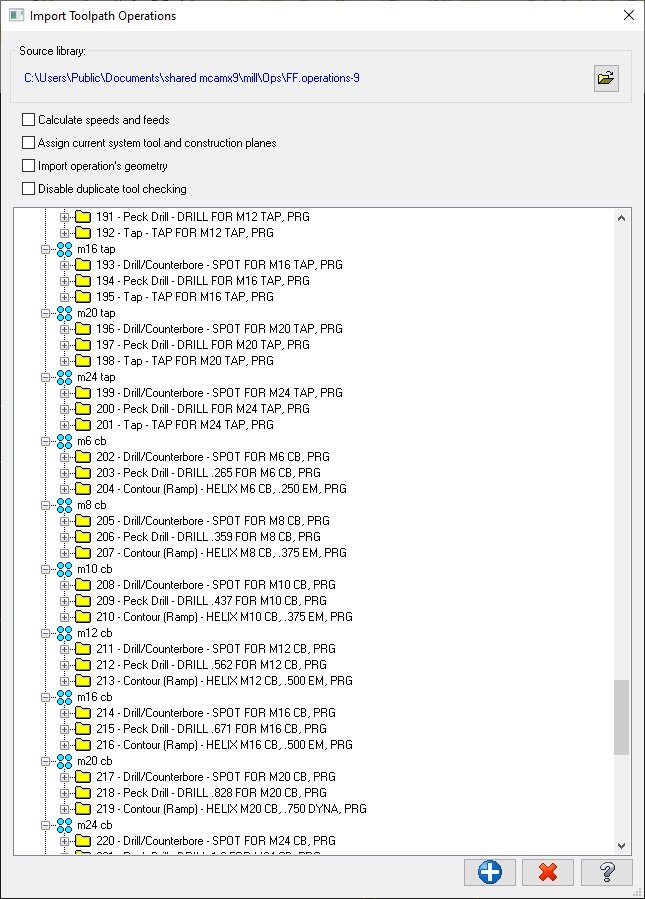
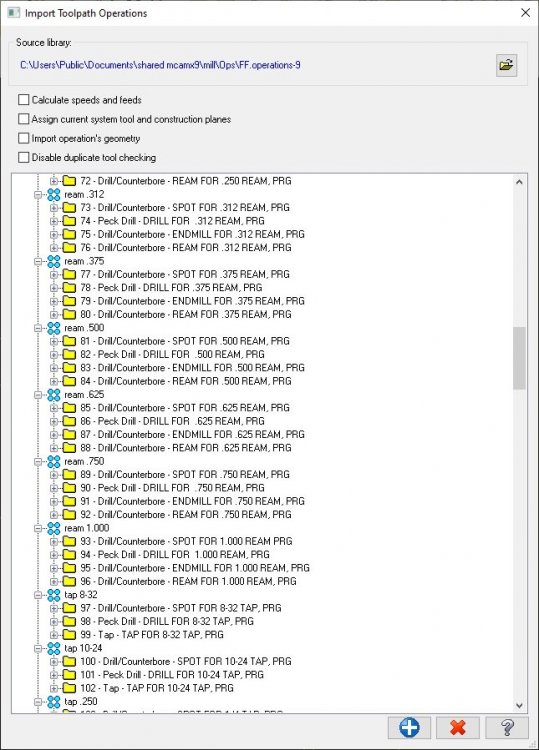
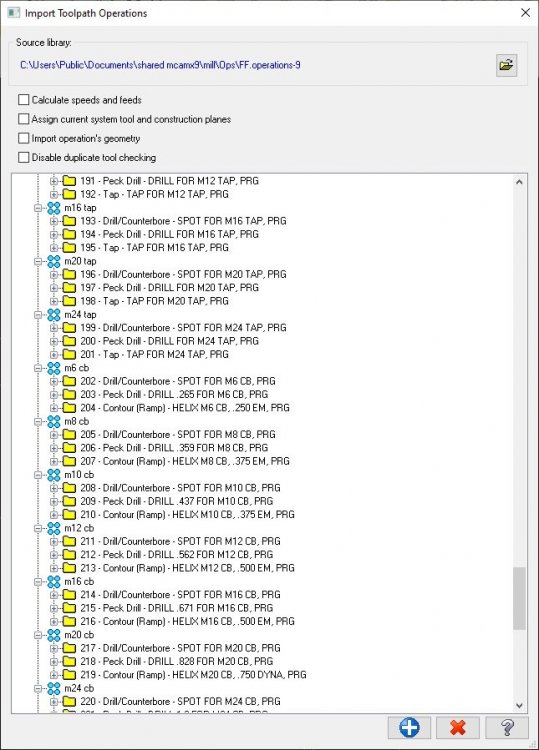
Another tip for the contour parameters...even though you may have separate ops saved for the various options (2D, remachine, ramp, etc) within contour, go into each option and set each type's parameters the way you like them, then disable the option. To clarify, say you have a plain old 2D contour op saved. What if, after you import it, you want to change it to contour-ramp? When you select ramp from the drop down, all of your settings for ramp should be set already. Same with remachine, etc. Every contour operation in your library should be saved so that you can change contour types and those parameters are already setup. Does that make sense. I'm not sure if I'm describing that clear.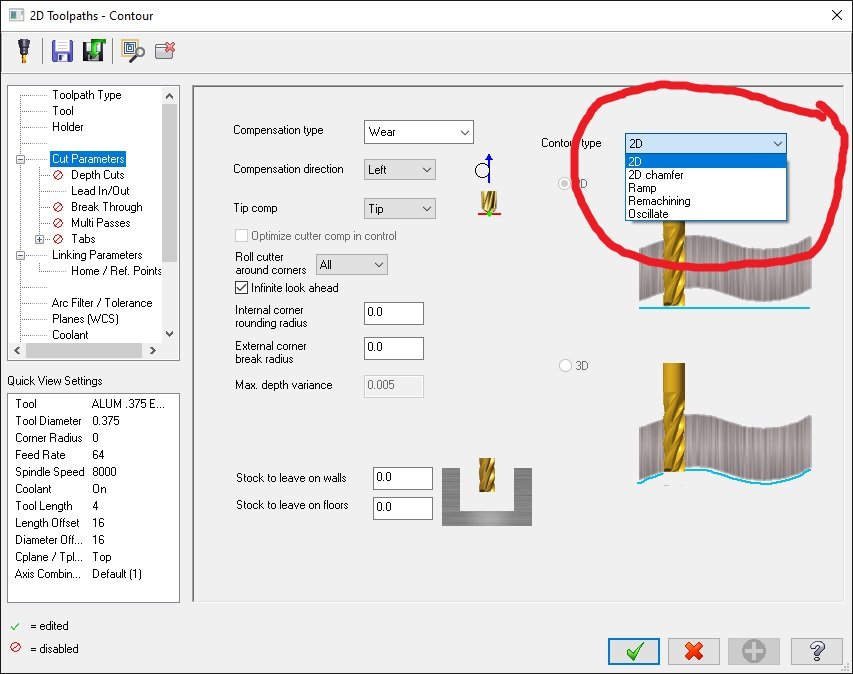
-
99% of the time, when I want to do what you're asking, I select the top hole (at the pocket floor Z level) for my geometry, set top of stock to incremental 0, and my depth to incremental -.5.
-
Mostly done in extensive upgrade in our use of Mastercam
Thad replied to sharles's topic in Industrial Forum
If you use standard level names, make a CSV file of your level names, then import the names into your MC file by right click in the levels manager->Get Named Levels.