ajmer
-
Posts
501 -
Joined
-
Last visited
Content Type
Profiles
Forums
Downloads
Store
eMastercam Wiki
Blogs
Gallery
Events
Everything posted by ajmer
-
try this

-
that is what "blank" does
-
what about a 2d contour set to ramp not sure if that is what you are looking for or not
-
Optirough not doing what I think it should with rest material
ajmer replied to huskermcdoogle's topic in Industrial Forum
sorry misunderstood your question how about this one ajmer_ihs_rev 1_Optirough_Rest_Problem_2020.mcam -
Optirough not doing what I think it should with rest material
ajmer replied to huskermcdoogle's topic in Industrial Forum
take a look at this file all i did was a containment ajmer_ihs_Optirough_Rest_Problem_2020.mcam -
the walls of your PAWS are vertical and the floor is horizontal if all you want to do is go around shape just use a 2d contour see attached fileajmer_ihs_Tiger Paw Convex_new.emcam
-
try copying the workspace file in teh config directory C:\Users\user.name\Documents\My Mastercam 2020\Mastercam\CONFIG
-
seems that it doesnt like center drills if you change to a ball mill it works right away
-
First thing to try is deleting the workspace file. Close mastercam and go here It will be in my documents/my mcam 2018/config folder Then delete the workspace file Restart mastercam That might not be the exact path but point you in the right direction anyway
-
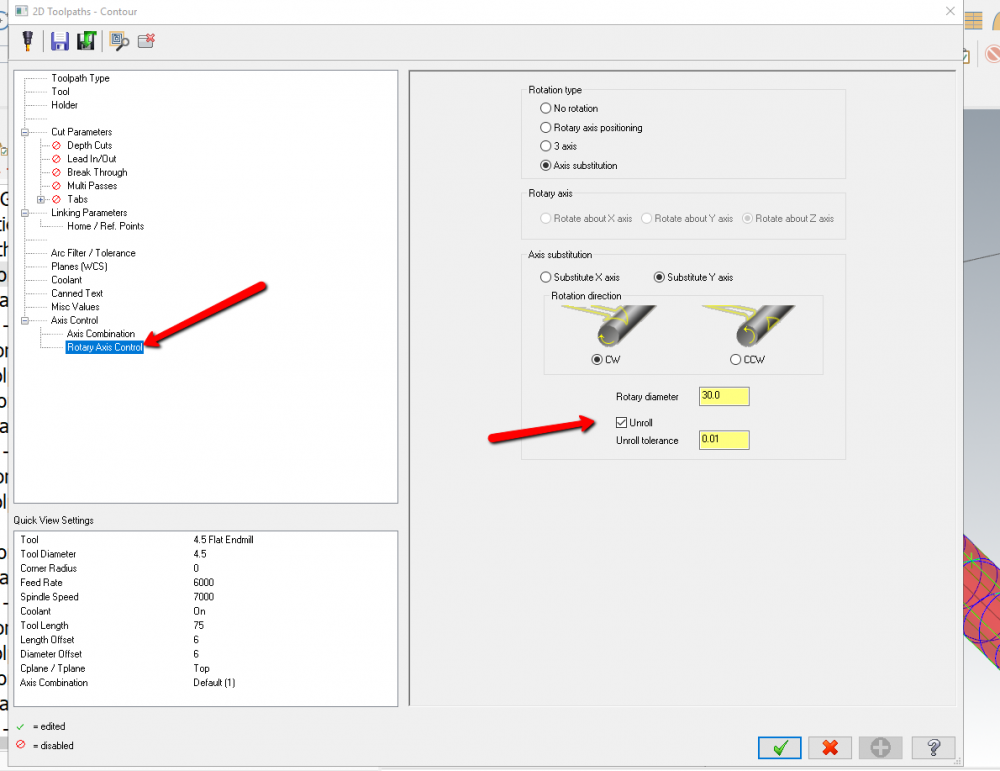
C Axis Helix - Lead in/out question - 2020 lathe
ajmer replied to RLeuschen's topic in Industrial Forum
not sure why it's doing that but to get by use the regular lead/in/out settings tangent 100% to get this result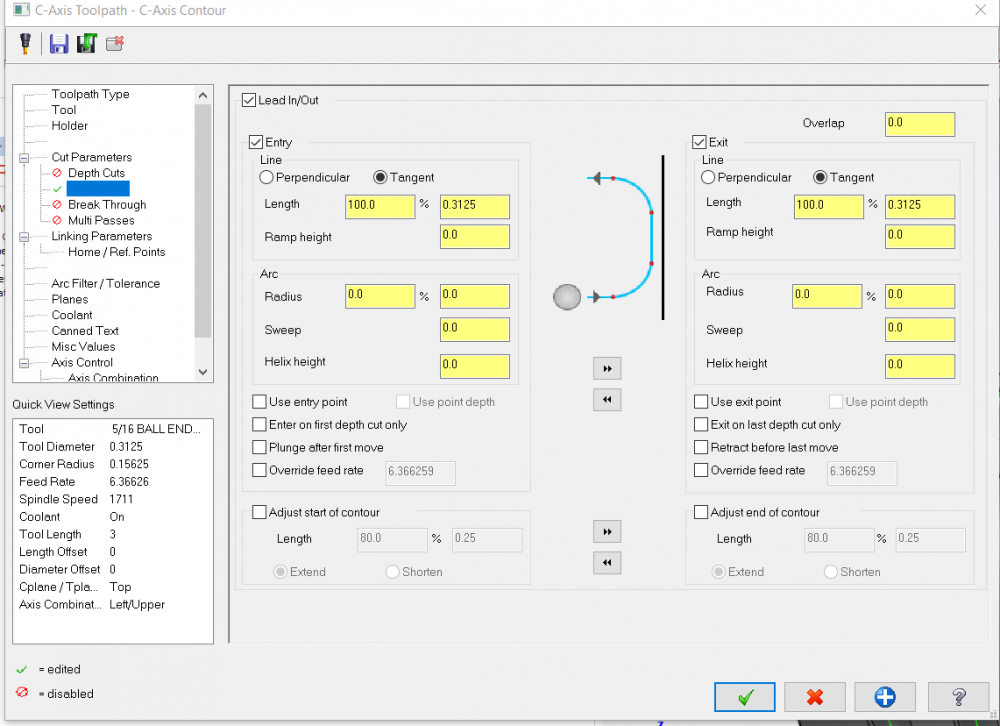
-
try right clicking and then push this button
-
it did eat a lot of ram but when i changed to the way i mentioned above it didnt
-
not sure if this is the issue but i created a pmesh from the last stock model in operation 1 then i created a stock model from that in the 2nd machine group then it seemed to work not too slowly the other thing is that you dont have to have 2 machine groups for this especially if it is the same machine

-
Help to convert files, have not mastercam anymore
ajmer replied to str8fwd's topic in Industrial Forum
here are the files converted for you Lower_Guidingblock_deadsolid.stp Stainless pipe.dwg Upper guidingblock deadsolid.stp -
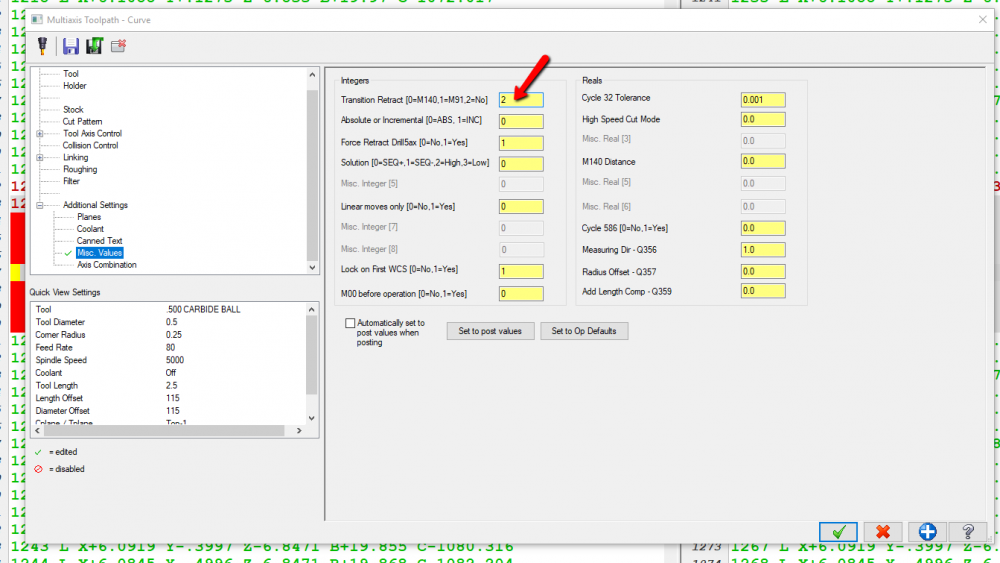
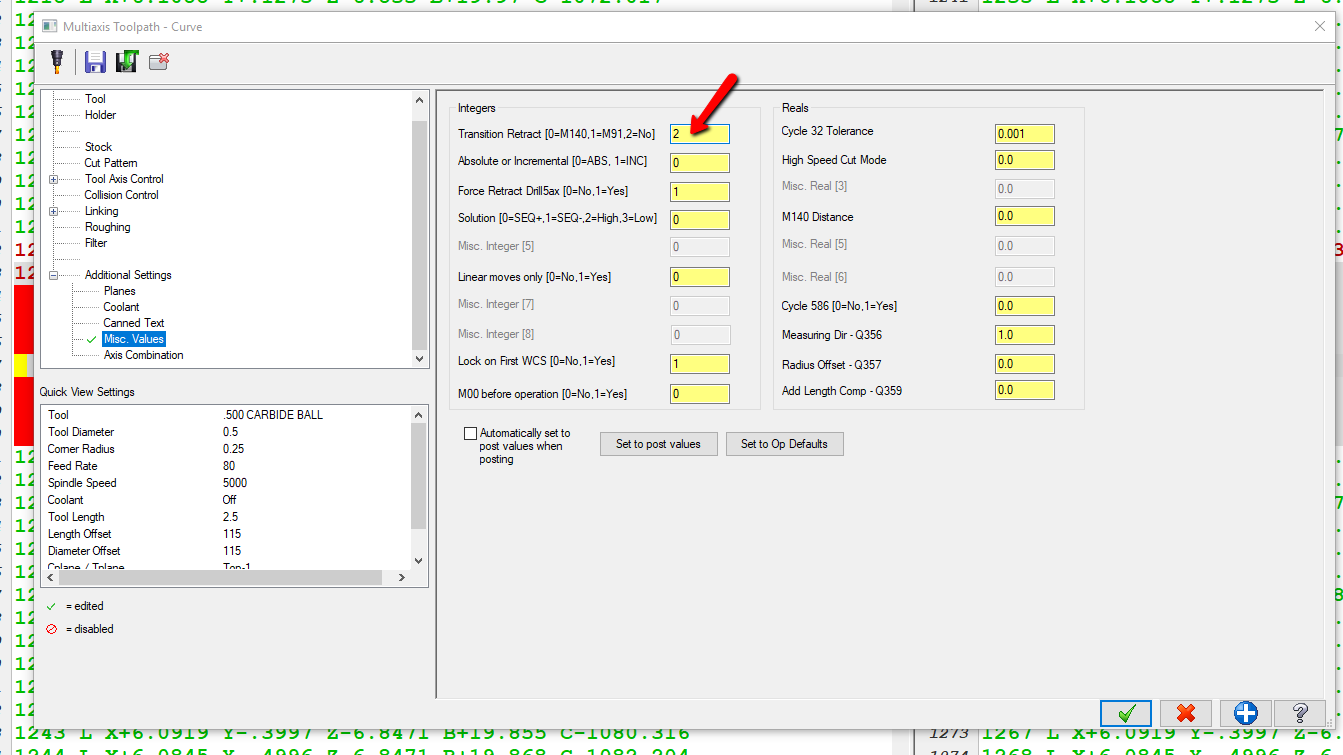
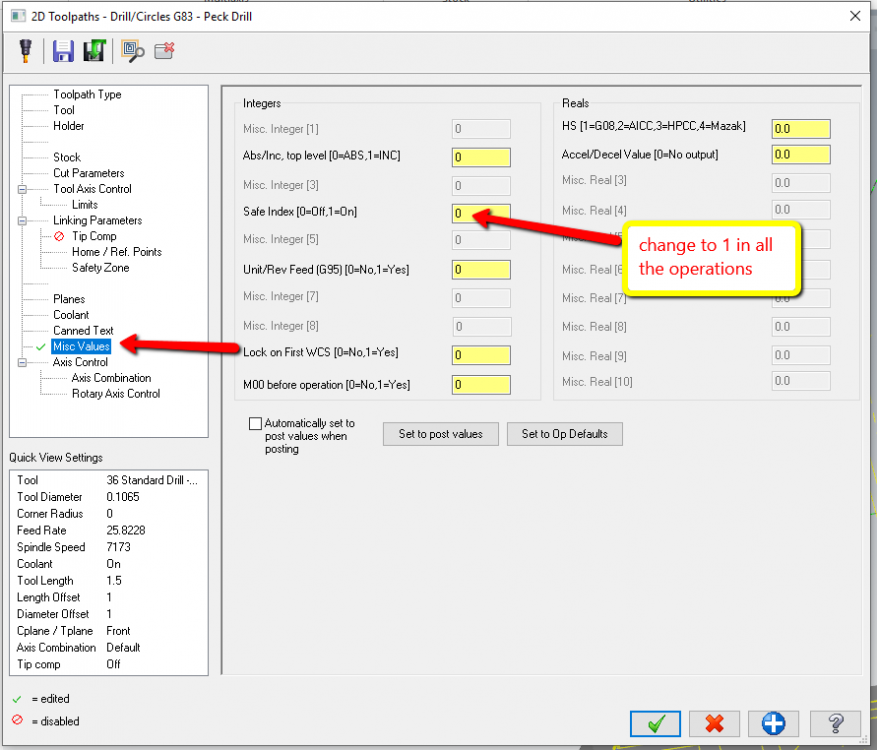
yes there is look in the misc values change this to a 1
-
open the pst file look for this section pwrtt$ # Write tool table, scans entire file, null tools are negative if rotaxis$ > 0 | rotary_type$ > 0 | mill5$ <> 0, [ sav_rot_on_x = rot_on_x output_z = no$ ] if vmc = 0 & tlplnno$ <> 2, sav_rot_on_x = rot_on_x if vmc = 1 & tlplnno$ > 1, sav_rot_on_x = rot_on_x #sav_rot_on_x = rot_on_x #Uncomment this line to output rotary axis value even when it's not used t$ = wbuf(4,wc4) #Buffers out tool number values if tool_table = 1, ptooltable if tool_table = 2, ppredtool if tool_table = 3, pmetatool if t$ >= zero, tcnt = tcnt + one ptravel pwritbuf5 remove the # from this line above #sav_rot_on_x = rot_on_x #Uncomment this line to output rotary axis value even when it's not used save the file and repost
-
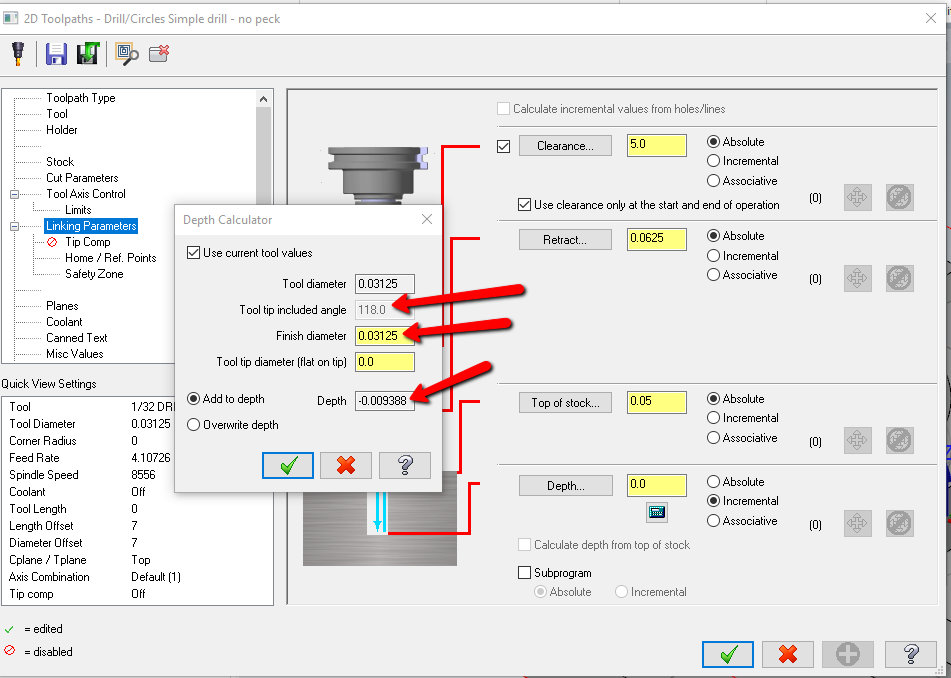
there is a spot calculator built into mastercam that will tell you how deep to go based on the diameter and angle of the tool aswell
-
you have to have that saved in the control definition
-
I found I had to restart mastercam in order for that setting to actually work.
-
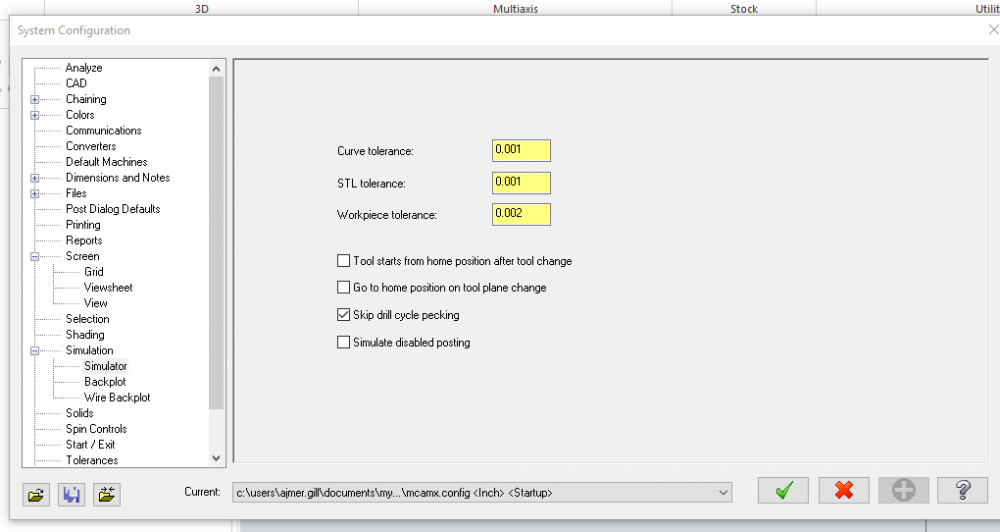
its in configuration
-
this should do it set what you want as defaults click the exclamation mark and then the save to defaults

- 1 reply
-
- 1
-

-
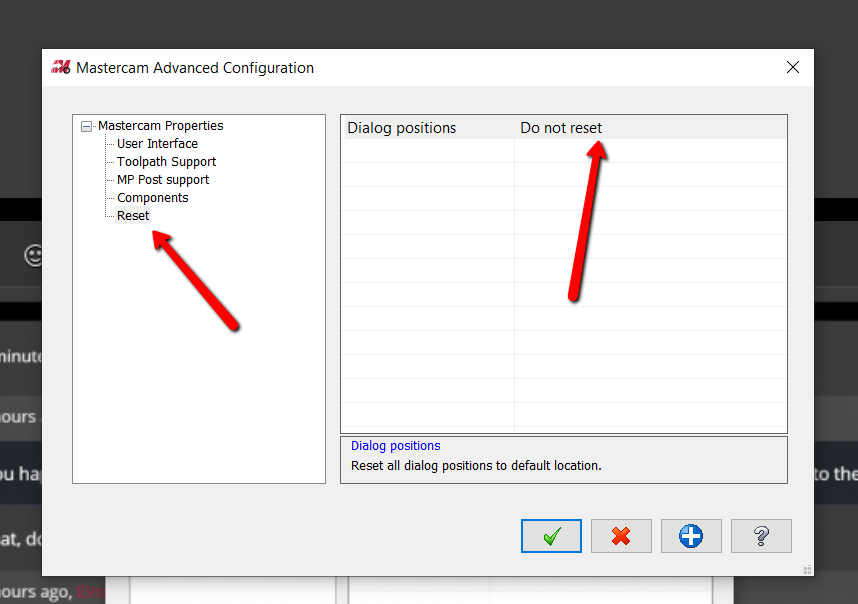
try this close mastercam start-->mastercam-->advanced configuration and change to reset and say ok
-
mastercam 2020 Solid disappears after toolpath regen, Mastercam 2020
ajmer replied to PacificMachinist's topic in Industrial Forum
make sure that these 2 buttons are not pressed that could be the issue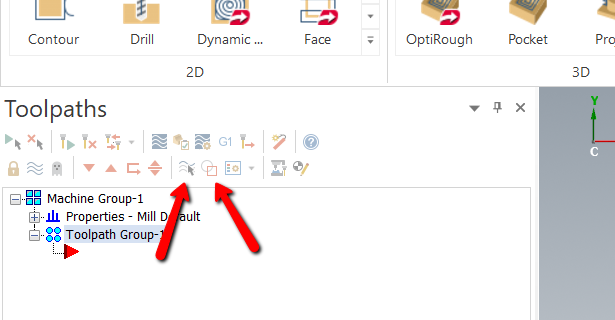
-
Dynamic mill and pocket not leaving stock on a Wall.
ajmer replied to Tinger's topic in Industrial Forum
take a look at this simplified file i used multi machining regions set it to stay inside and multi air regionsajmer_ihs_C7956902.mcam -
try this in all the toolpaths and repost be careful with the results